Posted January 11th, 2023 at 4:31 pm by Philip Kendall
In this tutorial, Dan explains how to install the new DDM Safe-T-Winder™. The Safe-T-Winder™ is a new type of winder that winds standard torsion springs without the use of winding bars, by turning the end of the shaft. A power drill is all you need. This makes it safer and easier to use than the typical winding method.
Getting Started: Safety First
CAUTION! Replacing garage door torsion springs is dangerous because the springs are under tension. If you do not use the right tools and follow safe procedures, you could lose hands, limbs or even your life. You could also damage property. Although the Safe-T-Winder™ makes doing this job significantly safer, as well as easier, by no means does it remove the risk entirely.
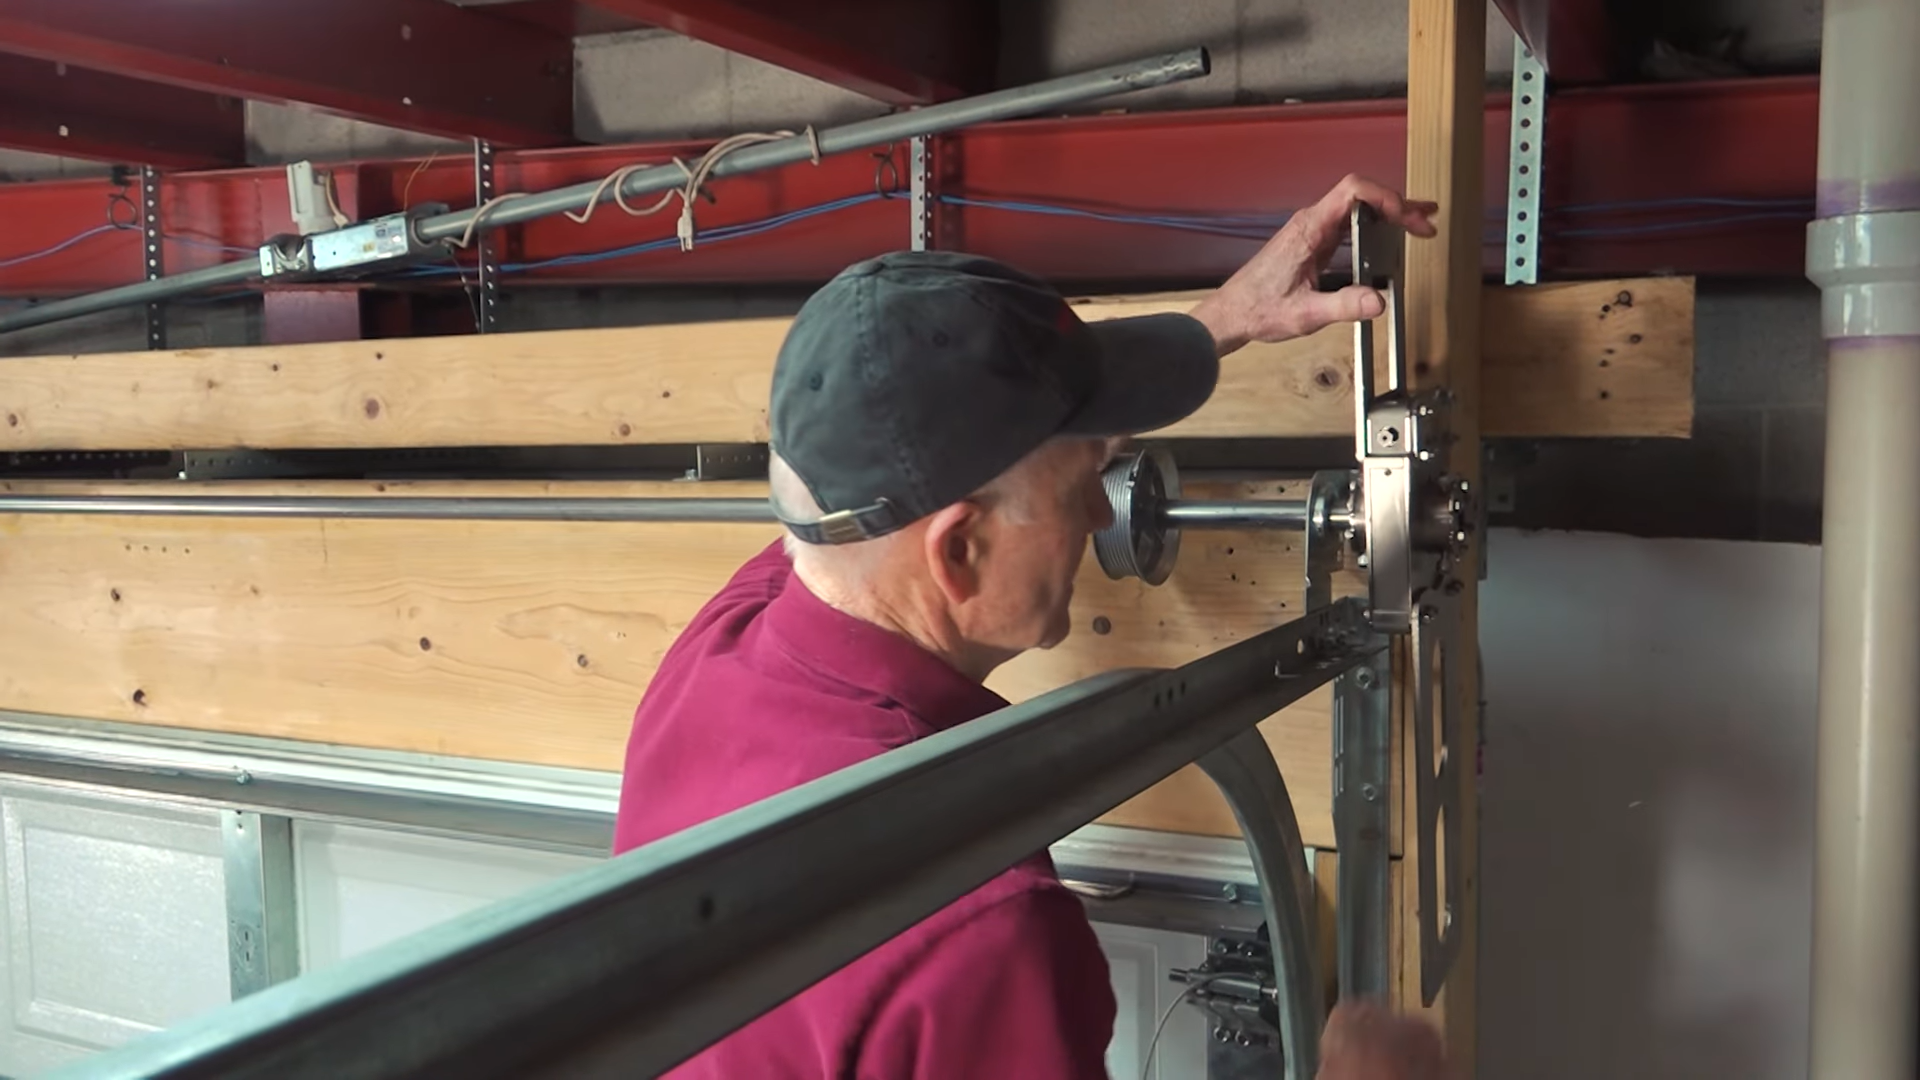
Install Springs and Torsion Hardware
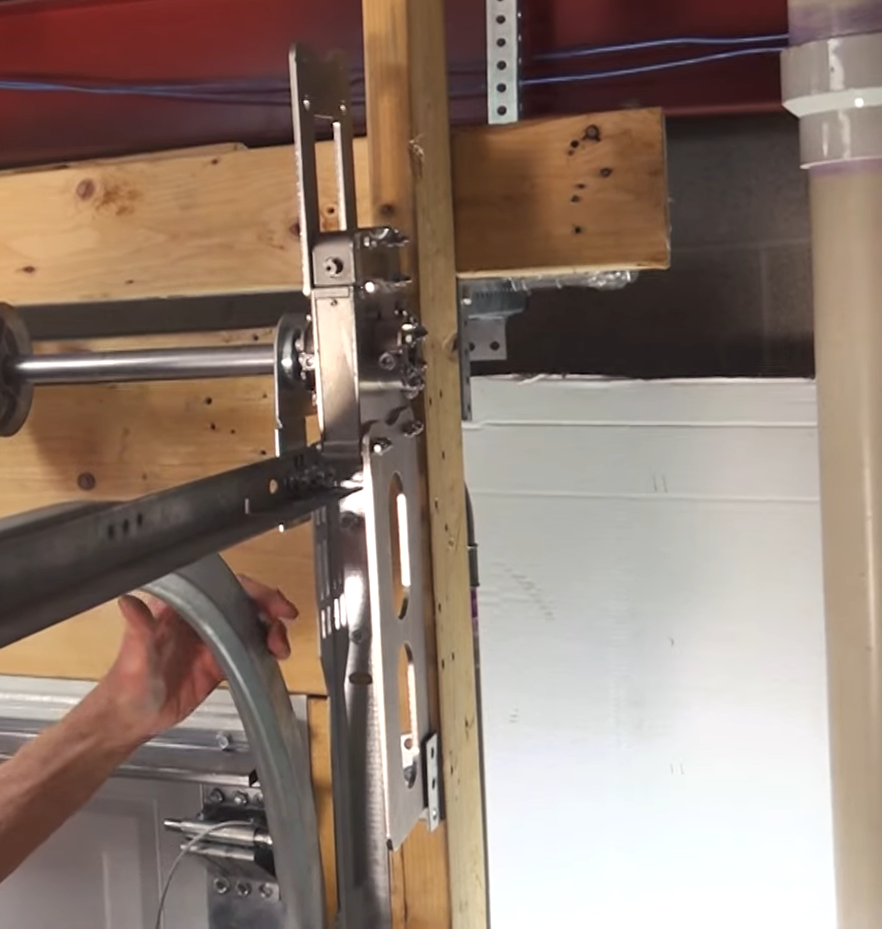
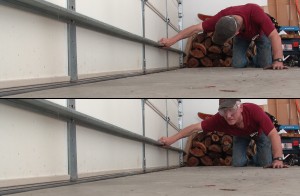
We will first install and adjust drums to prevent the shaft from sliding. This will also make the installation of cables much easier after the springs are wound, and will ensure the springs can be properly and safely wound.
For detailed instructions on how to install garage door torsion springs, please visit our tutorial page. There you will find instructions for installing one torsion spring and another for replacing two springs on the page titled How to Replace Garage Door Torsion Springs.
Your next step will depend on whether or not the torsion spring shaft on your door has a coupler.
Hollow Shaft Without Coupler
If your shaft does not have a coupler, then follow these instructions before you install the Safe-T-Winder™. Usually, residential torsion spring assemblies will use hollow shafts without couplers.
- Bolt the torsion spring(s) to the center support bracket.
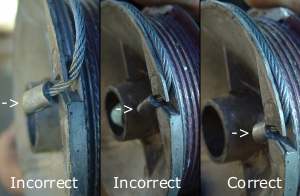
- Secure the first cable drum to the shaft
- Install the cable on that cable drum
- For detailed instructions on how to install cables on torsion spring assemblies, see our torsion spring cable reinstallation tutorial.
- Push the drum against the end bearing.
- Then, turn the shaft to tighten the cable
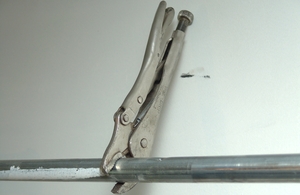
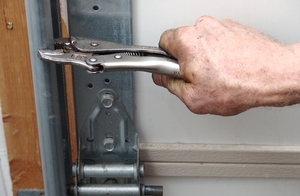
- Vise-grip the shaft to keep the cable tight
- Install the second cable to the second cable drum.
- Push the drum against the end bearing.
- Since you already secured the first cable drum to the shaft, you will need to have the second one in position before securing it to the shaft as well.
- Turn the drum to tighten the cable
- Finally, secure the cable drum to the shaft
Solid Shaft With Coupler
If you have a solid shaft with a coupler, then follow these instructions before installing the winder. Solid shafts are more common in commercial applications with large doors.
- First, secure the coupler
- Insert the key into the coupler
- Secure the coupler to the shaft
- Tighten the bolts
- Bolt the torsion spring(s) to the center support bracket

- Secure the first drum
- Insert the key into the drum
- Secure the first cable drum to the shaft, against the end bearing
- Install the cable on that cable drum
- Turn the drum until the cable is tight, then loosen by one quarter-turn
- Vise-grip the shaft at the 9 o’clock position to keep the cable tight. This gives enough leeway to install the second cable, as explained in steps 5-7.
- Secure the second drum
- Align the keyways, then insert the key into the coupler
- Secure the first cable drum to the shaft, against the end bearing
- Install the cable on that cable drum
- Turn the drum until the cable is tight, then loosen by one quarter-turn
- Turn the shaft ninety degrees, until the cables are tight.
- Finally, vise-grip the shaft to keep the cables tight.
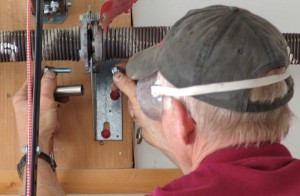
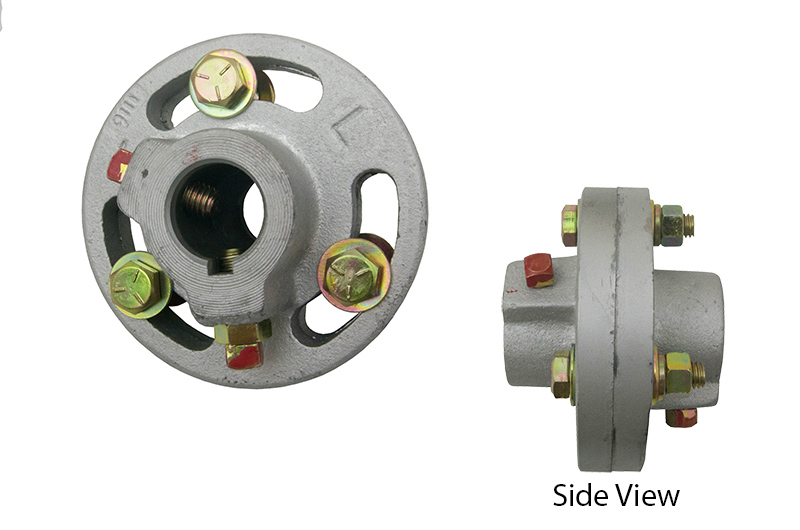
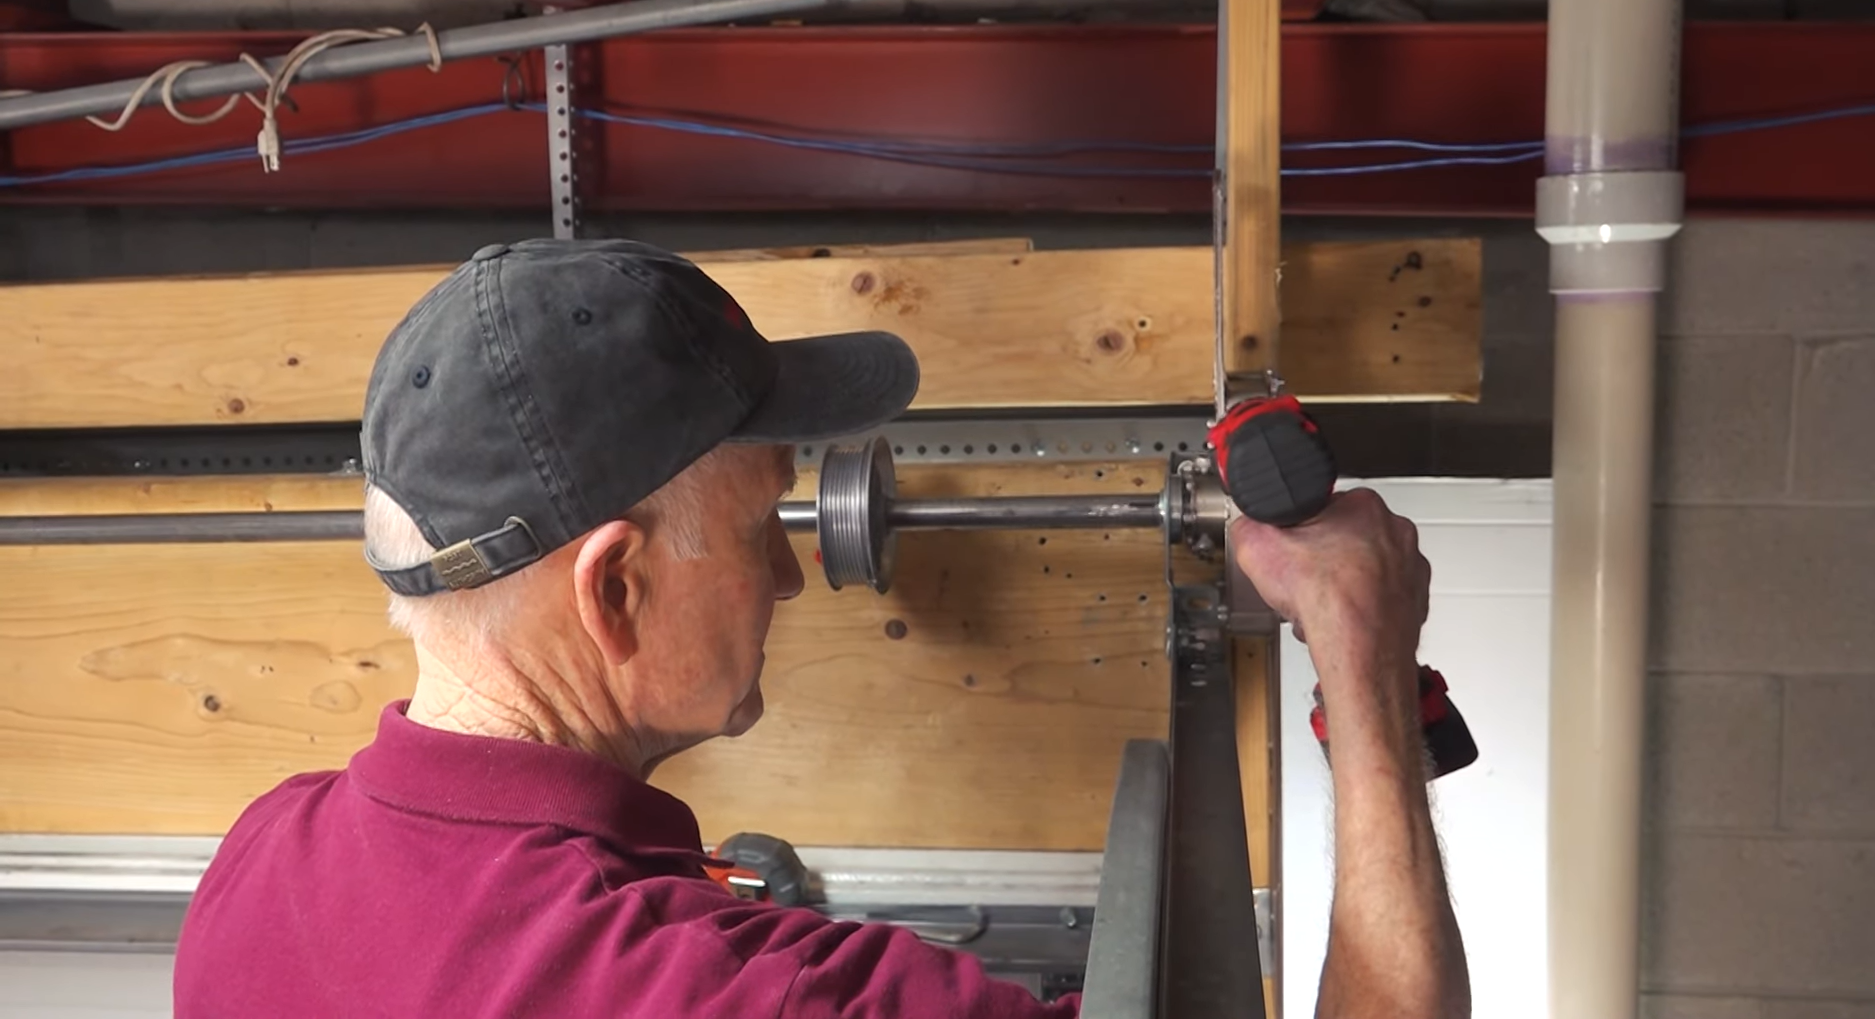
Installing the Safe-T-Winder™
Now that your torsion spring assembly is in place, you can install the Safe-T-Winder™.
- Slide the winder onto the shaft.
- The winder coupler should be ¼-inch from the end bearings
- Then, make sure there is something solid behind the bottom of the winder to support it and keep it from spinning. In the demonstration video, since the winder was so close to the edge of the wood jamb, Dan screwed in a short piece of angle iron to keep the bottom of the winder from slipping.
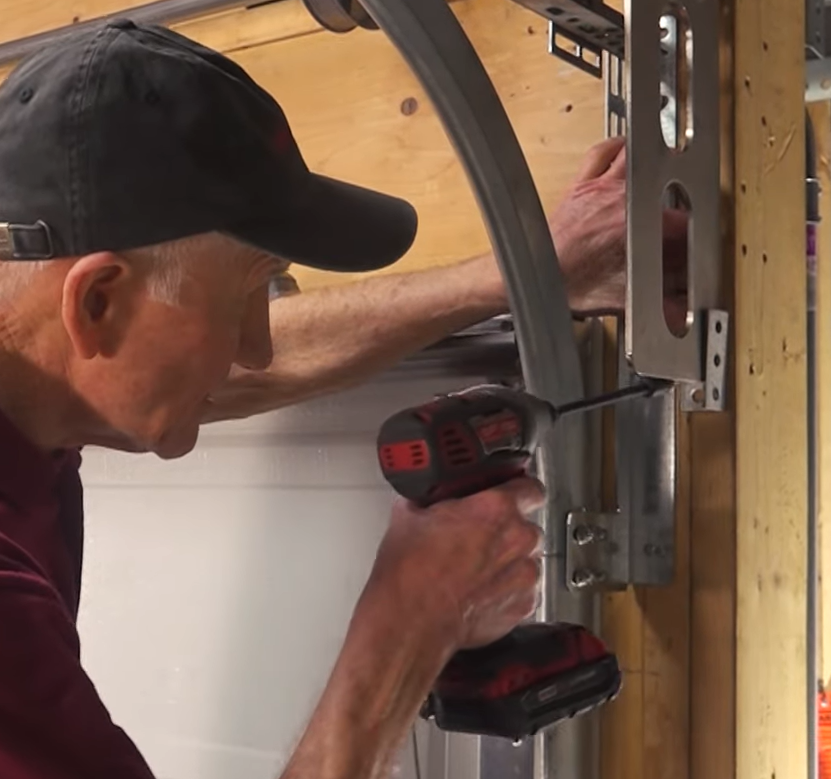
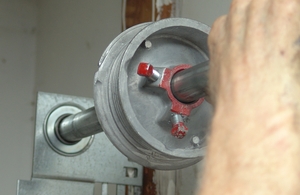
- Once the Safe-T-Winder™ is in place and there is something supporting it below, use a socket wrench with a 1/2″ socket to tighten the set screws and secure the winder to the shaft.
In order to reach all of the set screws, you may need to turn the winder enough to tighten the other set screws. See step 13 below.
- Once you have secured the winder, unwind the shaft by one quarter-turn in order to loosen the cables.
- Uninstall the cables you installed in the previous steps. This will allow the shaft to wind the springs without opening the door.
- Now that the winder is secured to the shaft, it should be safe to remove the vise grips.

Stretch the Torsion Springs
Once you have installed the Safe-T-Winder™, you will need to stretch the springs.
- First, secure the stationary cones of both springs to the center bracket.
- Stretch each spring the distance of one coil for every turn of spring tension. Then add 1/4″ and secure the winding cones. For example, if you are winding the springs 10 turns, measure the width of 10 coils and add 1/4″ to the dimension. If you have .250 wire, as an example, (10 coils)x(.250)+(1/4″)=2.75. The total stretch should be 2.75 inches.
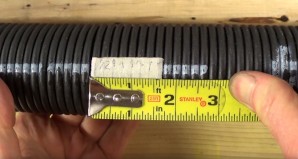
- Mark this distance from the end of each cone to set the stretch on your springs.
- After that, secure the torsion spring set screws.

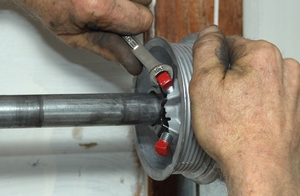
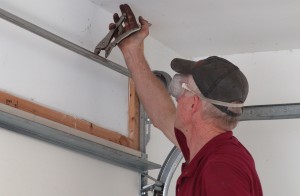
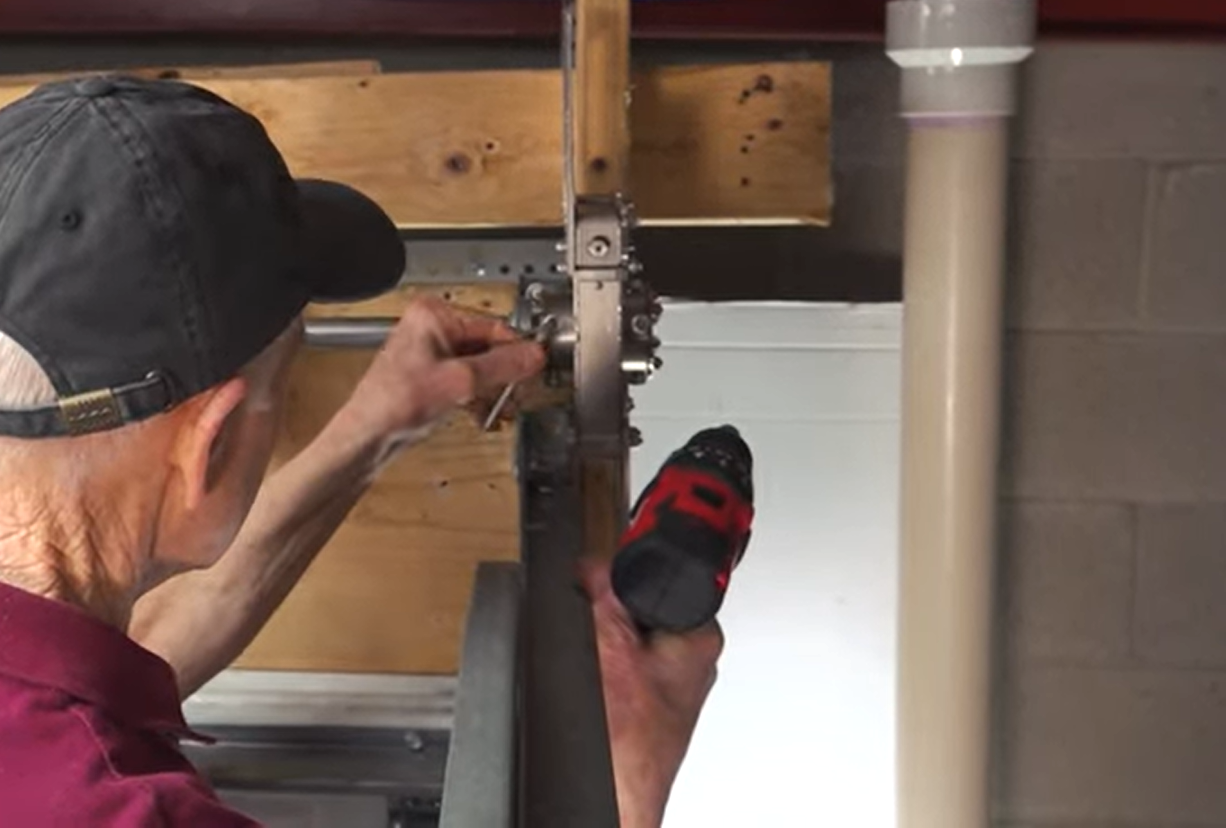
Winding the Springs
To wind springs using the Safe-T-Winder™, the only tool you need is a drill and a 7/16″ socket.
- First, be sure to mark the shaft so you can count the number of turns on your springs.
- Set the drill to counterclockwise
- If all three set screws have not all been tightened, use the winder to turn the shaft and winder hub. Then you can reach and tighten the other set screws.
If your door has a solid shaft with a coupler, you will need to use a ¼” key. We also recommend tightening all six set screws if the shaft is long enough.
- Once all the set screws are tightened, start winding the springs.
Depending on the strength of your drill, and the number of turns on the springs, the drill may start to slip.
- If this happens, increase the torque on your drill.
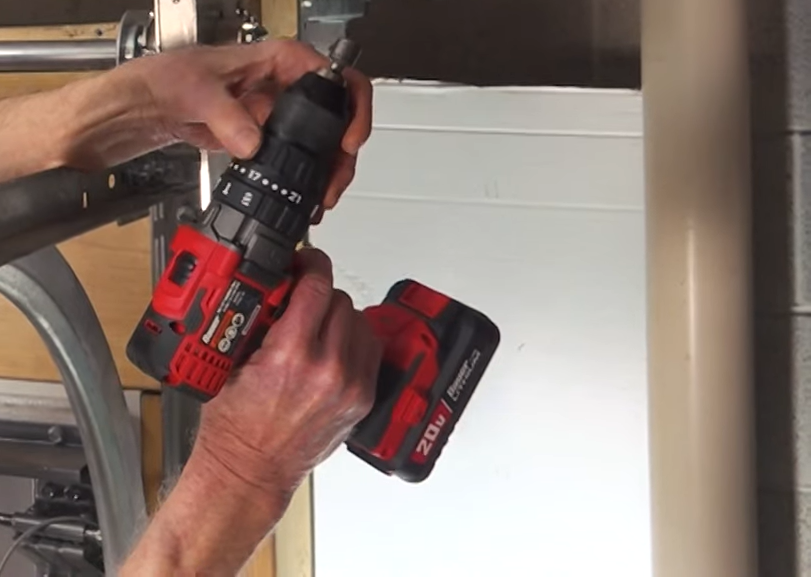
In the demonstration video, Dan winds the springs 7¾ turns. For instructions on how many turns to wind your garage door springs, see our blog post about how many turns to wind your torsion springs.
Finishing the Job
- Once the full number of turns has been put on the springs, remove one quarter-turn for easier installation of the cables.
- Reinstall the door cables.
- Secure the cable drums to the shaft with both cables tight.
- Vise-grip the shaft.
- Vise-grip the vertical tracks above a roller on each side. This is in case the springs are too strong.
- Turn the winder until the tension transfers from the winder to the drums and cables.
- Remove the Safe-T-Winder™.
- Test the door balance. If the door is not properly balanced, you will need to reinstall the winder and adjust the springs, or even replace them.
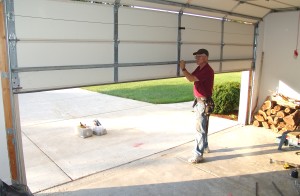
- Your last step should be to remove the vise grips. If the springs are not balanced properly when you remove the vise grips, the door could fly up and knock you off the ladder.
It is important to make sure the winder is well-lubricated while you are using it.
To see other options, visit our Torsion Spring Winding Systems page.
Dangers
Please use caution any time you are dealing with garage door springs. Although the Safe-T-Winder™ is much safer than winding bars, working with torsion springs is always dangerous.
- Be sure to test the door balance before removing the vise grips, or you could be knocked off the ladder as the door flies open.
- Make sure you do not over-tighten or under-tighten the set screws.
- Make sure the winder bracket is supported so that the winder cannot fly loose.
- Stay out from under the door
- If the shaft is not long enough, mark the shaft 1″ from the end to ensure the set screws can secure the winder.
Please exercise extreme caution!
This entry was filed under Products, Technical Support. You can follow any responses to this entry through the RSS 2.0 feed.
