Counter Wiring for A LiftMaster Operator - DDM Garage Doors Blog

Posted December 18th, 2020 at 5:55 pm by Dan Musick

An operator counter tracks door cycles: one opening plus one closing equals one cycle. To track the usage of a garage door, users often install counters on the operators.

An image of  a LiftMaster operator with an external counter showing 196,491 cycles.
This 24-volt counter shows that the operator has cycled 196,491 times.

One of the more common reasons to track door cycles is to schedule maintenance before the door or the operator needs repairs. For example, if overhead sectional door springs typically last 20,000 cycles, the counter can tell you when the springs have almost reached this limit. This allows you to predict when the springs will break. By replacing springs before they break, you avoid downtime costs.

We also used a counter to test the quality of our LiftMaster operator. We ran a single jackshaft operator for nearly 200,000 cycles, and all the internal components still worked just fine.

The wiring for a counter on a LiftMaster operator is simple. Twenty-four volts travels from the control board to the counter. Normally, an open auxiliary limit switch blocks the current. When the garage door closes, the limit nut closes the auxiliary limit switch, completing the circuit and triggering the counter.

A wiring diagram showing how a counter should be wired.
Wiring from the operator control board on a LiftMaster operator through the normally open auxiliary switch activates the counter when the switch arm is pressed.

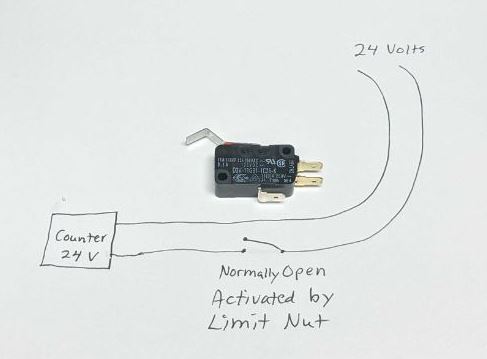
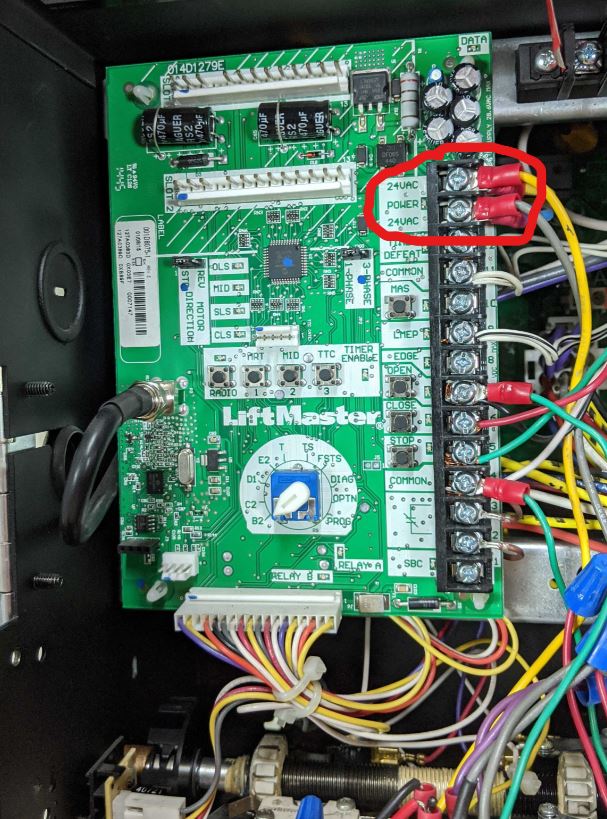
The top two screws on the LiftMaster Logic 5 control board provide the 24 volts for the counter.

A LiftMaster Logic 5 control board with the top two screws circled in red indicating 24 volt connections.

One wire from the board is wire-nutted to the counter wire. The other wire runs through the normally open auxiliary limit switch.

An image of an installed limit switch.
As the door opens, the white grooved limit nut slides to the left and presses in the switch arm. This closes the contacts on the normally open switch to activate the counter.

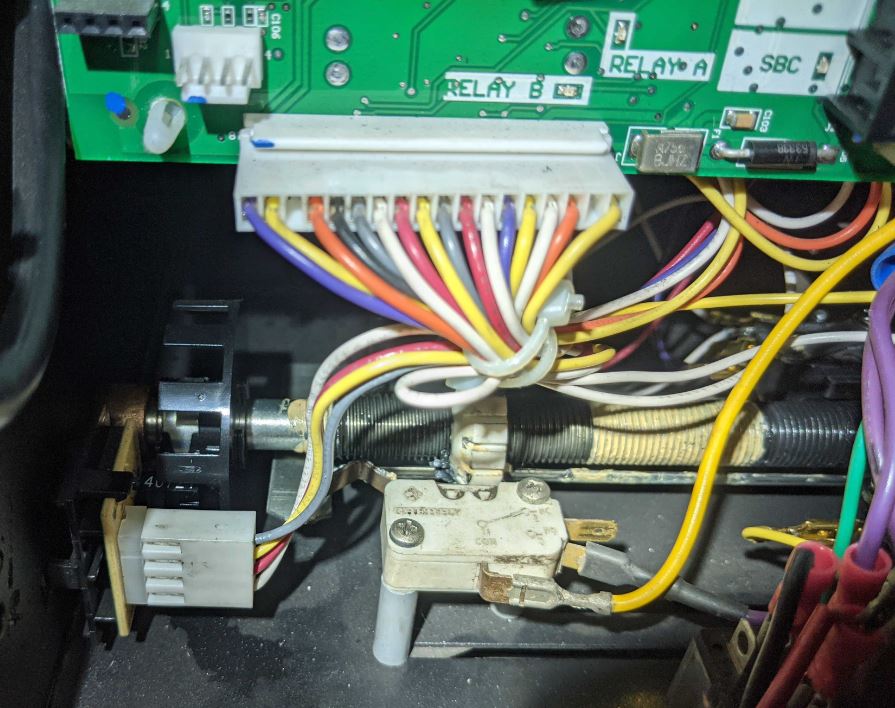
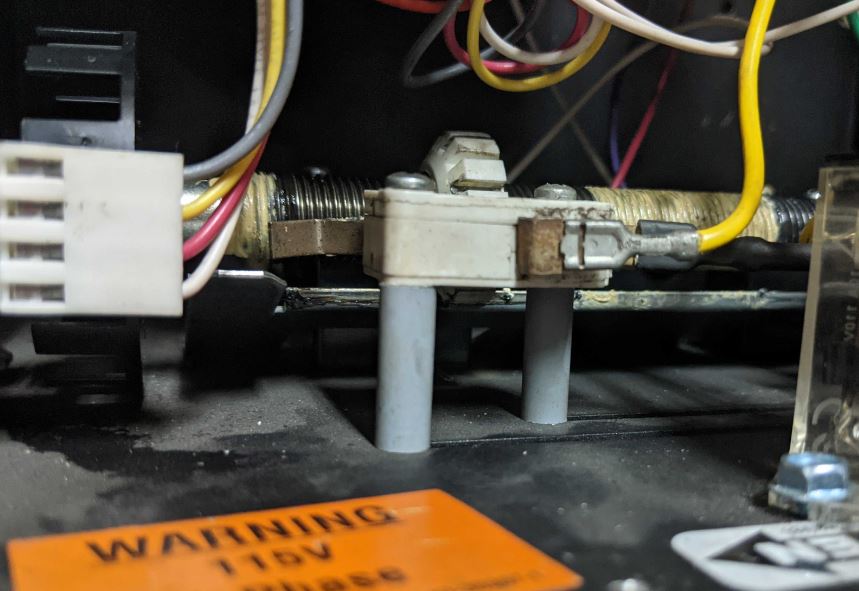
There are a number of ways to mount the switch. One way is to use long screws and washers or small tubes to align the switch with the limit shaft.

A side view of a limit switch installed through two small tubes.
Mounting the switch required drilling two holes in the bottom of the case.

For more information about the potential applications of operator counters, see our post on counter and timer modification. We also have a post about limit switches.

This entry was filed under Products, Technical Support. You can follow any responses to this entry through the RSS 2.0 feed. You can skip to the end and leave a response. Pinging is currently not allowed.

Leave a Reply

Your email address will not be published. Required fields are marked *


Since 1997 the Gold Standard for Online Garage Door Parts

CUSTOMER SUPPORT HELP WANTED

Huge inventory of torsion springs for same or next day shipping! Here you will find all you need in the most common sizes of 1 3/4," 2," 2 1/4," and 2 5/8" inside diameter springs. Larger 3 3/4" and 6" inside diameter commercial and industrial springs may require a day or two to ship. You'll also find TorqueMaster Springs, Extension Springs, Self-Storage door springs, steel rolling door springs and springs for one piece single panel doors.

Shelves packed with every part you need to fix your doors.

Please note. Shipping times and costs have changed. Normal transit times are currently not guaranteed, even on next day and second day shipments. Shipping prices on items over eight feet have more than tripled.