Posted January 11th, 2023 at 4:42 pm by Philip Kendall
In this video, Dan explains how to take apart and then put back together a Serco dock leveler hold down unit.
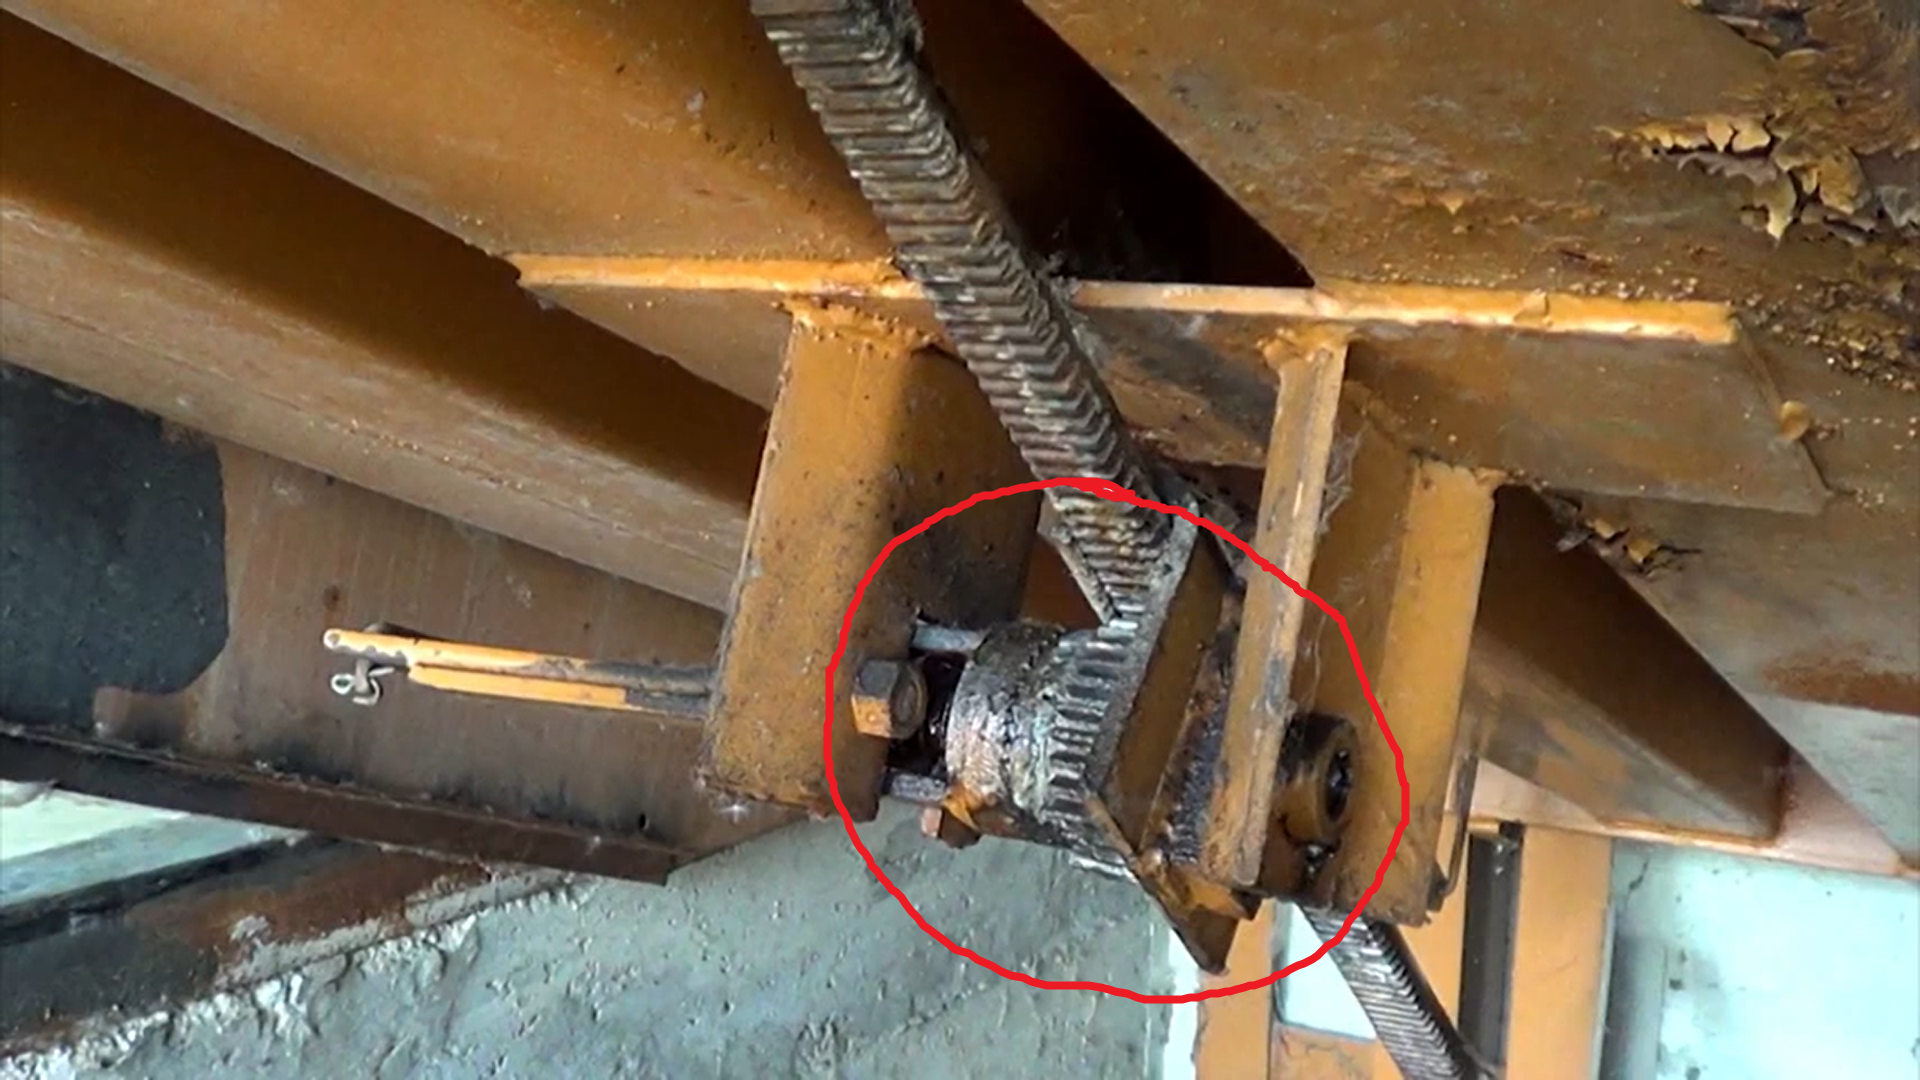
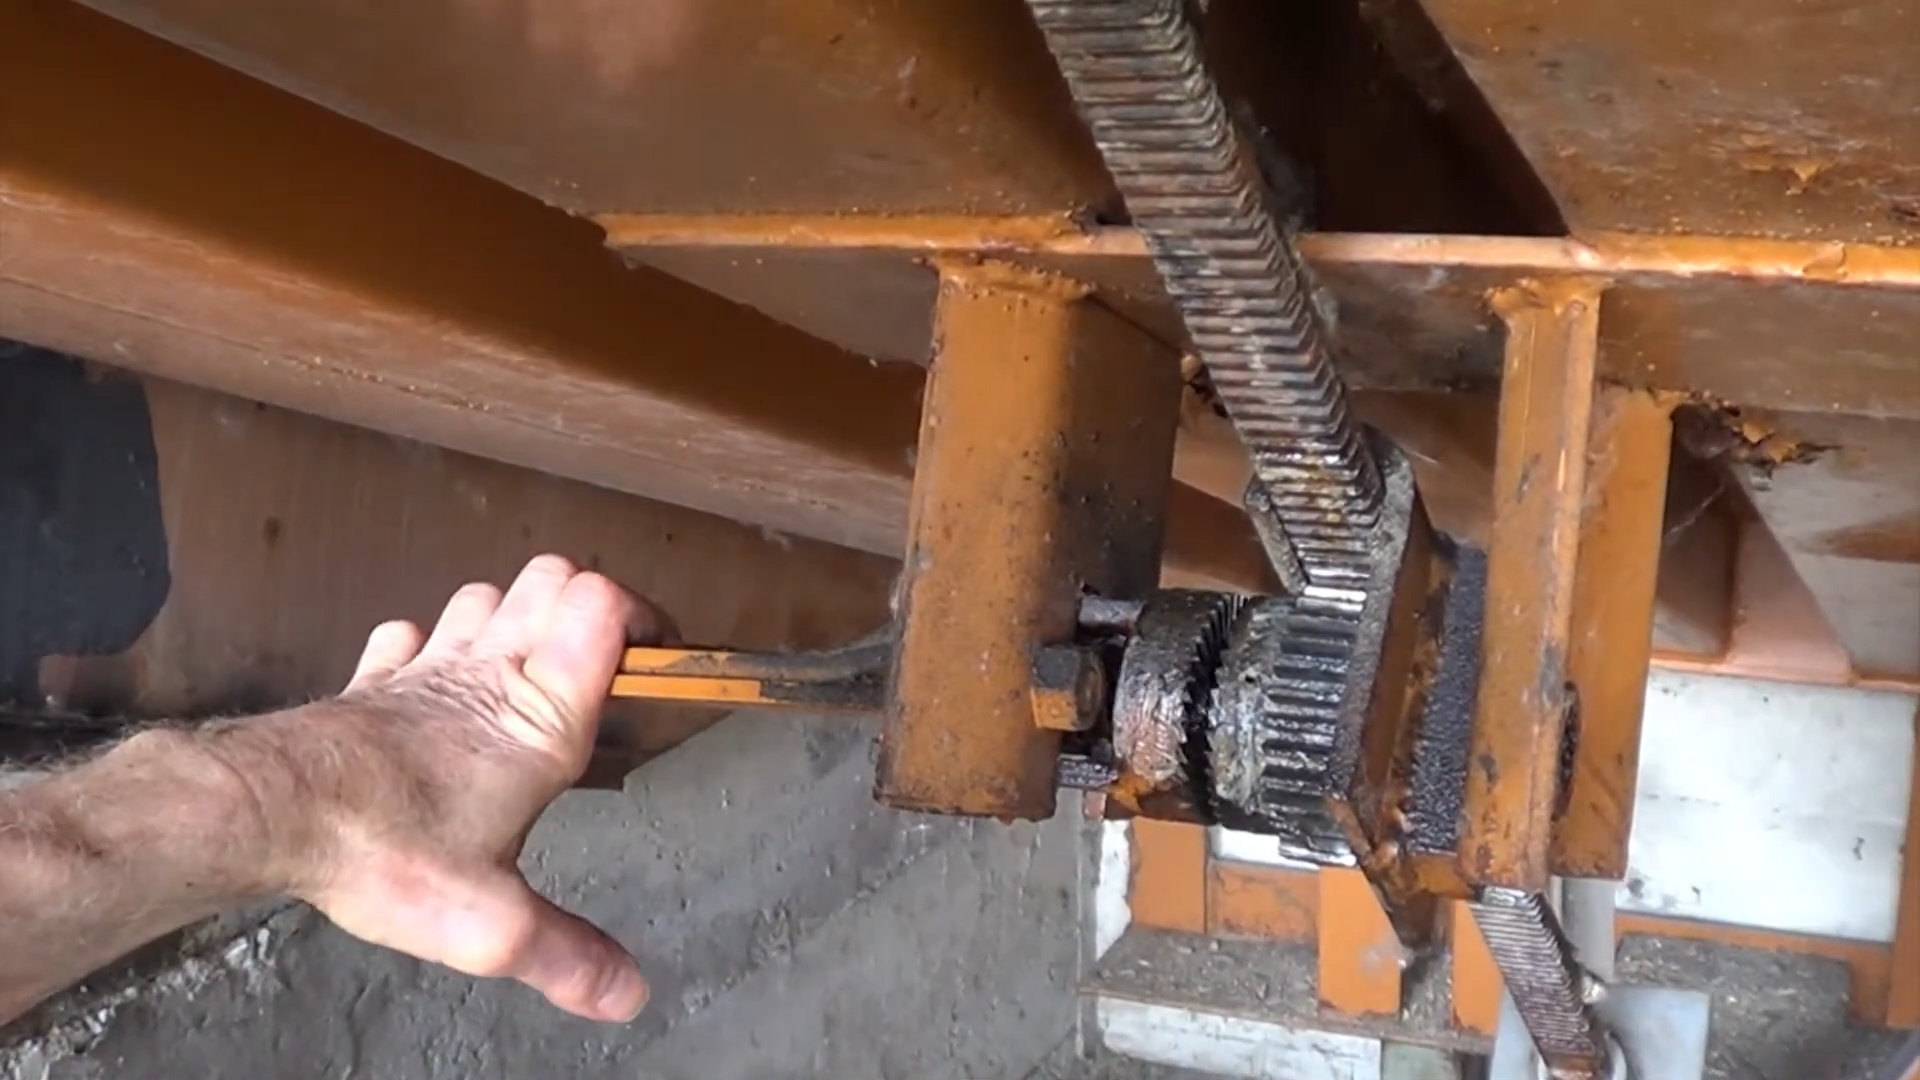
Disassemble the Hold Down Unit
To take apart and rebuild a Serco hold down unit, you will need 9/16″ and 3/4″ wrenches, as well as an adjustable wrench.
Setup
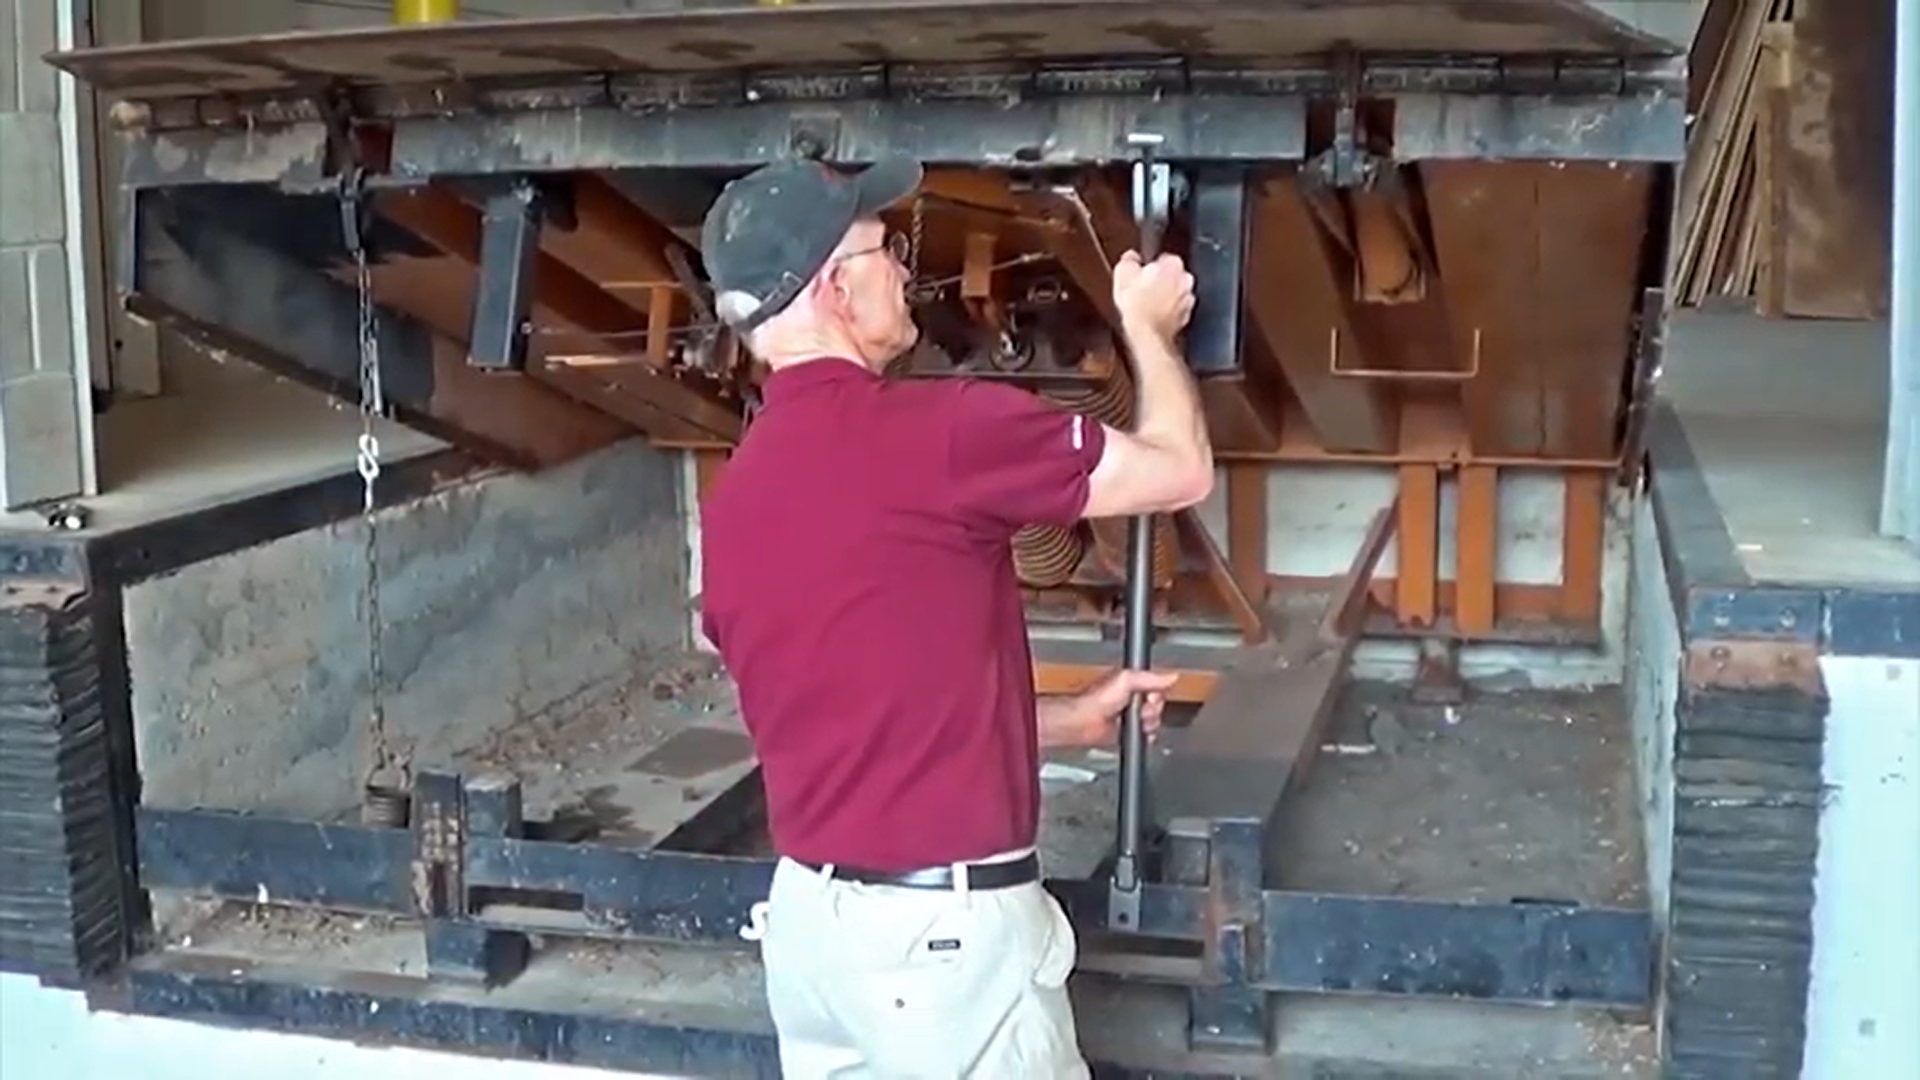
- Firstly, make sure the area you will be working in is secure.
- Raise the deck of the leveler, then secure it in place with two maintenance struts.
- Before disassembling the unit, support the rack with a C-clamp.
Remove the Hold Down Unit
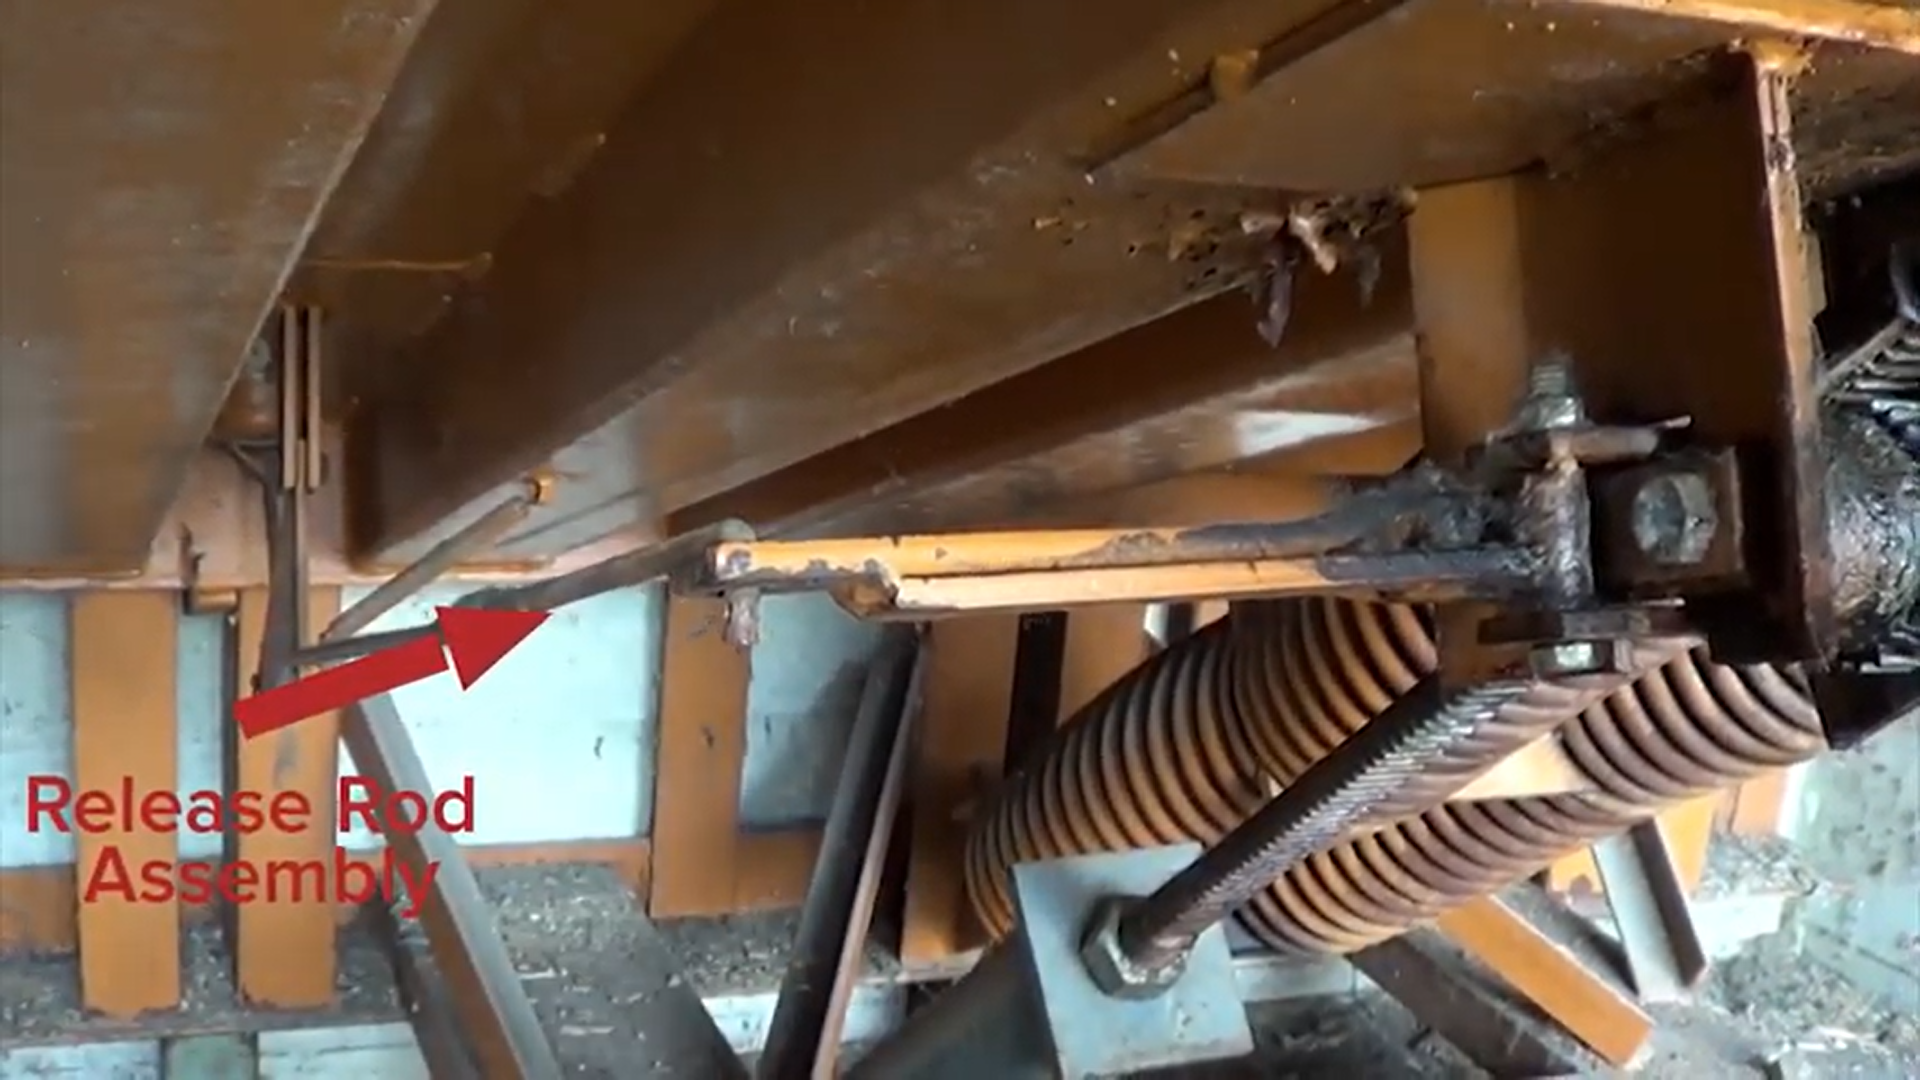
- Next, remove the release rod assembly.
- Remove the pin.
- Then, lift and separate the release rod.
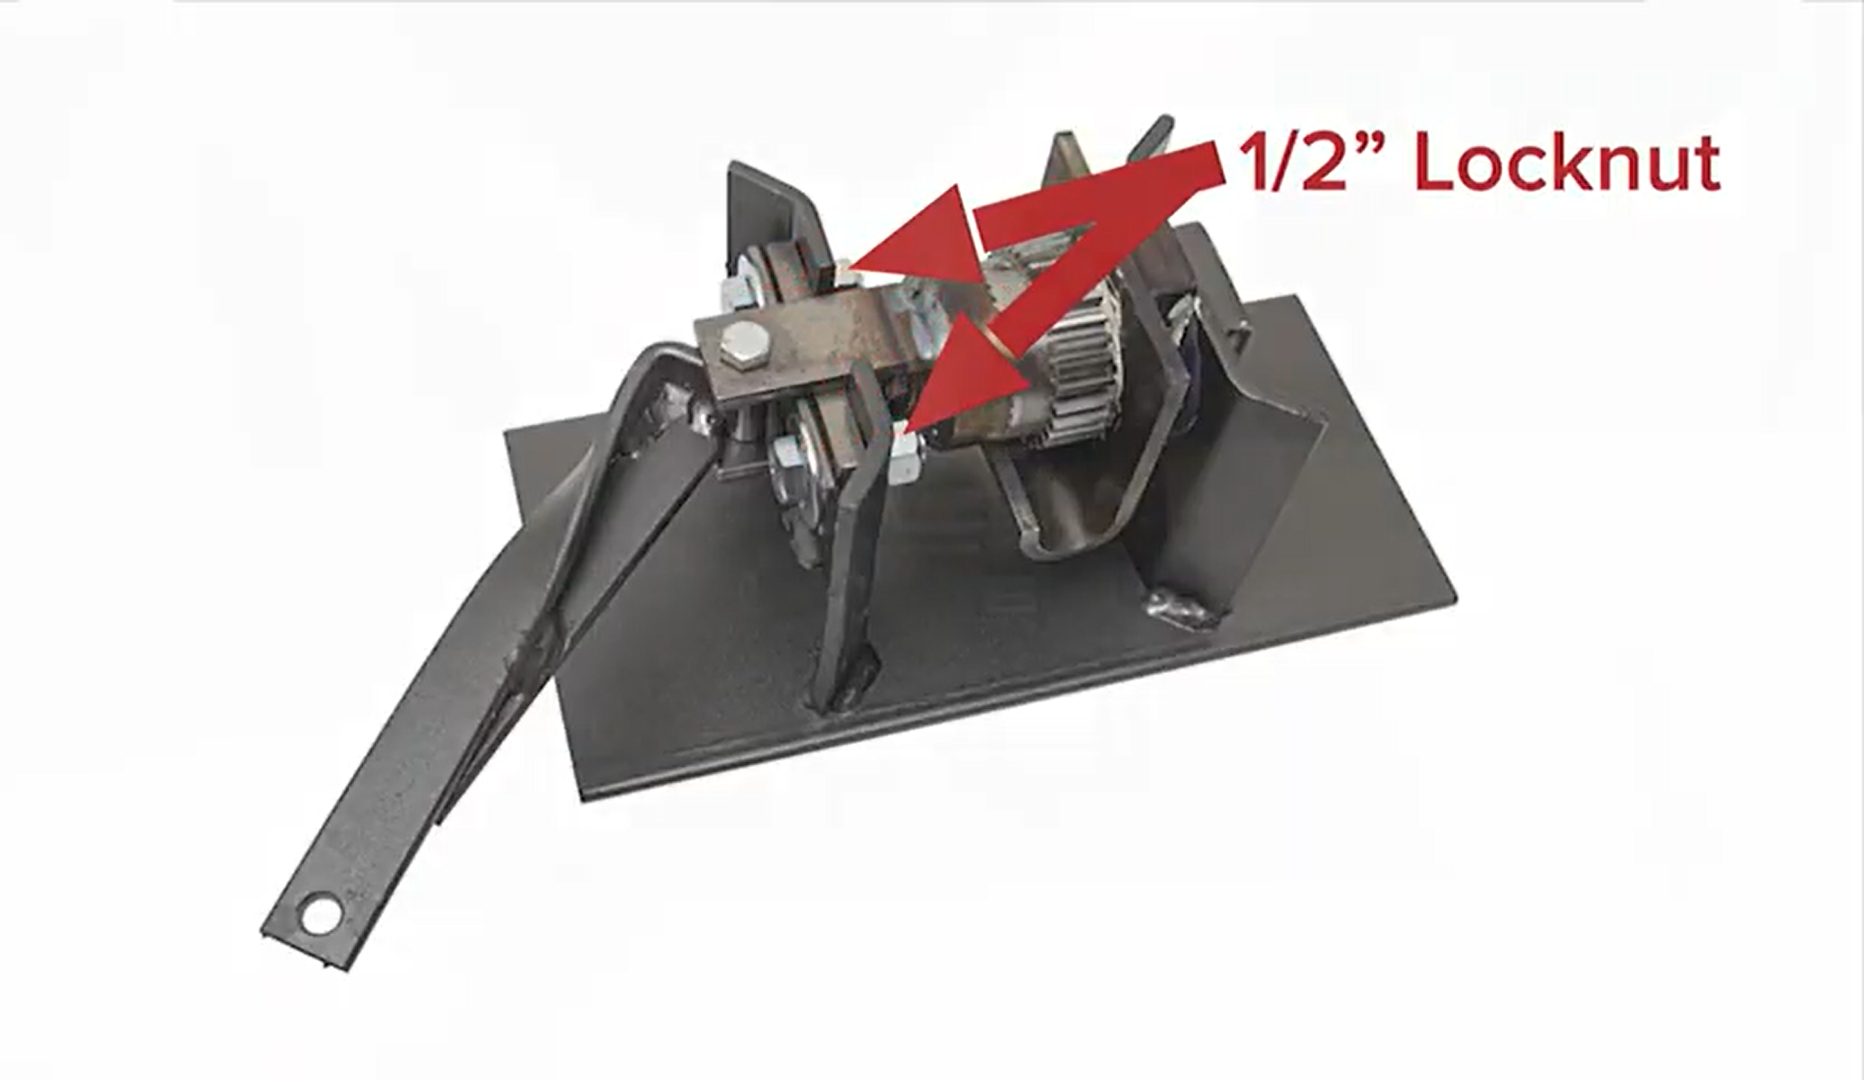
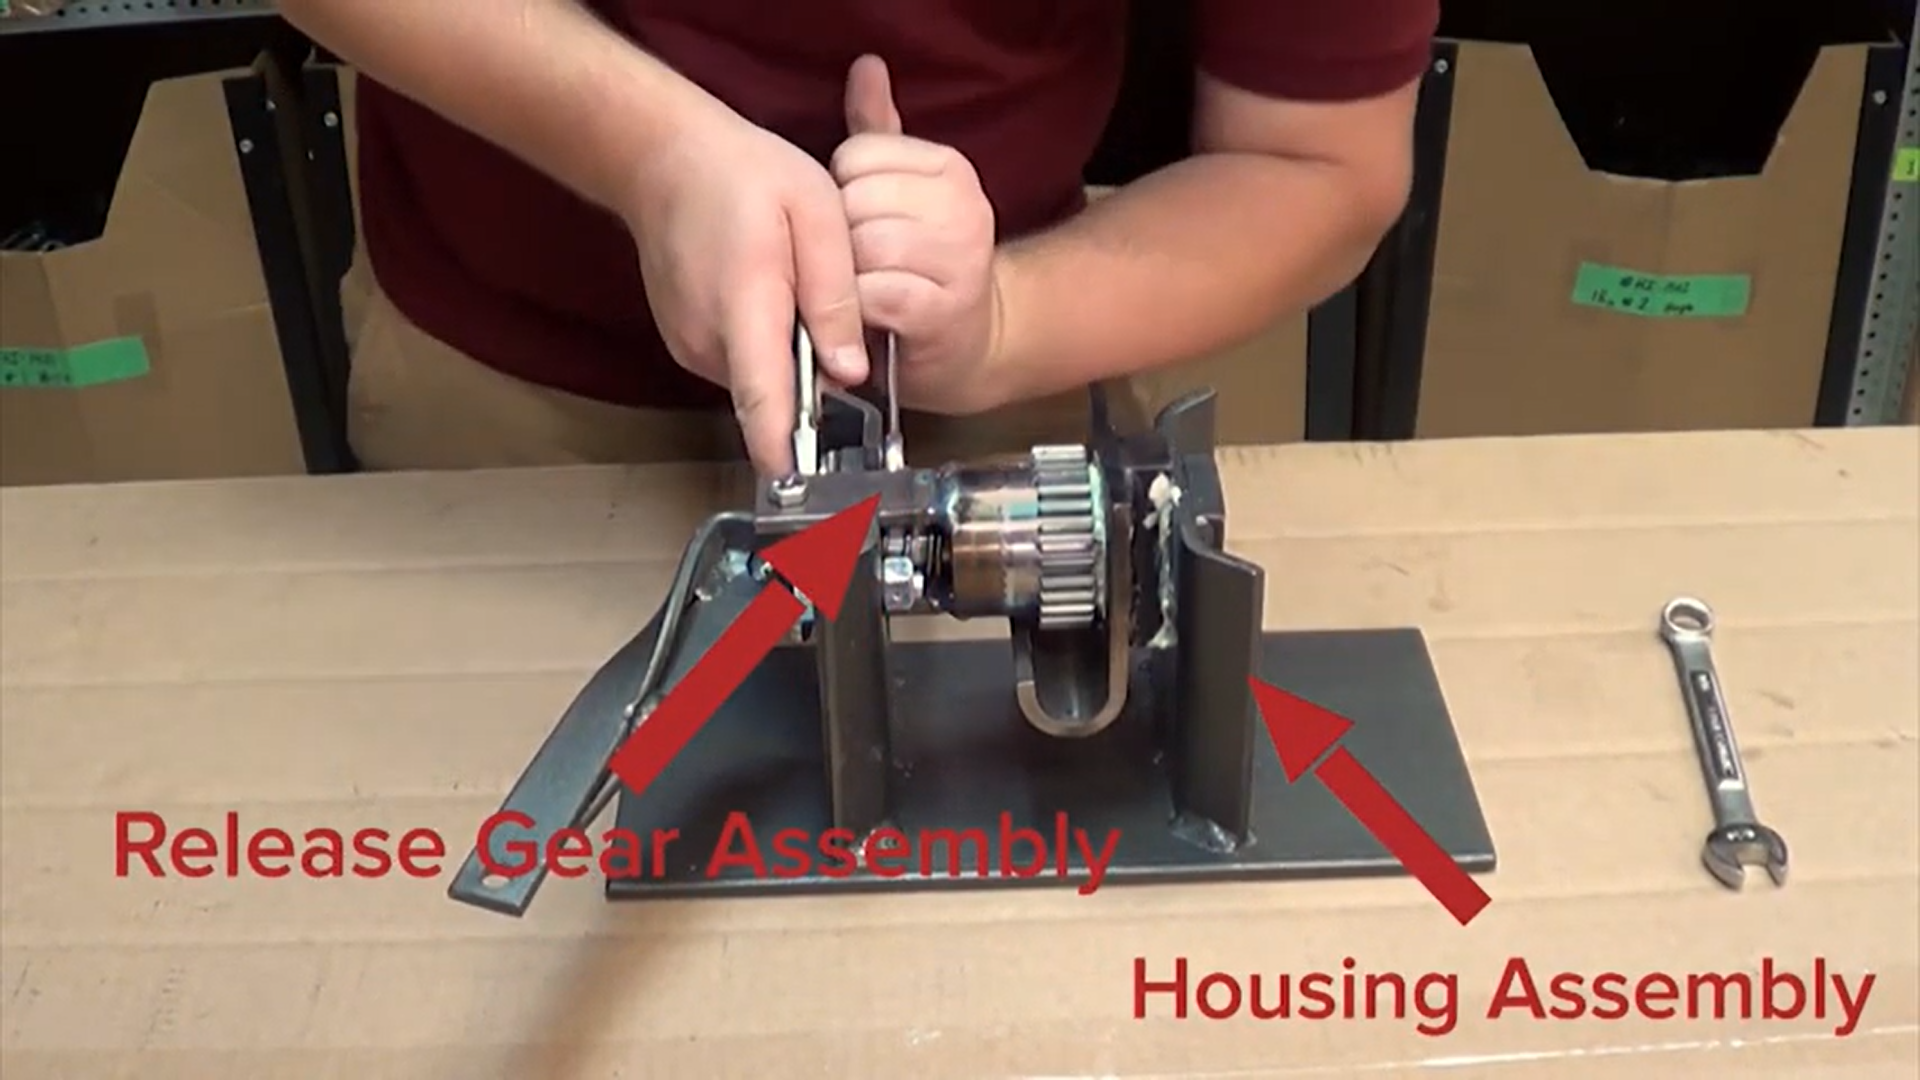
- Remove the two 1/2″ lock nuts and bolts that attach the release gear assembly to the housing assembly, using 3/4″ wrenches.
- Release the C-clamp.
- Remove all parts from the housing assembly and rack.
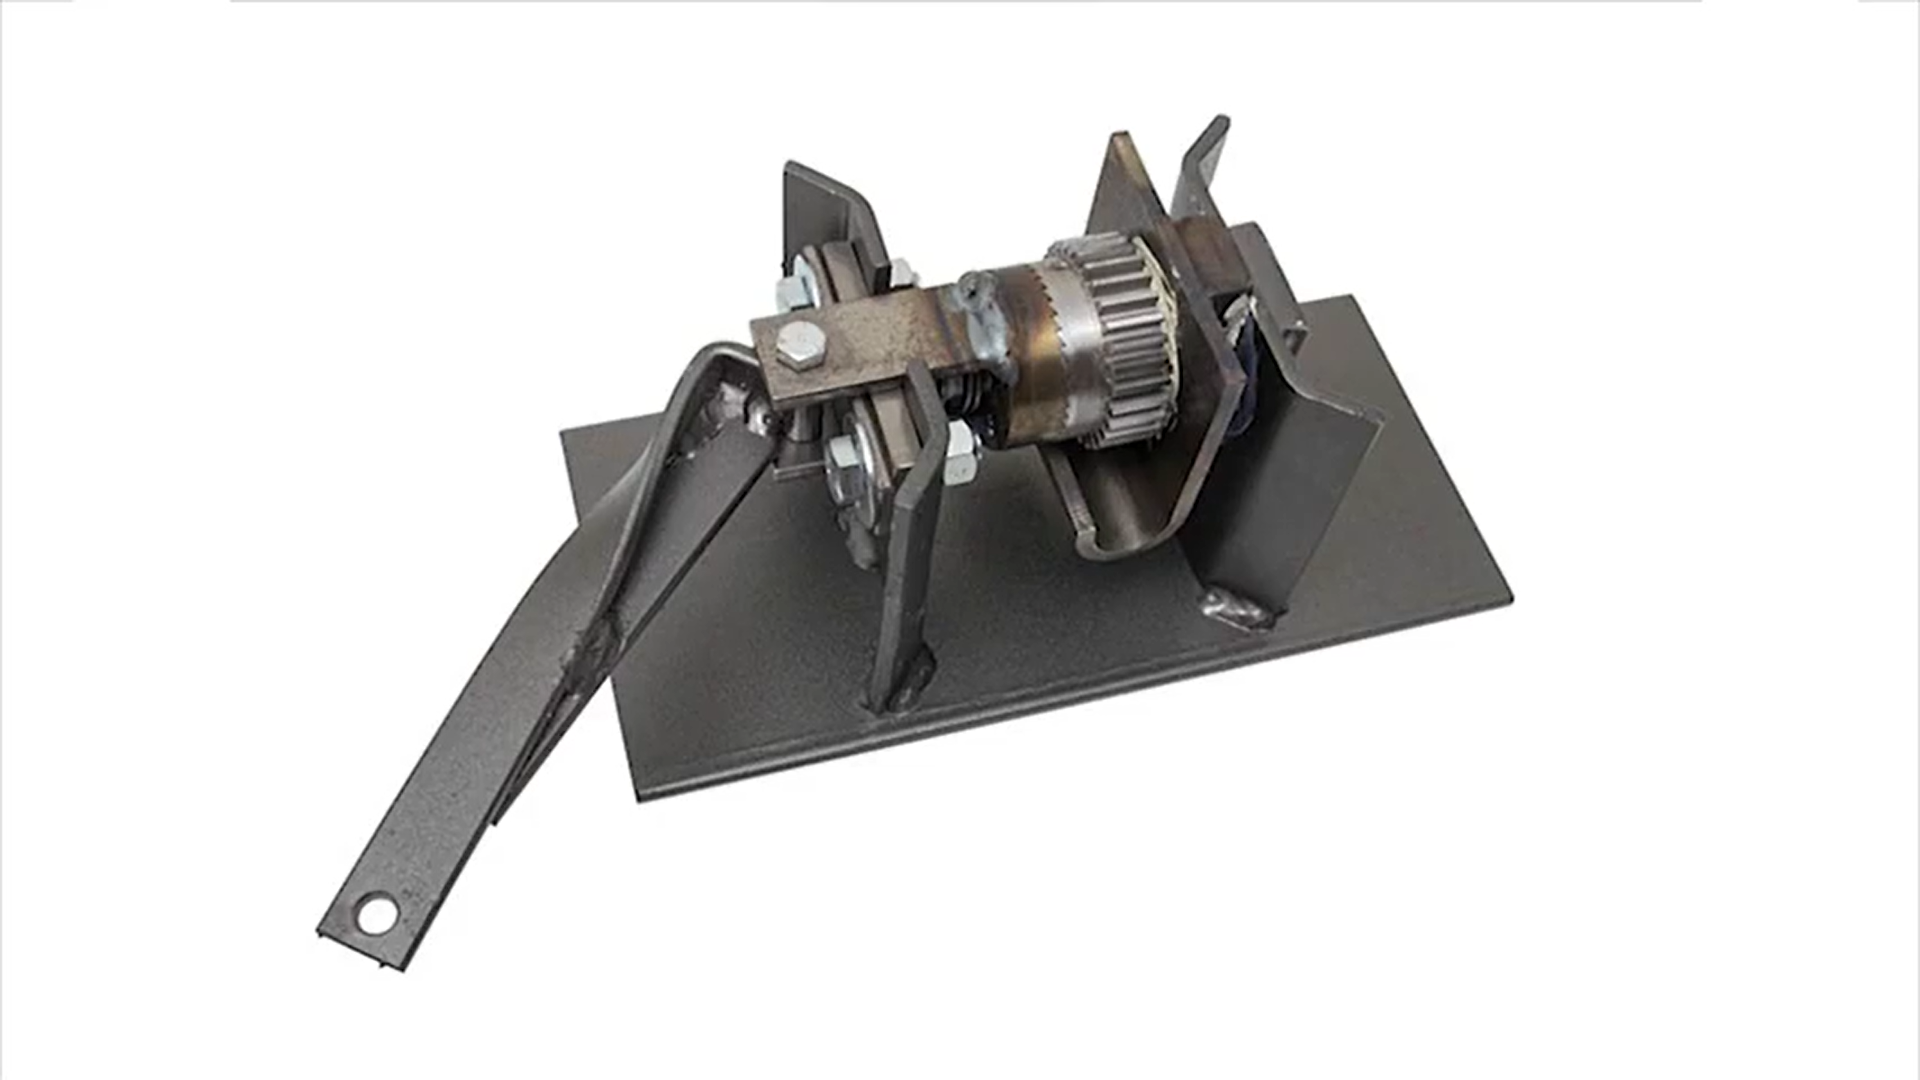
Take Apart the Hold Down Unit
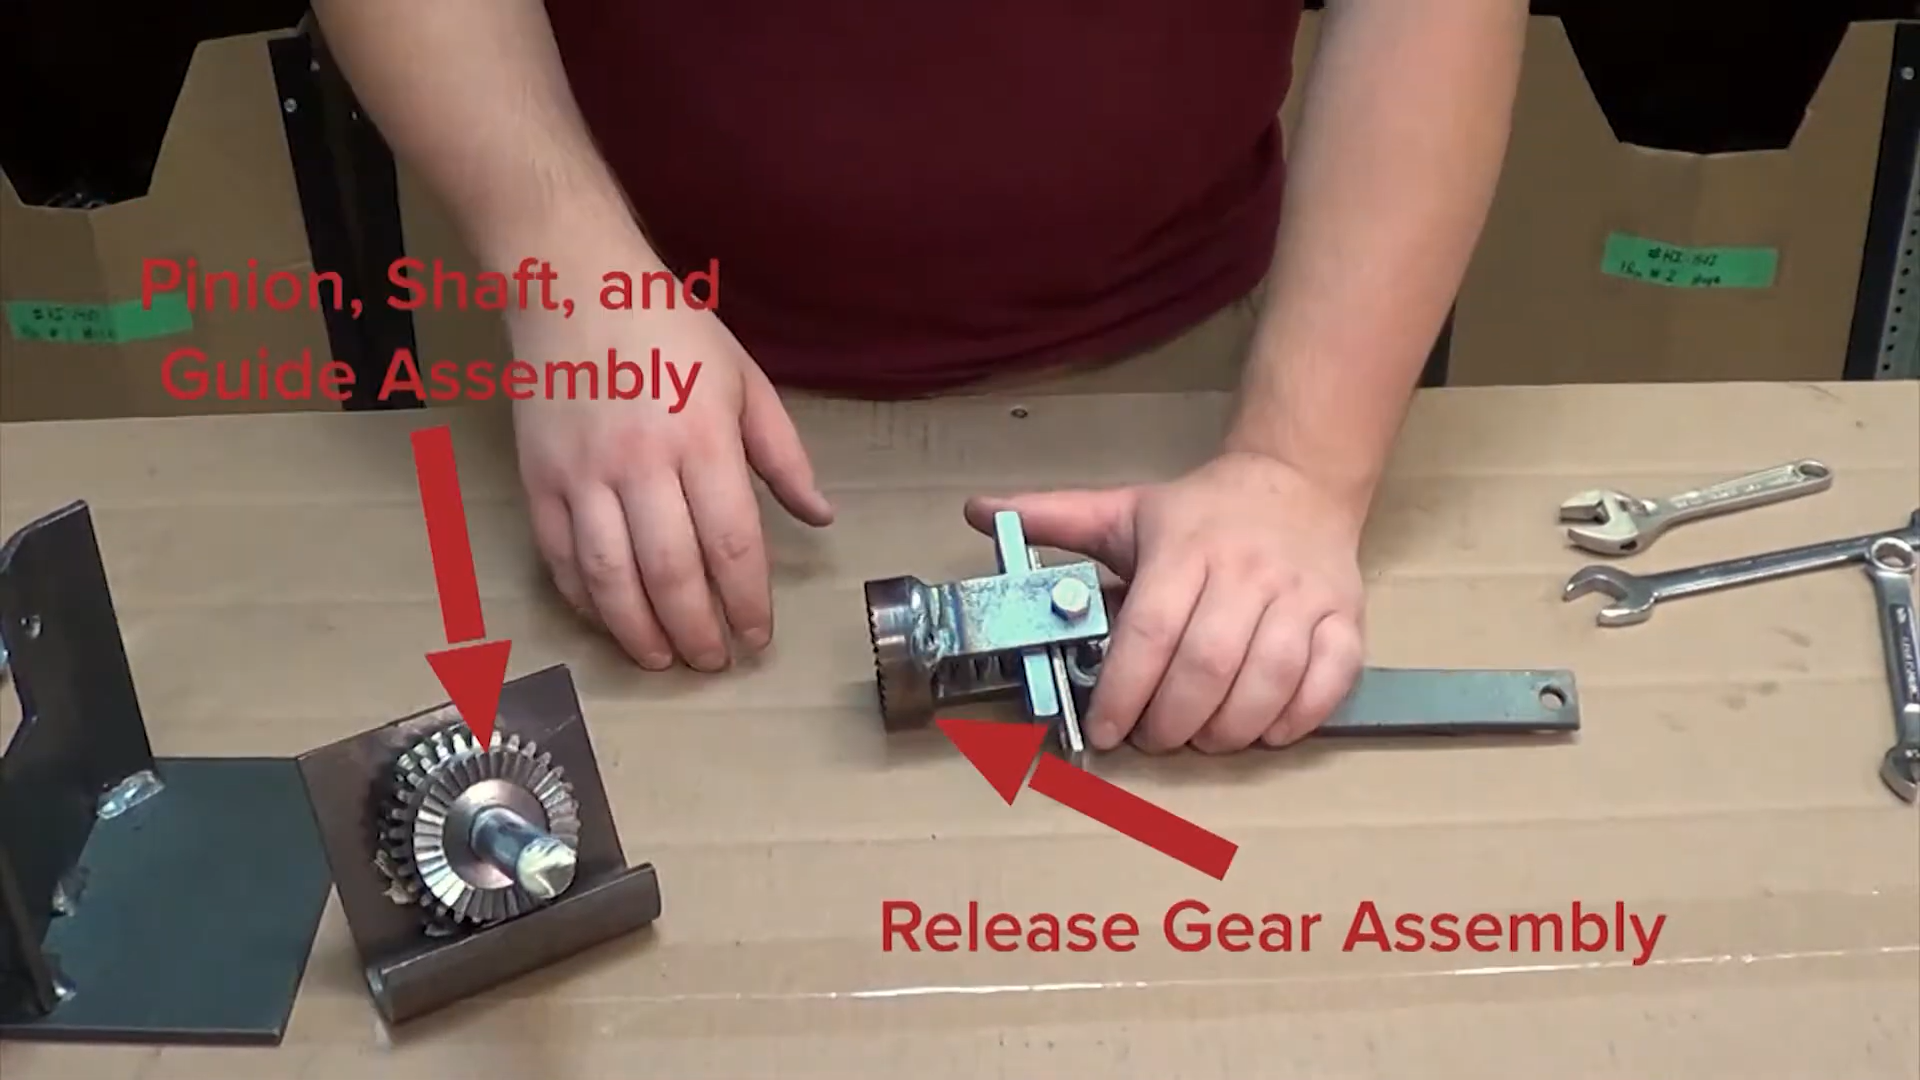
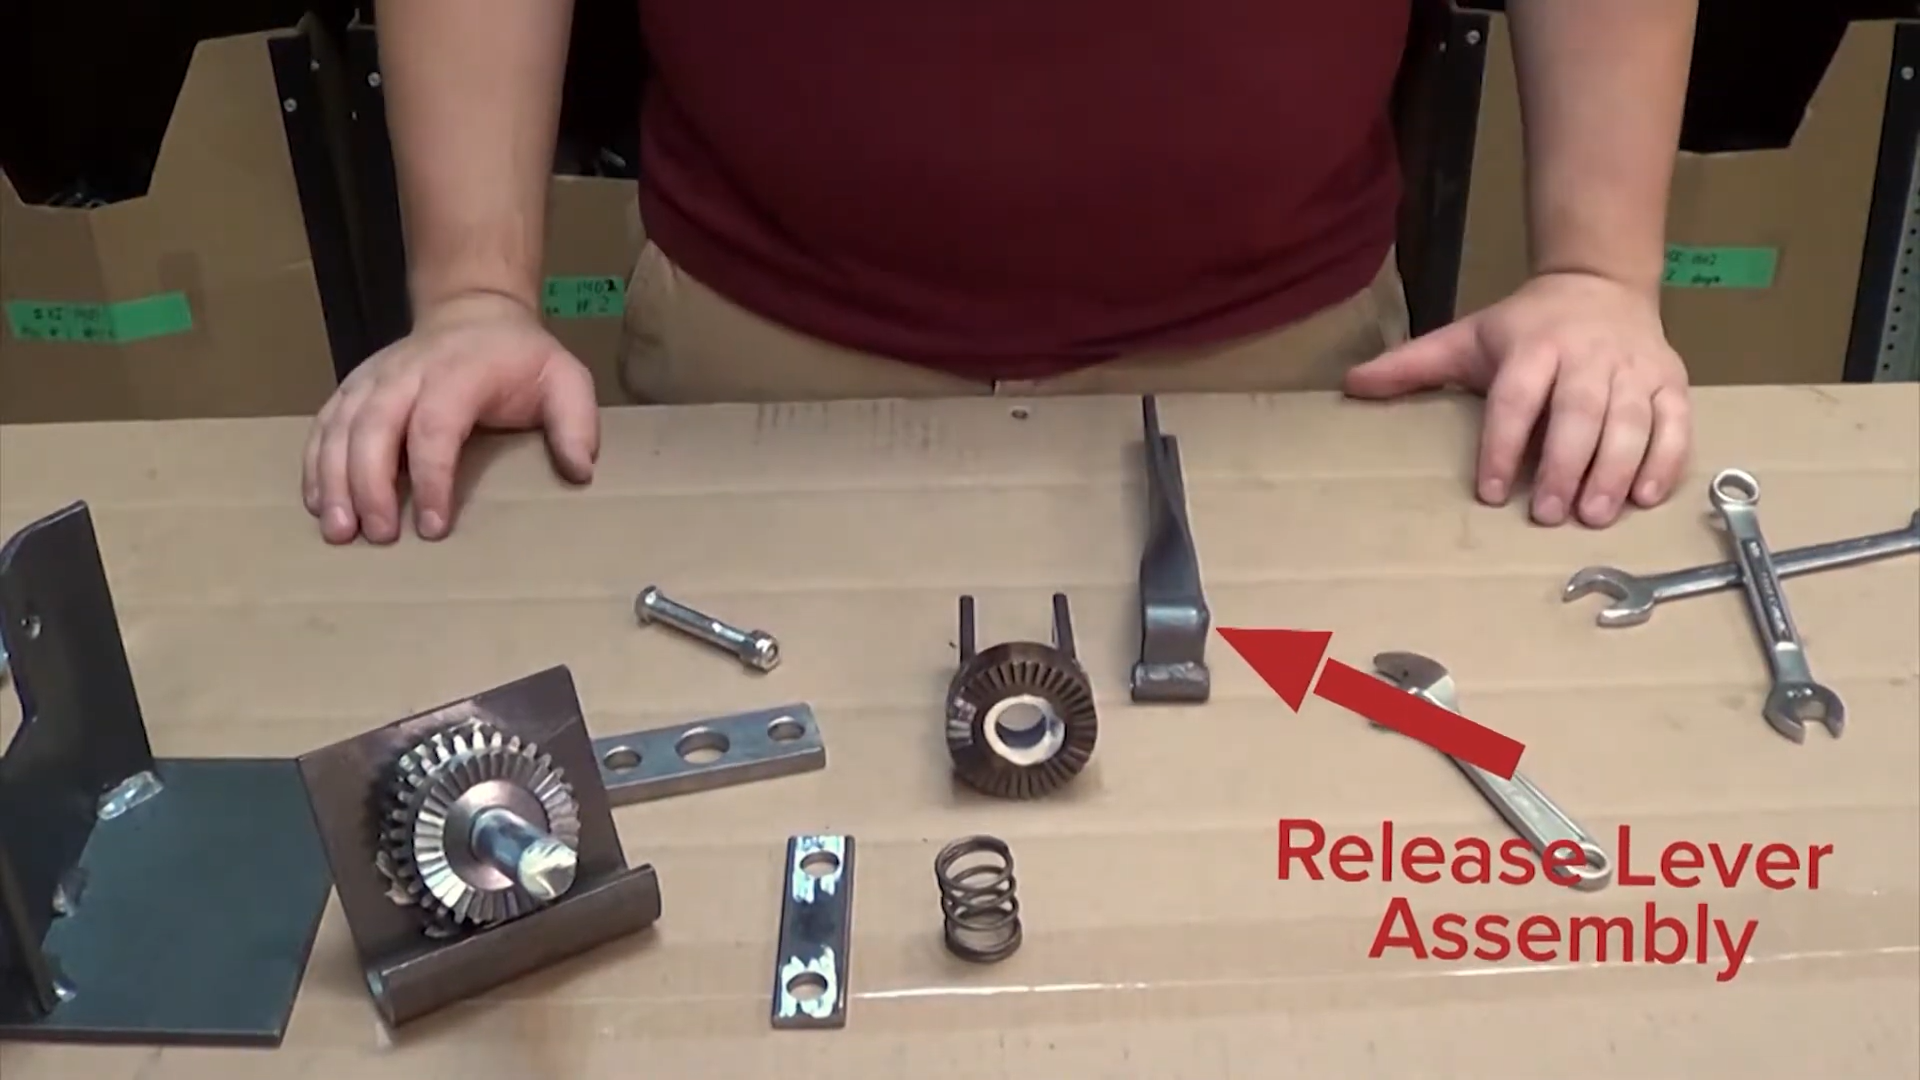
- Separate the pinion, shaft, and guide assembly from the release gear assembly.
- Then, remove the end plate from the release gear assembly.
- Use the 9/16″ wrench and adjustable wrench to remove the 3/8″ lock nut on the release gear assembly.
Doing this will release the tension. As a result, the return spring and shaft retaining plate should fall out.
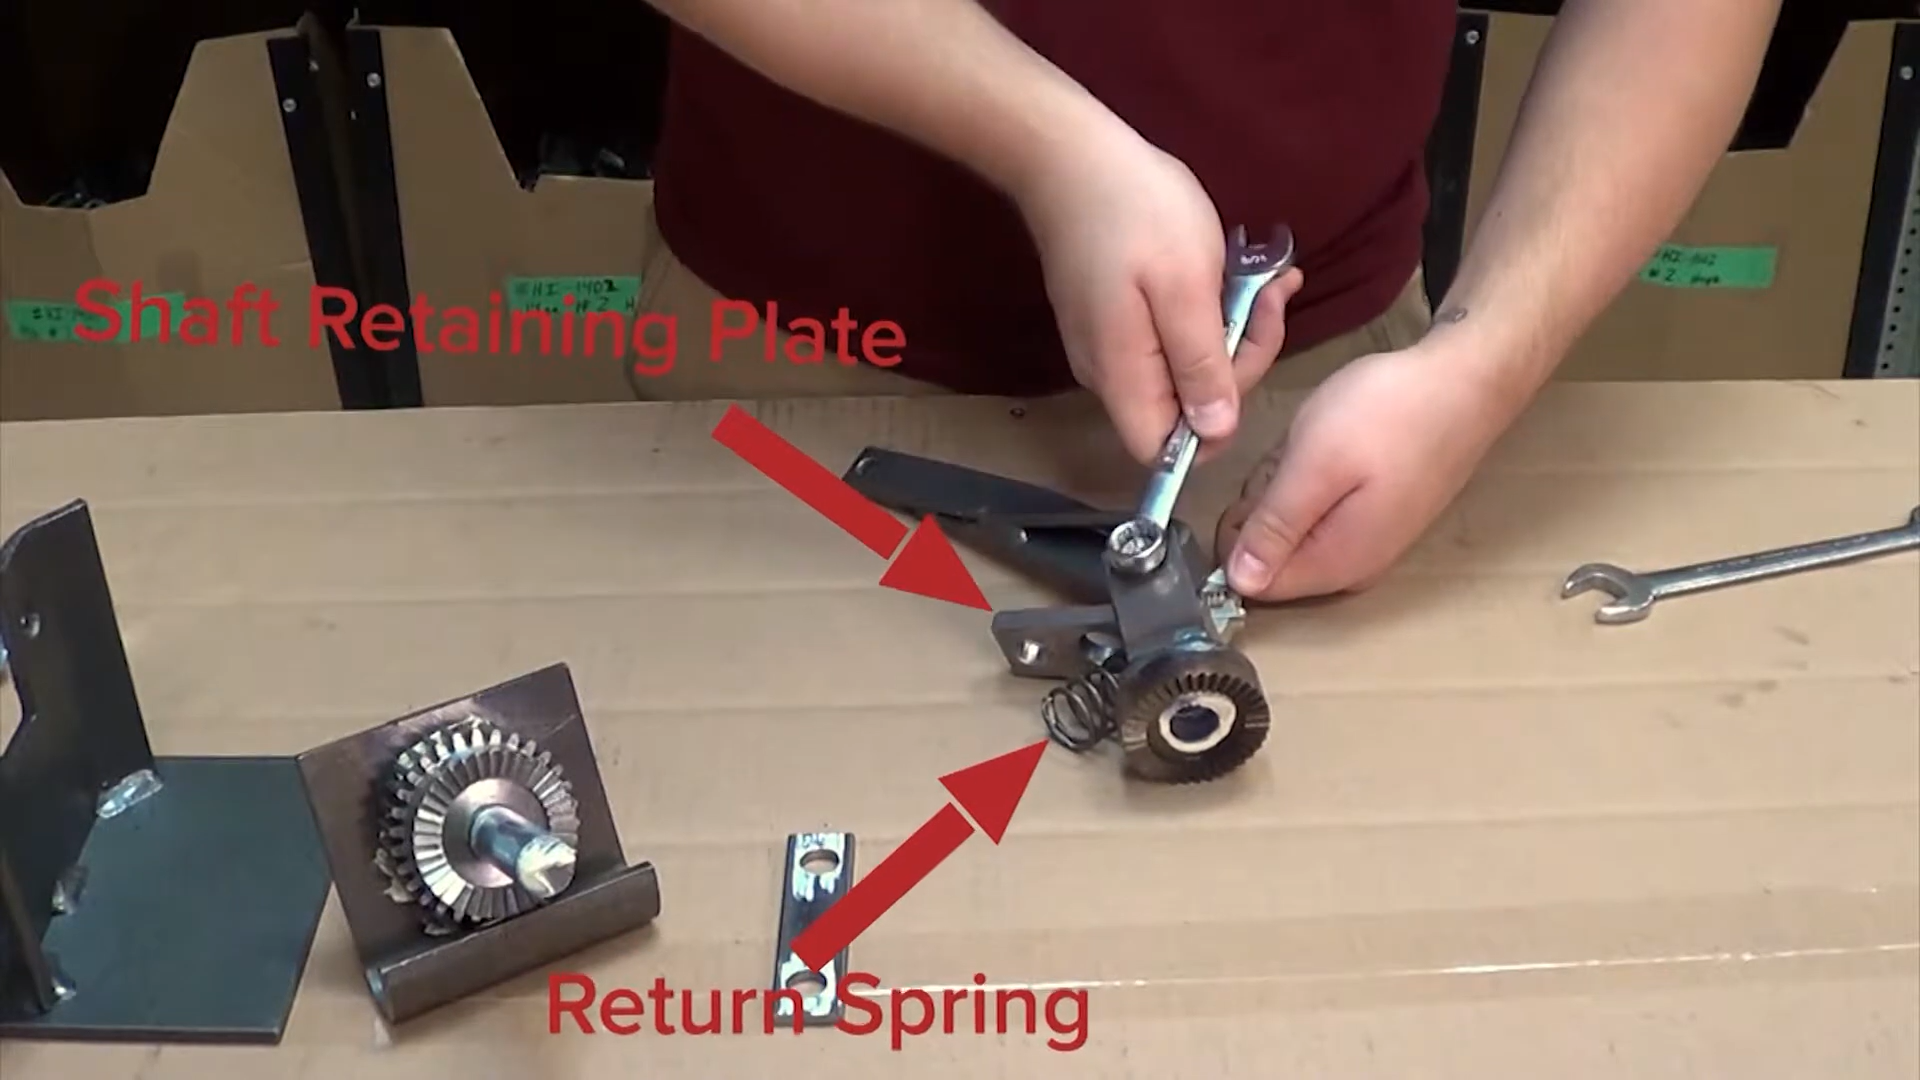
- Remove the lock nut completely.
- Finally, separate the release lever assembly from the release gear assembly.
Now that the Serco hold down unit has been disassembled, you can reassemble it and replace the necessary parts.
Rebuilding the Serco Hold Down Unit
When rebuilding a Serco hold down unit, the parts must be reinstalled in a slightly different order than they were removed. Before you do so, be sure to grease the shaft on the pinion, shaft, and guide assembly, if it is not greased already.
Replacing the Hold Down Unit
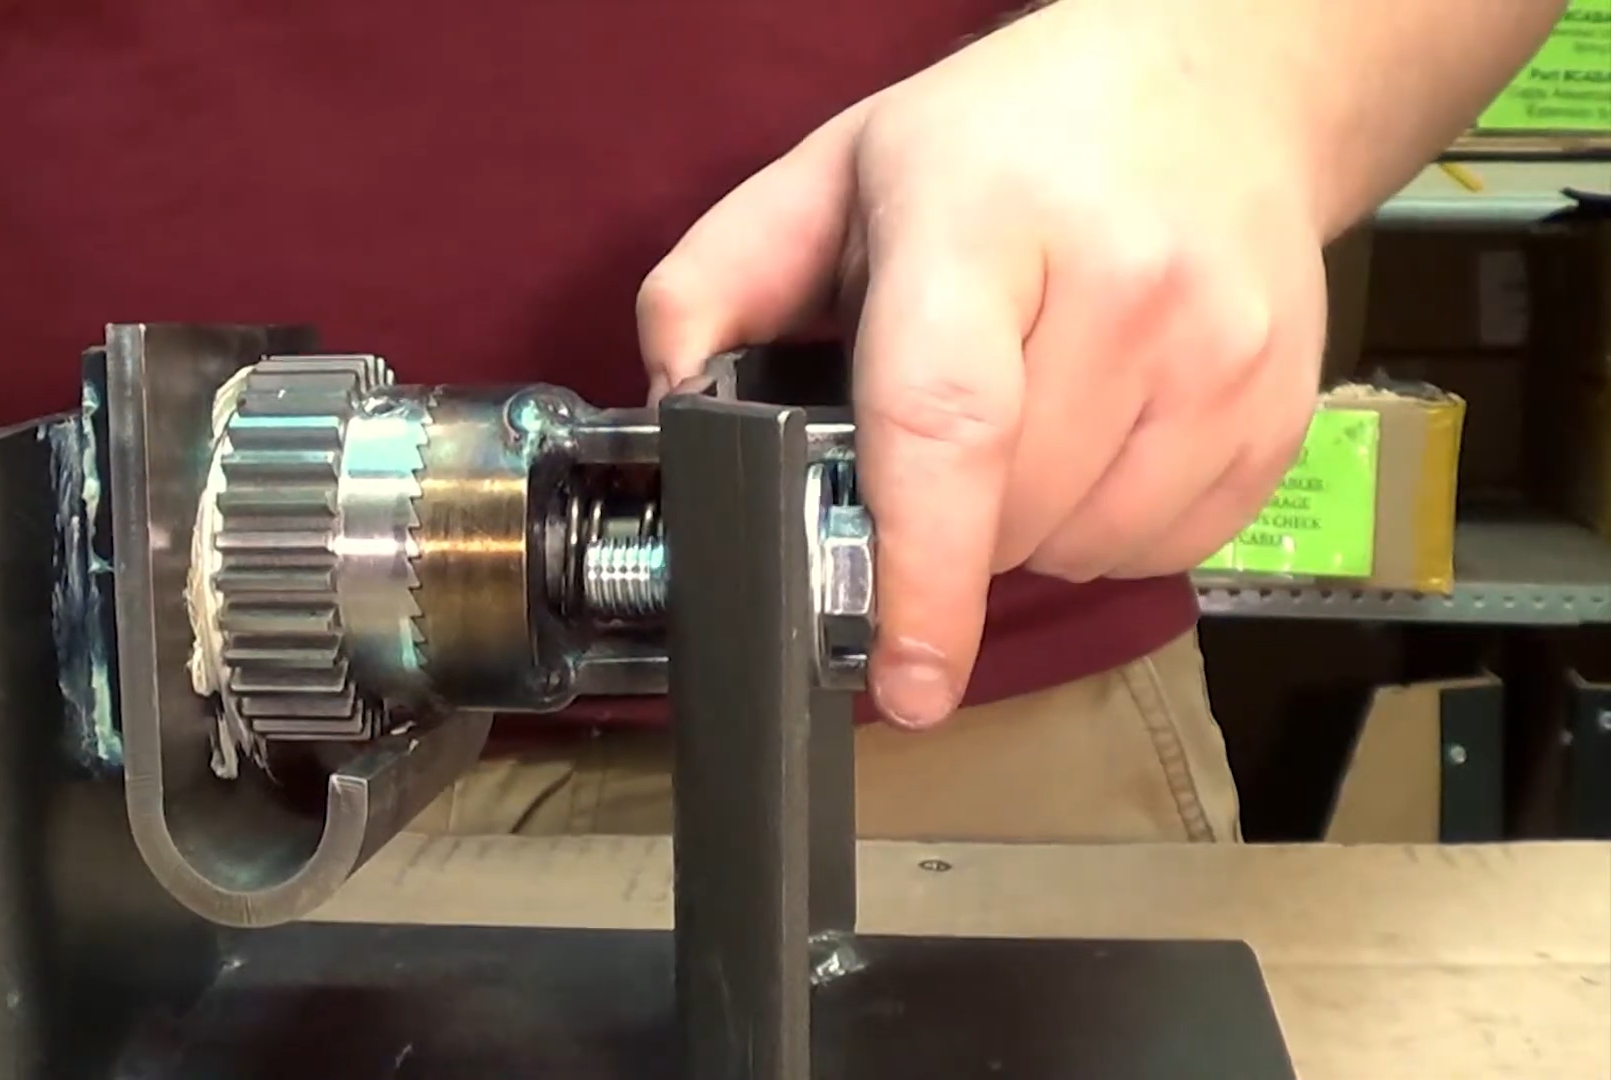
- Reattach the release gear assembly and the pinion, shaft, and guide assembly.
- Then, replace both in the housing assembly.
- When you replace the assembly, make sure the rack is correctly positioned inside the guide assembly.
- C-clamp the rack in place.
Rebuilding the Hold Down Unit
- Slide the spring onto the shaft.
- Then, replace the shaft retaining plate.

- Replace the end plate.
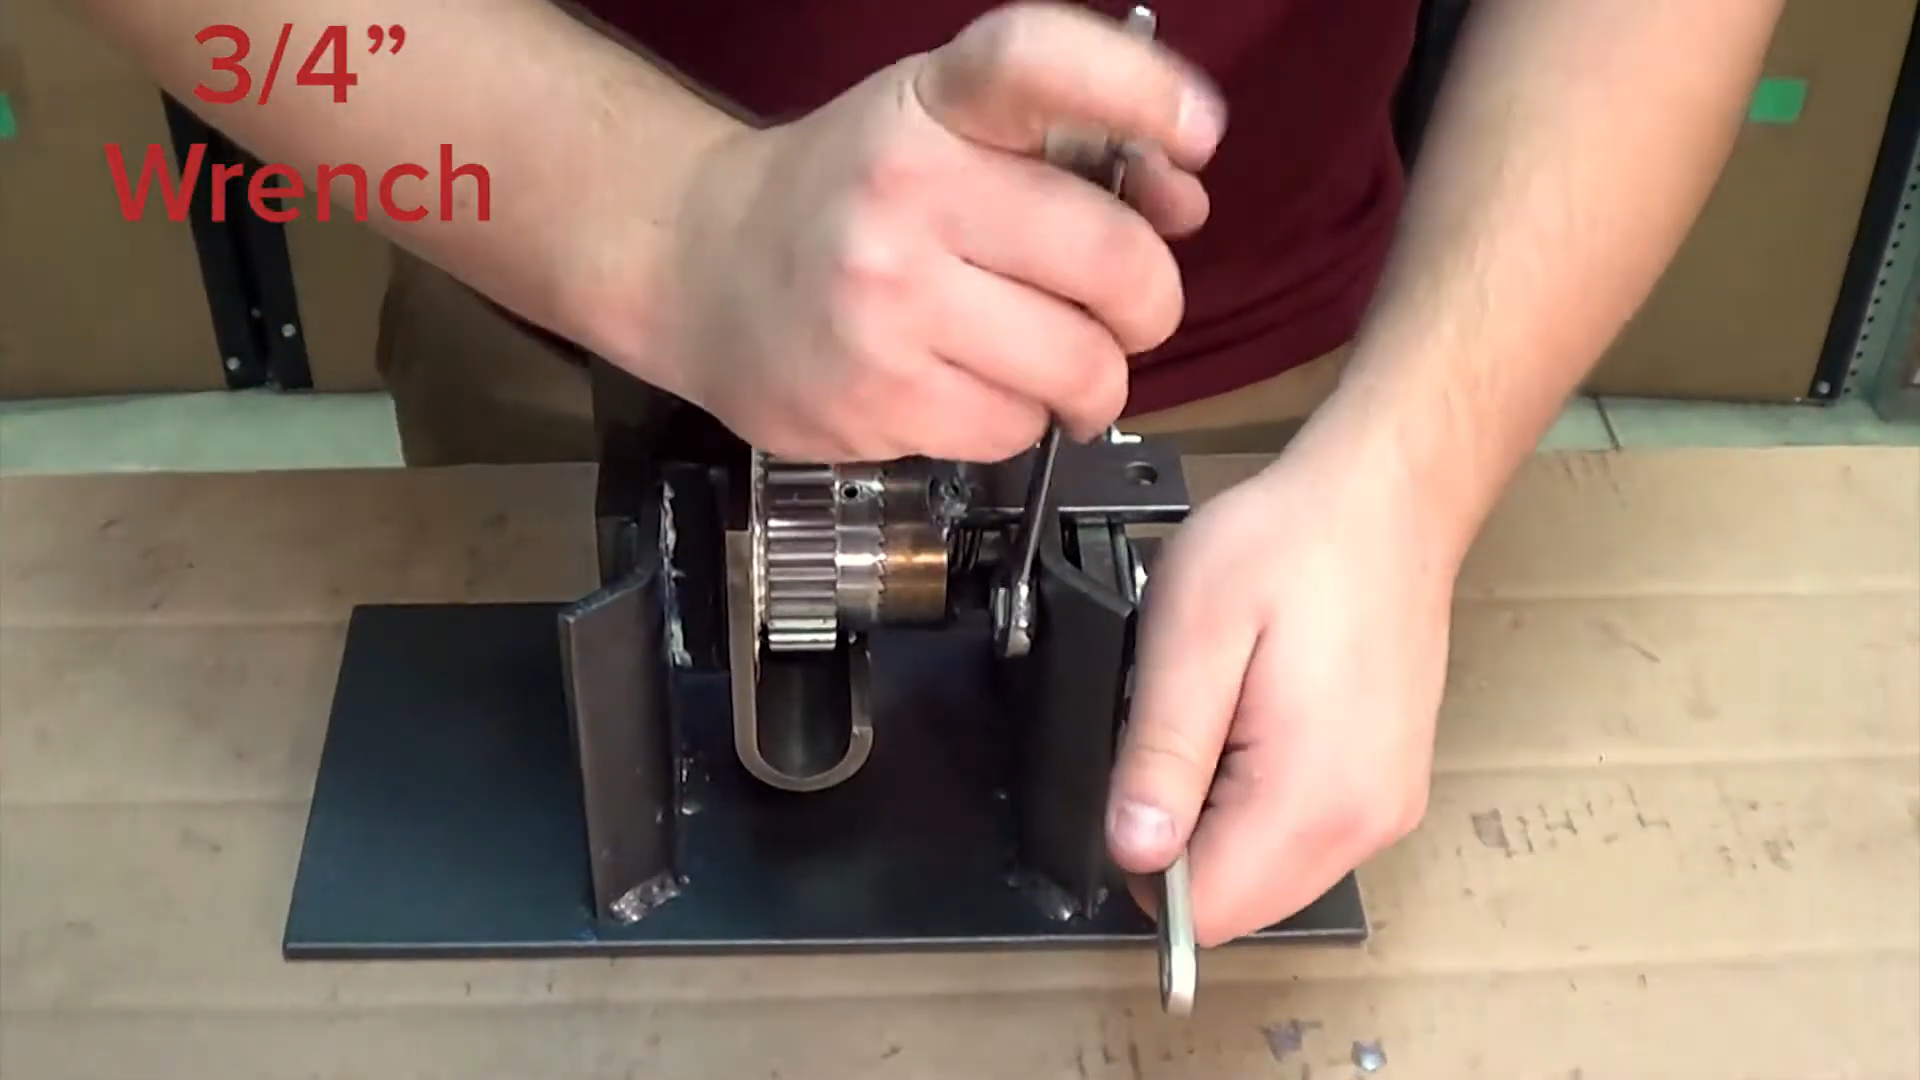
- Reinsert both 1/2″ hex bolts with their washers.
- Secure with the 1/2″ lock nuts.
To maintain the correct alignment, finger-tighten both lock nuts before tightening fully with the 3/4″ wrench. When using the wrench, alternate between each set of nuts.
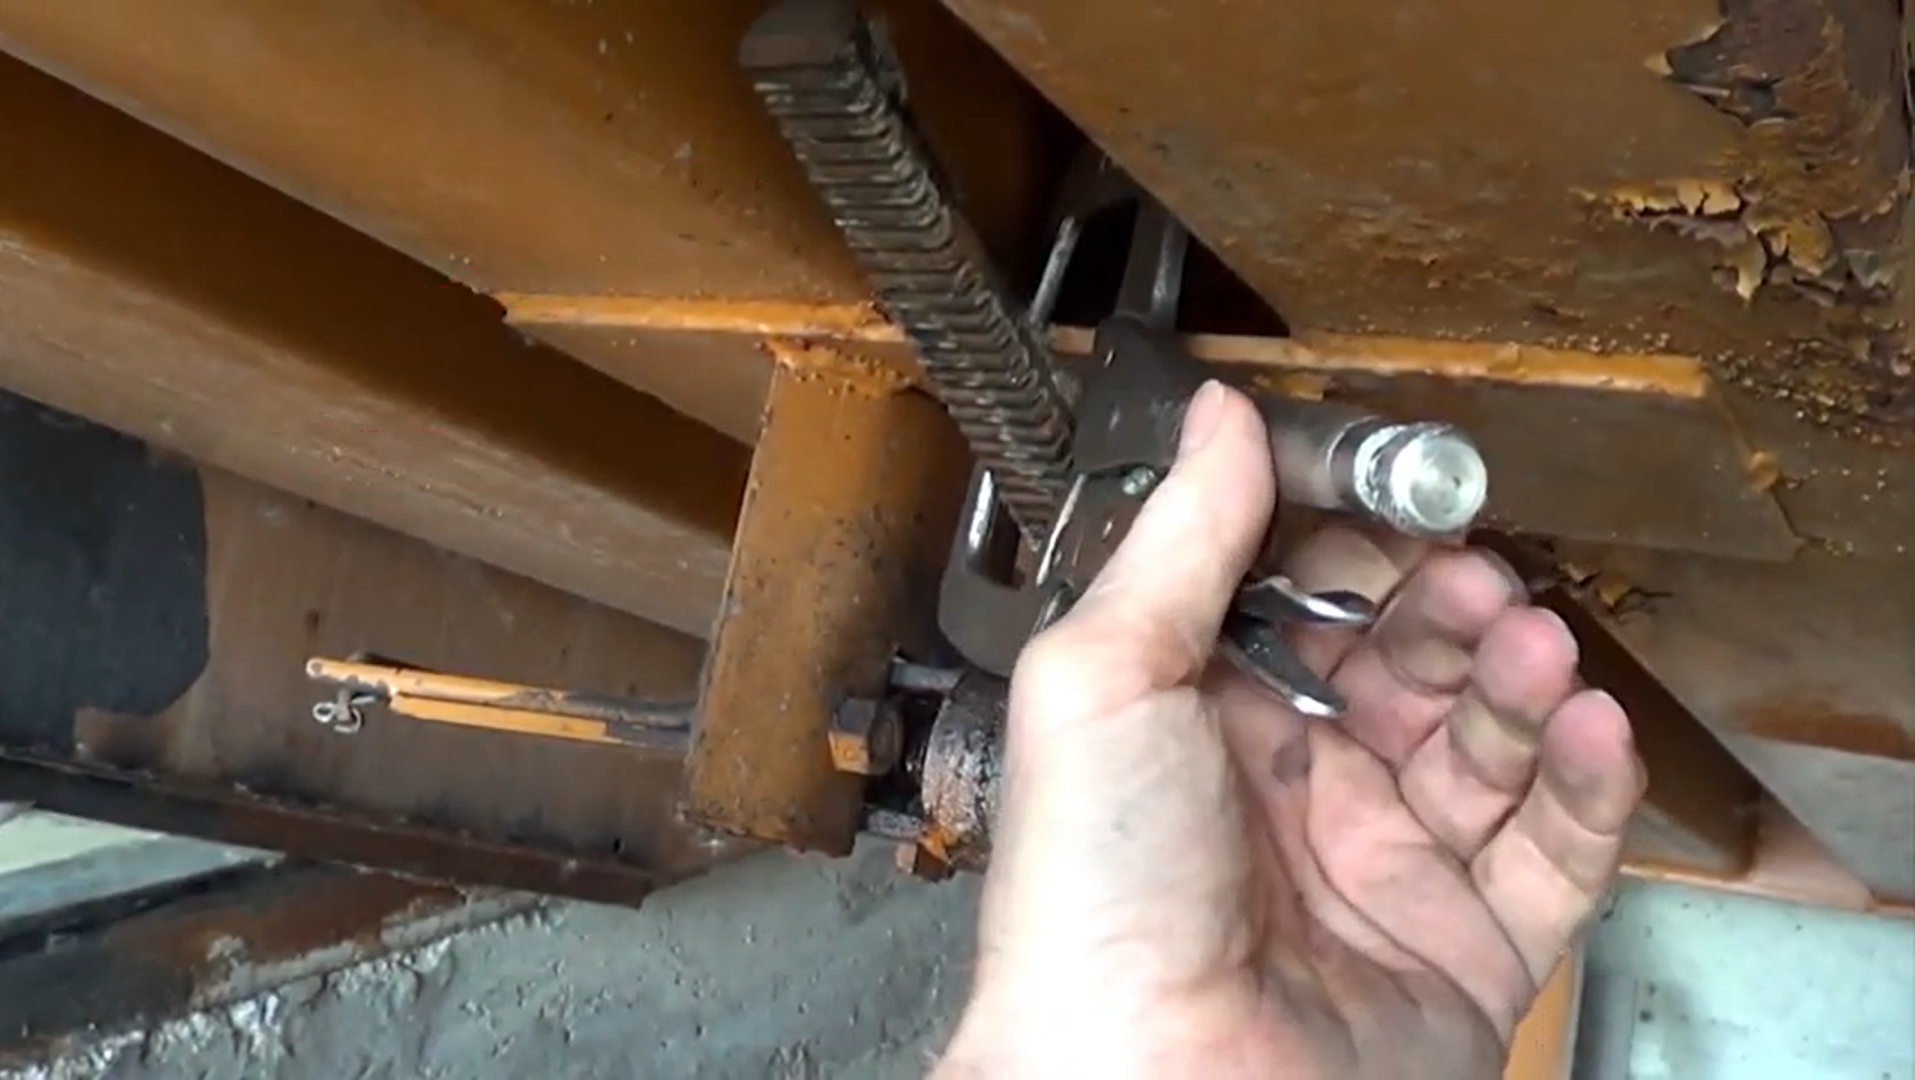
- Slide the release lever into position.
- Insert the 3/8″ hex bolt, and secure with a 3/8″ lock nut. Then, using the 9/16″ wrench, tighten the 3/8″ nut and bolt.

Tighten until the assembly is secure, while leaving it loose enough for unimpeded operation.
Finishing Up
- Test that the lever functions properly, and readjust the 3/8″ nut and bolt as needed.
- Then, make sure that the gears release properly.
- Remove the C-clamp.
- Lastly, reattach the release rod to the release lever, and secure with the pin.
We hope this helps you to repair or replace your Serco hold down unit. More information about dock levelers is located in our blog posts about snubber assemblies and hinge lubrication.
This entry was filed under Products, Technical Support. You can follow any responses to this entry through the RSS 2.0 feed.
