Posted March 22nd, 2019 at 10:40 am by Dan Musick
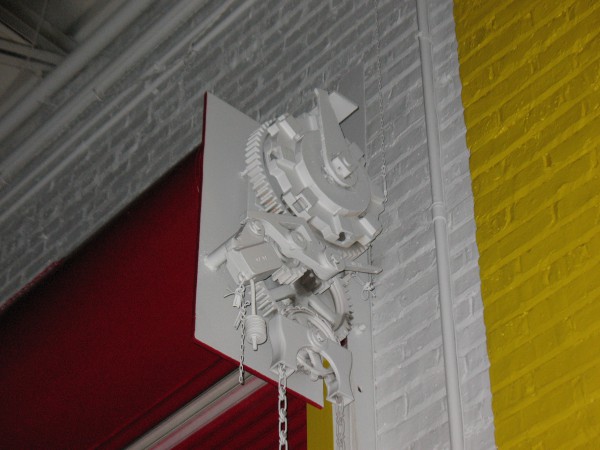
This tutorial will provide step by step instructions on how to install a steel rolling door. Please be prudent, as this process can be both difficult and dangerous.
Preparation
- To begin with, check to confirm you received all the parts necessary to successfully install a steel rolling door, and ensure that they are the correct size. Parts you will need include the steel curtain, the rolling barrel, tracks, endplates, and a hardware box. New doors normally come with the barrel assembly and curtain separate, along with the tracks and hardware box with instructions. Sometimes the endplates are separate.
Getting started
- First, install the tracks. Depending on the jambs, the longer angles may need to be separated from the guide angles. Also, if the upper bellmouths are welded to the tops of the tracks, the guide angles will need to be separated at this time.
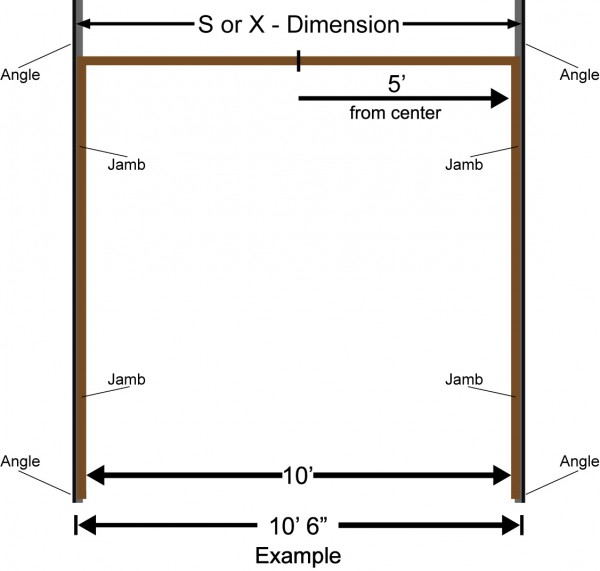
- Then, Determine the S or X dimension. This is the dimension between the vertical mounting angles which support the tracks and endplates. In this case, the S-dimension is 10′ and 6″.
Installing the Curtain
- Measure and mark the jambs.
- Secure the angle on each side. Both angles must be plumb, level, and evenly spaced according to the S-dimension at the top and bottom. This step is absolutely critical for the steel rolling door to operate smoothly.
- Install the door curtain onto the barrel.
- Unroll the curtain onto plywood, cardboard, or two 2 X 4s or 2 X 6s. This prevents scratches from occurring on the outside of the curtain.
- Then, position the barrel just beyond the top of the curtain.
- Determine from the instructions, your order, and from markings on the barrel, which end is the drive end. The shaft on the drive end does not have a bearing in the end of the barrel; the winding end does have a bearing. Turn the drive end, so it is on the correct side of the curtain.
- If barrel rings are in the box, install them at this time. Some barrels do not have rings, and some barrels come with the rings already installed.
- Install both endplates. The plate with the bearing goes on the drive end, and the plate without the bearing goes on the winding end. This is the opposite of the barrel, where the bearing goes on the winding end.
- If the steel rolling door comes with a hand chain drive, install it at this time.
Installing the Barrel
- Sometimes the top slat has holes to secure to the barrel, and sometimes there are several short starter slats to align with each barrel ring or with the holes in the barrel. If you have several starter slats, slide them into the top slat at this time.
- Position the barrel over the top of the curtain, lift the top of the curtain up to the barrel, and secure the starter slats to the barrel rings or to the barrel.
- Roll the curtain onto the barrel. You do this by turning the drive shaft, and by pushing, pulling and rolling the curtain.
- Afterward, tie and secure a strap around the center of the curtain.
- To protect the curtain, place two 2 X 6 boards on top of the forklift blades.
- Lift the center of the steel rolling door and see if one side is heavier. If so, move the forklift to support the balance center of the curtain and barrel.
- Lift the curtain and end plates into place and bolt the end brackets to the tops of the support angles.
- Raise and lower the blades as needed to allow the bolts to fit in the holes.
- Secure the bolts and nuts. Wind the springs one or two turns until the header side of the curtain starts to pull up. Then, remove 1/4 turn of tension. Also, record the number of turns.
- Lower the curtain just enough to allow you to install the two angle guides on each side with the bell mouths just above the bottom bars if you earlier separated the tracks from the longer vertical support angles.
- Secure the angle guides (tracks) to the longer vertical support angles at this time.
- If the angles were not separated, install the bell mouths at this time.
Setting Spring Tension
- Check the installation manual and adjust the spring tension as needed.
- Carefully close the steel rolling door and check the balance. Then, adjust the springs if needed. Test the door manually to ensure everything is working properly.
- If there is an operator, install the drive sprocket to the drive shaft and secure it. Also, if the operator mounts to the endplate, install it at this time. However, if the operator mounts to the jamb, install the drive chain at this time.
- Check and adjust the travel limits as needed. Then, set the close limit with only a few slats compressing at the bottom. Set the upper limit so that the bottom of the door clears the header, but not so high that the bottom bar hits the bell mouths.
- If there is a hood for covering the barrel, install it at this time.
- This concludes the tutorial on how to install a steel rolling door successfully.
Note: For instructions on removing an existing door, view our blog titled, “How to Remove a Steel Rolling Door.” However, if you need to replace the springs on your door, our blog titled, “How to Replace Steel Rolling Door Springs,” will provide you with additional support. If you want to learn how to repair garage doors, we offer in-house training seminars as well as smaller sessions at our warehouse.
This entry was filed under Technical Support. You can follow any responses to this entry through the RSS 2.0 feed.
