Posted October 20th, 2015 at 2:23 pm by Dan Musick
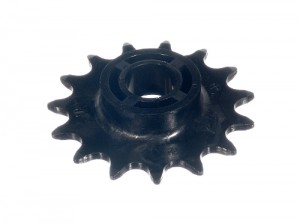
A customer recently wrote asking for instructions on limit sprocket replacement on their Raynor, Allister, or Allstar opener.
Here is the procedure.
- Unplug the power cord and disengage the door from the opener.
- Afterward, loosen the two nuts that secure the chain tension bolt to the trolley.
- Remove the chain from the trolley and the limit sprocket.
- Then, remove the old sprocket. On Allstar and Allister openers, if the limit dog causes the chain to bind, remove the chain dog. Mark the chain for ease of locating where to secure the dog when reassembling.
- Install the new sprocket. Note: The sprocket in the image above is upside down.
- Also, reinstall the chain on the limit sprocket.
- Reconnect the chain tension bolt and chain to the trolley.
- Tighten the bolt until the chain on the opposite side is about 3/8″ from the T-rail.
- Lock the two nuts to the trolley.
- Plug in the power.
- Connect the door to the trolley.
- If you removed the limit dog from the chain, then open or close the door to the halfway point and reinstall the limit dog.
- This concluded your limit sprocket replacement.
- Run the door to the fully closed and opened positions and adjust the travel as needed.
For more information, watch our YouTube video on “How Garage Door Openers Work.”
This entry was filed under Customer Input, Technical Support. You can follow any responses to this entry through the RSS 2.0 feed.


