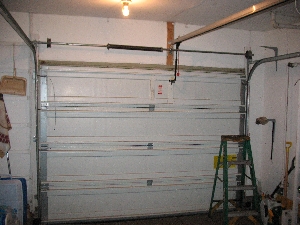
Wayne Dalton TorqueMaster Torsion Spring Conversion
The purpose of these instructions is to demonstrate how to convert from the original Torquemaster One torsion spring system to standard garage door torsion springs.


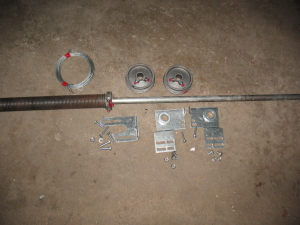 |
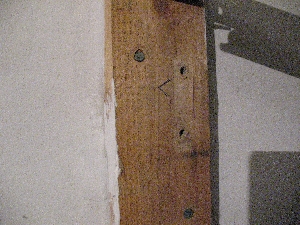
To begin, gather the parts you need to convert your system. You'll need the spring anchor bracket, bearing, end bearing plates, cable drums, and cables. You'll find all these parts in our torsion spring conversion kit. We have kits for both seven and eight-foot door heights, so be sure you order the correct ones. If your original cables are 3/32" please let us know, as these work better on some of the doors. You also need a shaft as long as the door is wide, plus at least six inches. Garage door shafts are hollow one inch outside diameter tubes usually made of 14 - 15 gauge steel. You can purchase these from home centers, steel supply stores, or from us. |
| Before installing the new springs, check the weight of the door. Disengage the opener. Place a properly reinforced analog scale under the door. Grab the tube with a pipe wrench. | 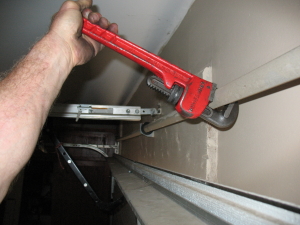 |
 |
Lift the pipe wrench handle 90 degrees or until the cables on the drums at each end are loose. | Shake the door and check the door weight. Single car doors normally weigh from 65-80 pounds, and double-wide garage doors typically weigh from 125 to 180 pounds depending on the model. To order springs provide the width, height, and weight of the door. If you have already purchased the parts, confirm that the springs will match your door weight. | 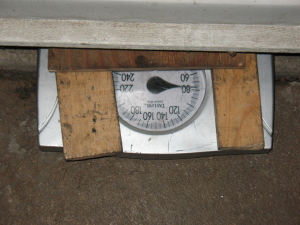 |
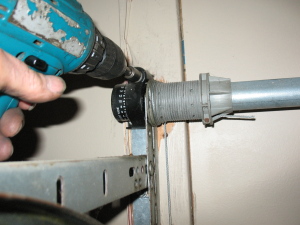 |
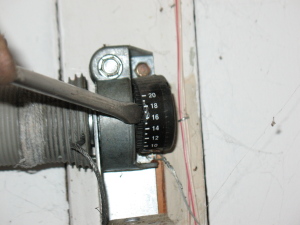
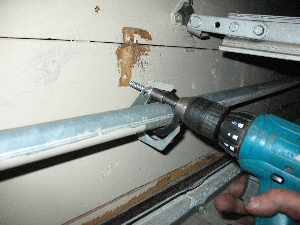
After weighing the door and confirming you have the correct replacement spring or springs, unwind the unbroken spring. Use a drill with a 7/16" nut driver. |
| Drill counterclockwise. As you drill, the counter wheel will rotate until it reaches zero. At this point, the cables should loosen from both drums. If not, the other spring may need to be unwound. | 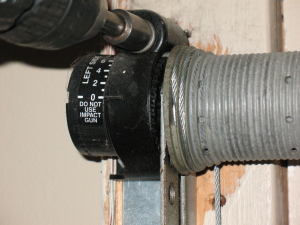 |
 |
Confirm that the cable is loose on the other end. | If it is not loose, unwind the spring as on the other side until both cables are loose. | 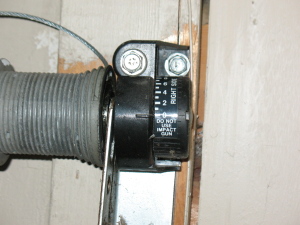 |
 |
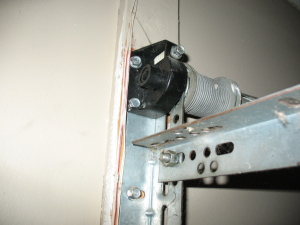
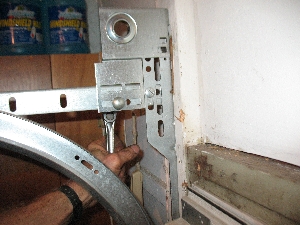
Inside the counter wheel is a counter gear. The center of this wheel is wedged inside the winding cone inside the winder. |
| Pry the counter gear and counter away from the end of the winder. | 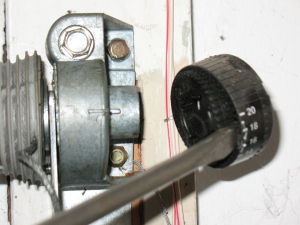 |
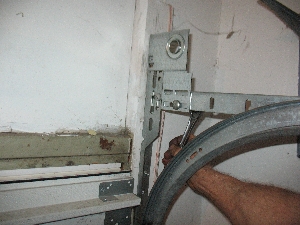
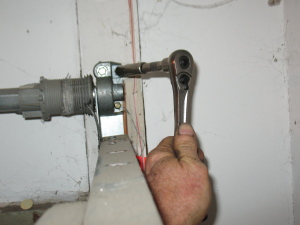 |
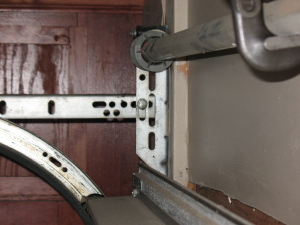
The winder is secured to the jamb with two lag screws and a third smaller sheet metal screw. Notice on this side that the top screw is just to the right of the winding gear bolt head. Remove the top screw. | Loosen and . . . | 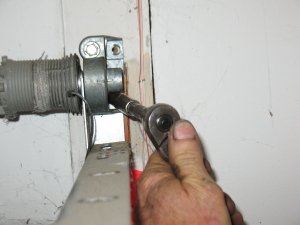 |
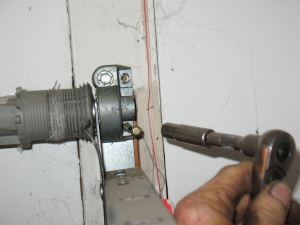 |
Remove the bottom screw. |
| Remove the third smaller sheet metal screw. Remove this with a #2 Phillips head screwdriver or bit. Many installers forget to install this screw, and you will not need to remove it. |  |
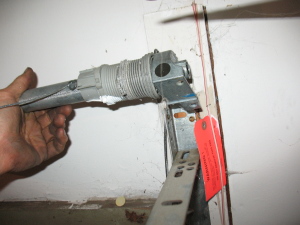 |
At this point, the winder and the end of the tube are free from the jamb and support angle. | Follow the same procedure on the opposite side. | 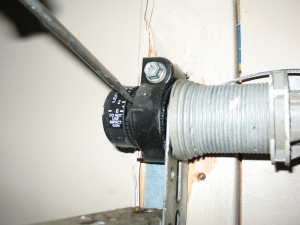 |
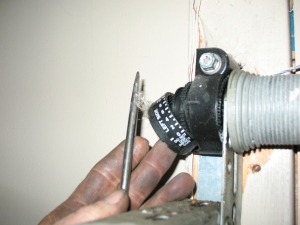 |
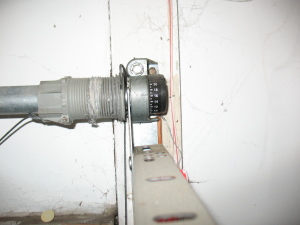
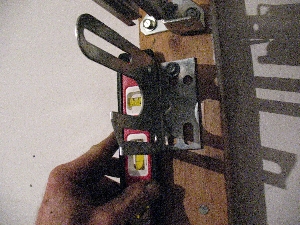
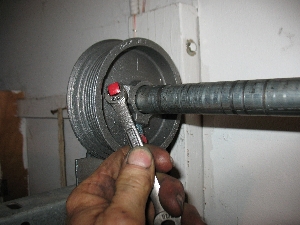
Remove the counter wheel and counter gear with a flat screwdriver. |
| Sometimes the counter wheel breaks, and you'll need to pry the counter gear off the drive gear housing. |  |
 |
The three screws are ready to remove. | Using a 7/16" nut driver or socket, remove the two support screws. |  |
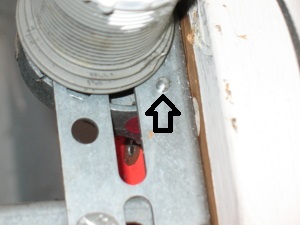 |
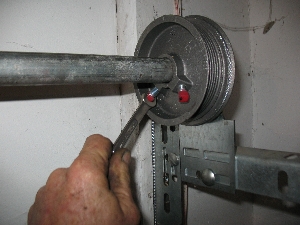
At the five o'clock position under the drum, notice the small sheet metal screw installed from the opposite side. |
| Remove this screw as you did from the other side. | 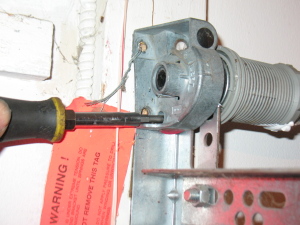 |
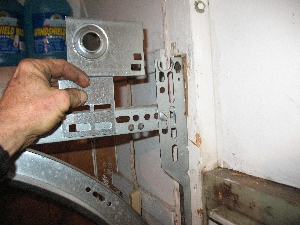
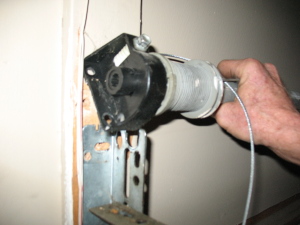 |
You should be able to lift the winder, cable drum, and the end of the tube at this point. | Remove the winder. Here you see the end of the Torquemaster winding cone. | 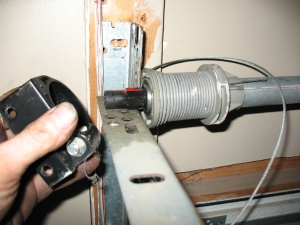 |
 |
Before removing the spring assembly you will need to replace the cables. If needed, raise the door enough to get to the bottom fixture pins and remove the cables. |
| To prevent the cable from coming off the bottom fixture, Milford pin, squeeze the bottom of each cable loop. |  |
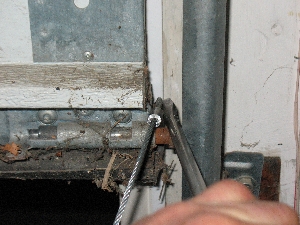 |
Fit the loop over the pin and pry as needed to position it completely over the pin. If the cable is not properly installed, it will come loose after installing and winding the springs. | At this point, you are ready to remove the center support. If the opener arm is in the way, remove it. | 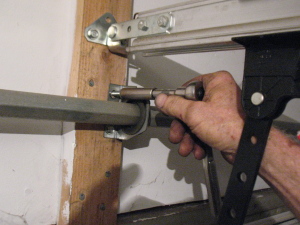 |
 |
Remove both support screws. |
| On a single-car door, you can let one end drop to the floor. Caution: As you tilt the shaft, the springs may slide down inside the tube, causing the higher end to jerk upward. |  |
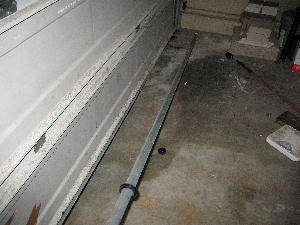 |
On a double car door, you will need to remove the opener arm and bring the tube to the floor. Remove the old tube to prevent an accident. |
| At this point, you will install the end bearing plates. | 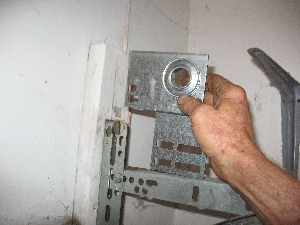 |
 |
Position the plate in place. Secure the bottom of the bracket with at least one 5/16" or 3/8" carriage bolt and nut. | Predrill with a 3/16" drill bit and screw the top of the end bearing plate to the jamb with a 5/16" X 1 5/8" lag screw. | 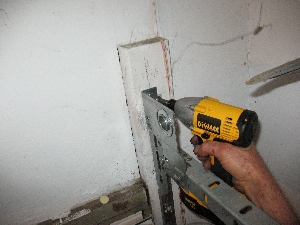 |
 |
Follow the same procedure on the other side. |
| Position the bracket in place and bolt the bottom to the jamb end of the horizontal angle. | 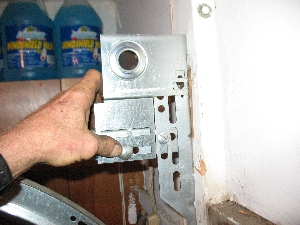 |
 |
Secure the bolt and nut. | Screw the top of the bracket to the jamb as you did on the other side. | 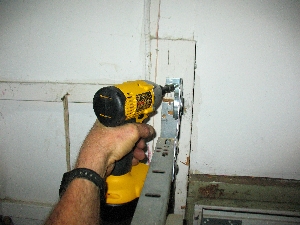 |
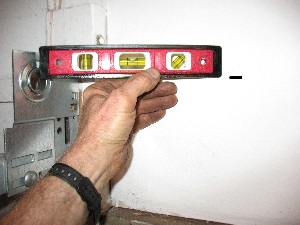 |
In order to level the torsion shaft, we need to center the center support bracket, so the shaft is the same distance in the center as it is on each end. To do this, use a level to mark a line even with the center of the end bearing. Measure from the top of the door to the mark. |
| Go to the center pad, measure, and mark the same distance. | 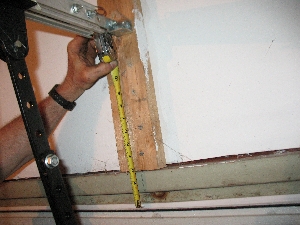 |
 |
You will use this mark to center the spring anchor bracket. | Position the mark in place. | 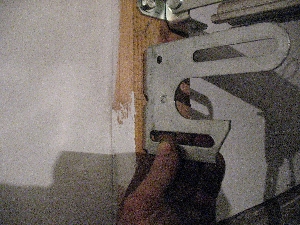 |
 |
Install a 5/16" X 1 5/8" lag screw in the top of the bracket and then plum the bracket. |
| Install the lower screw. On double-wide doors, it is usually better to secure the bottom of the bracket with two screws. | 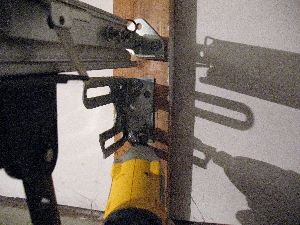 |
 |
Next, install the spring, center bearing, and drums on the shaft. Lift the assembly up and slide the ends of the shaft into the end bearings. Center the shaft. Check to see that the same amount of shaft sticks out each end bearing plate. | Bolt the stationary cone to the center support, as shown. If you have two springs bolt, the stationary cones back to back. You will need only one center bearing with a two spring system. When tightening the bolts, check to assure the race of the bearing is not catching on the spring anchor bracket. Otherwise, one of the stationary cones could break. | 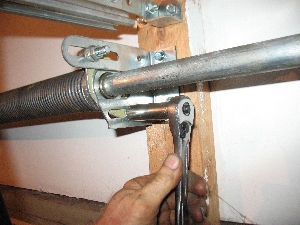 |
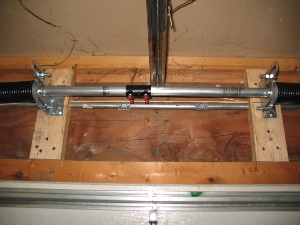 |
Often, when converting to standard torsion springs, a shaft for a nine-foot wide or a 16' wide door is not available. It is sometimes necessary to ship two shorter shafts and couple them in the middle. A second center support bracket is then needed for a two spring system. Here is how a coupler and two center supports would be mounted. |
| To install the drums, first finger-tighten both set screws until the tip of each set screw touches the tube. | 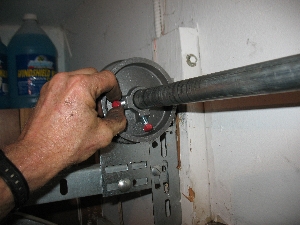 |
 |
Next, tighten each screw 3/4 turn. | Insert the cable into the drum and turn the shaft until the cable is tight on the drum. Vise grip the tube as shown to keep the cable tight on the one side. | 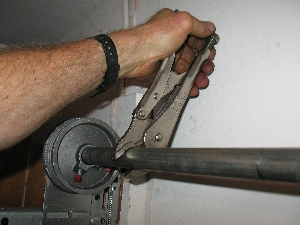 |
 |
On the other side, the procedure changes. First, make sure both drums are touching the end bearing. On this side, you will install the cable in the drum, and then turn the drum on the shaft until the cable is tight. Then, finger-tighten each screw until it touches the tube and then add 1/2 to 3/4 turns on each screw. |
| It is now time to wind the springs. On a seven-foot door, you will wind the spring 7.5 turns, and on an eight-foot high door wind each spring 8.5 turns. Caution: Winding torsion springs is dangerous. For safety, follow our Torsion Spring Replacement Instructions for winding the springs. You may also find helpful details in these instructions: How to Install a Single Torsion Spring Assembly, TorqueMaster Torsion Spring Replacement, and Double EZ-Set Torsion Spring Conversion. | 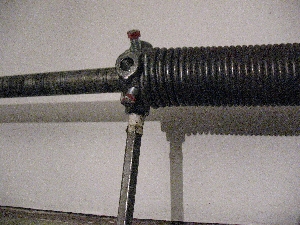 |