How to Replace Torsion Springs on a Self-Storage Roll-up Door
The following do-it-yourself instructions are for replacing a pair of torsion springs on a self-storage roll-up door. These doors are typically found at self-storage facilities, which are also called mini-warehouse doors.
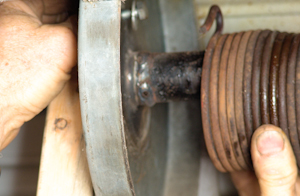
The torsion springs for self-storage roll-up doors secure to the end plate on one end and to a drum on the other. The springs balance the door, making it easy to roll the door up around itself on the drums.
While this tutorial shows how to replace both springs on a two-spring self-storage roll-up door with standard mini-warehouse loops on both ends of the springs, these instructions may be helpful for those with different spring ends or with a different number of springs on their door.
Remember that replacing torsion springs is extremely dangerous as wound springs are under extreme tension. Improper removal or installation of springs can endanger property and life.


1. Before you begin, you will need to gather all of your tools together. You will need: 1 vise grip, 2 pipe wrenches, a set of sockets, needle-nose pliers, an impact wrench, a saw, a step ladder, a 2X4 board, another board about 2X7, and your new spring or pair of springs.

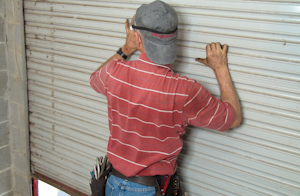
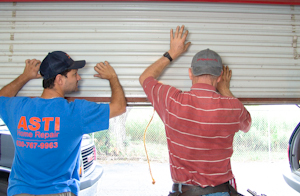
2. First you will need to open your garage door in order to get inside. You should have someone assist you in opening the door and entering underneath it. While one person raises the curtain, the second person needs to help roll the curtain around the drums. You will then want to raise the door to a comfortable height so that you can pass under it.
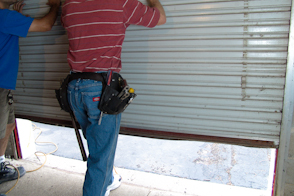
3. Once you have raised the door high enough to go in and out, vise grip the track just under the bottom of the curtain. Let the curtain rest on the vise grip.
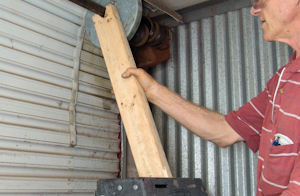
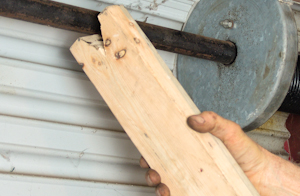
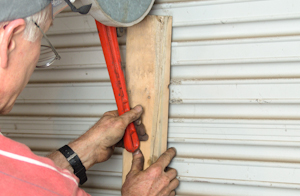
4. Bring your ladder and 2X4 into the self-storage unit. Measure the length of the board that you will need in order support the center of the shaft with the top of the ladder and the board.
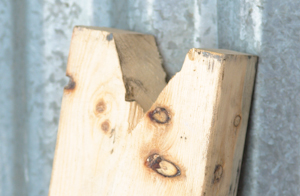
5. Cut the end of your 2X4 a couple of inches longer than the distance from the floor to the center of the shaft. Cut a V-shape into the end of the board as pictured.
6. Once you have cut your board, bring your tools and boards into the self-storage unit. You will need to have everything inside the unit that you will need to change your springs so that you will not have to open the door again until your springs are replaced. Carefully lower your curtain door to the floor.
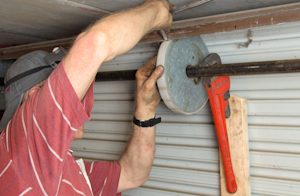
7. Having a wound spring pulls up on the curtain. To release the tension from the curtain, wind up on the shaft with a pipe wrench about 1/8 of a turn. Place a piece of wood between the bottom of the pipe wrench and the curtain so that you do not damage your door.
8. Once the tension no longer pulls on the curtain, remove the screws that secure the curtain to each of the circular drums. Caution: Never remove the screws without first removing the tension!
9. Look for additional screws on each drum and remove them. The curtain should be loose and free from the drums when you are done.
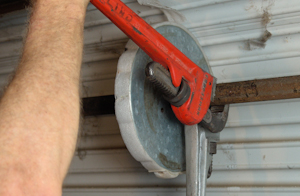
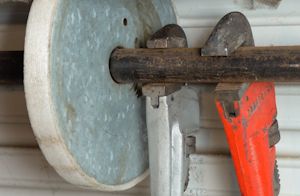
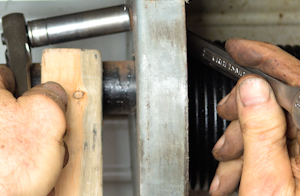
10. You are now ready to unwind your unbroken spring. In order to determine how many turns you need to put on your new springs, draw a line across the unbroken spring with chalk, paint or whiteout. You will need to use both pipe wrenches to unwind your spring. With the one pipe wrench in place that is not gripping the shaft (the silver one, in this case), raise the other pipe wrench (orange) and grab the shaft with the first pipe wrench. Lower the orange pipe wrench to start unwinding your spring.
11. Your door should now look like this. Gripping the shaft with the silver pipe wrench, loosen the orange pipe wrench and grab the shaft with it as before. Loosen the silver pipe wrench and pull down on the orange pipe wrench to loosen the spring more. Continue this process until the spring is loose and is not transferring its torque along the shaft to the pipe wrenches.
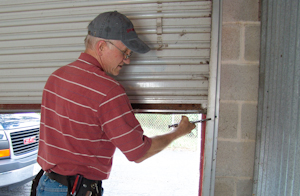
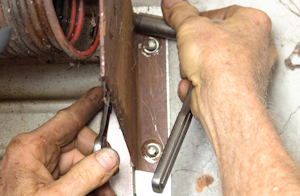
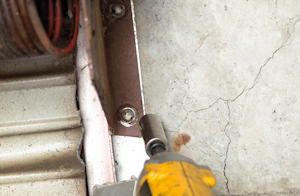
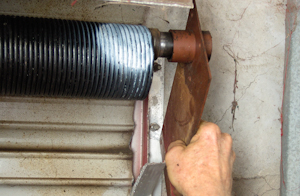
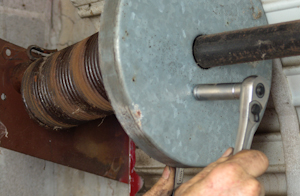
12. Once your spring is unwound, move to the right side of your self-storage roll-up door. Remove the bolt that secures the spring to the end bracket.
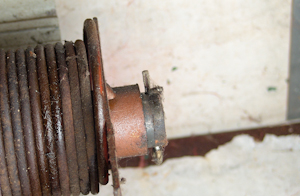
13. Remove the bolt that secures the spring to the drum of the door.
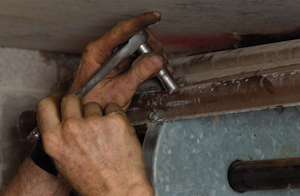
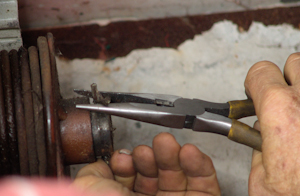
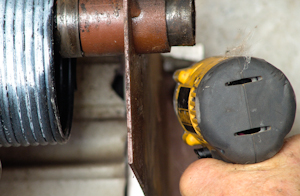
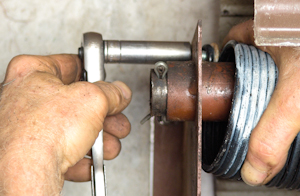
14. Remove the cotter pin on the end of the shaft.
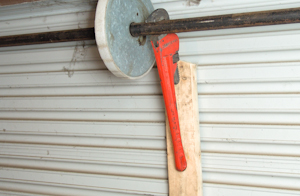
15. Support the shaft with your ladder, inserting your trimmed 2X4 between the ladder as pictured. The board needs to be pitched toward the outside of the door as pictured so that the shaft assembly will not fall inside the self-storage unit.
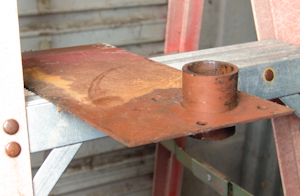
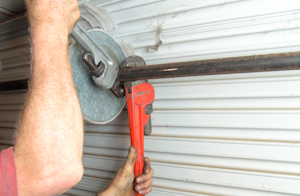
16. Remove the bolt that secures the end plate to the angle along the side of the door.
17. Remove the two screws that secure the end plate to the steel jamb.
18. Remove the end plate from the shaft assembly.
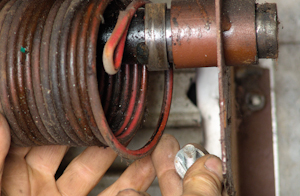
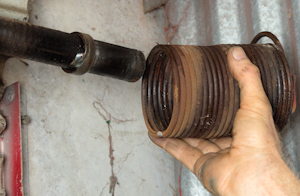
19. Remove your old spring from the shaft.
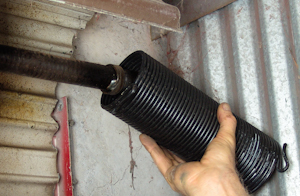
20. Slide your new spring on the shaft. Note the direction of the spring ends in this picture. This is a right wind spring, which goes on the right side of your self-storage roll-up door. Installing the wrong wind will not allow your door to operate.
21. Slide the end plate onto the shaft.
22. Line up the screw holes from before and install the screws, mounting the end plate to the steel jamb.
23. Slide the cotter pin into the slot at the end of the shaft. Once it is through the shaft, bend the ends of the pin to keep it from falling out.

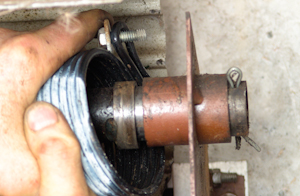
24. Secure the spring to the drum, making sure that you have a washer between the head of the bolt and the spring end loop. In order to count the number of turns you put on the spring, draw another line across your spring as before.
25. Pull the other end of the spring toward the end plate, securing the spring to the plate with the bolt.
26. Remove your 2X4 from the shaft as it no longer needs to support the weight.
27. Repeat the process on the other side. Remove the bolts that secure the spring. Support the shaft with your board. Remove your end plate and your old spring.
28. Install your new spring, drawing a line across the length of it, and reinstall your end plate. Secure your spring to the drum, and secure your spring to the end plate.
29. You are now ready to wind your new torsion springs. Count the number of times the stripe on your old spring went around after you unwound it. This is the number of turns you need to wind the springs by lifting up on the shaft with your pipe wrenches in a similar manner to how you unwound your spring before. With your first pipe wrench, grip the shaft. Put your second pipe wrench in place. Raise your second pipe wrench to start winding the springs. Grip the shaft with the second pipe wrench, release the first, and grab the shaft again with the first pipe wrench. Continue until the number of stripes on your new springs matches the number of stripes on your old spring.
30. Once your spring is wound, rest a pipe wrench that is still gripping the shaft against the curtain door.
31. Secure the curtain to the drums with the screws used before.

32. Remove the pipe wrench and test your self-storage door. The curtain should stay on the floor when closed and stay open fairly well when open. If this is not the case, remove the curtain from the drums and add more turns to the springs if the door won't stay open. If the door won't stay closed, remove tension from the spring.