CAUTION! Safety First! Replacing garage door torsion springs is dangerous because the springs are under tension. If you do not use the right tools and follow safe procedures, you could lose hands, limbs or even your life. You could also damage property. Although the Safe-T-Winder™ makes this job easier and safer, replacing springs is still dangerous.
Follow the standard safety procedures. Turn off power. Get a safe ladder. Stay out from under the door. Wear safety glasses.
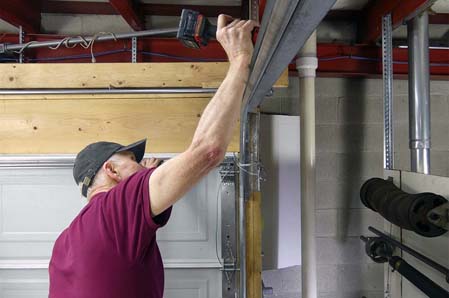
Inspect full lengths of both cables, especially the bottoms where rust often disguises the fray. Installing new springs will often break the cables creating a dangerous situation.
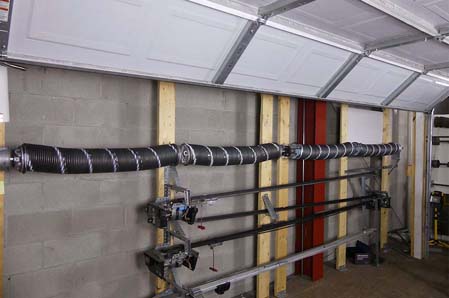
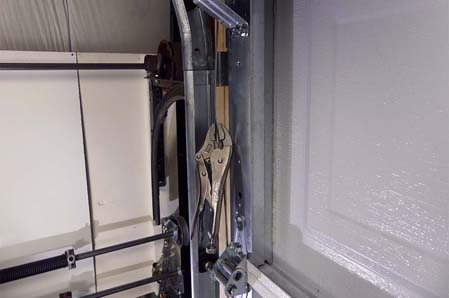
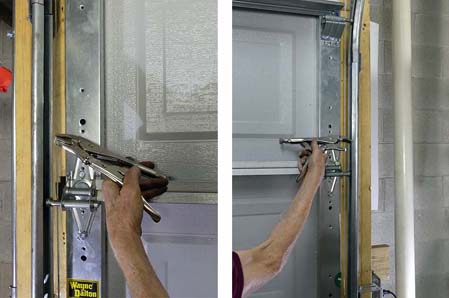
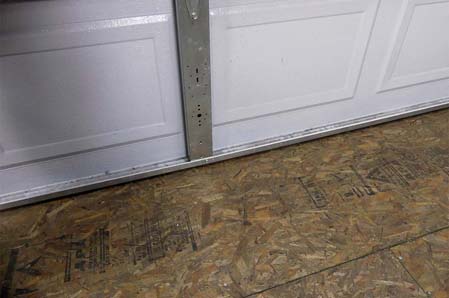
Vise grip both tracks about three inches above a roller on each side.
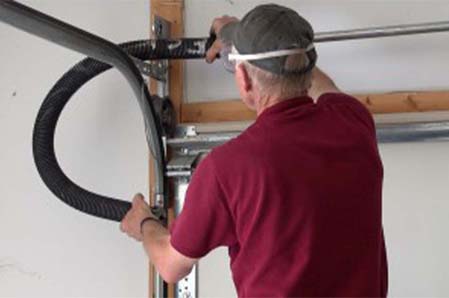
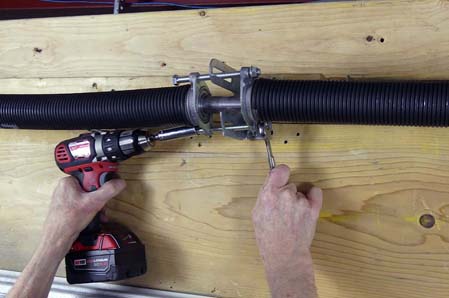
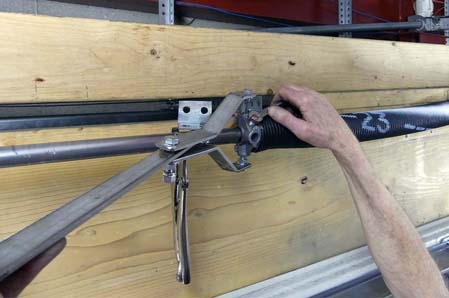
When installing the winder turn it so the winder is closer to the end bearing.
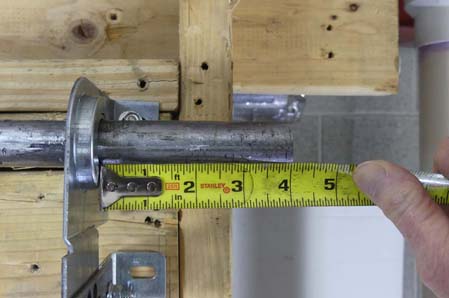
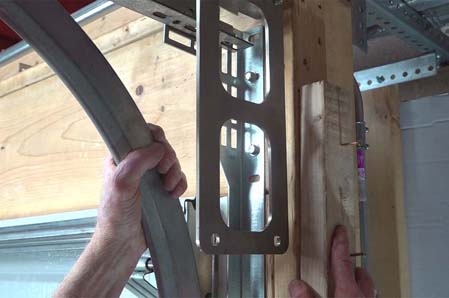
Allow 1/4 inch between the winder and the end bearing.
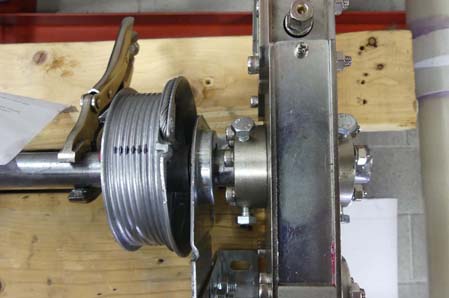
When installing the winder ensure the winder coupler overlaps the end of the shaft at least two inches. Measure and mark if you are not sure.
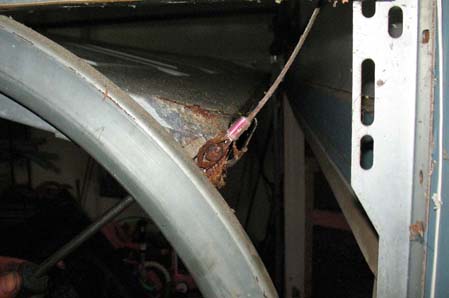
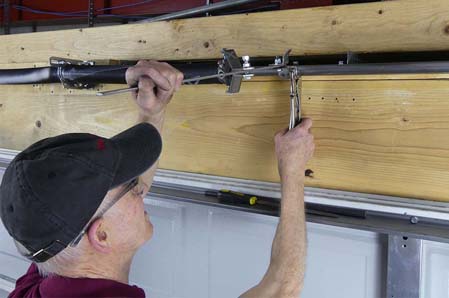
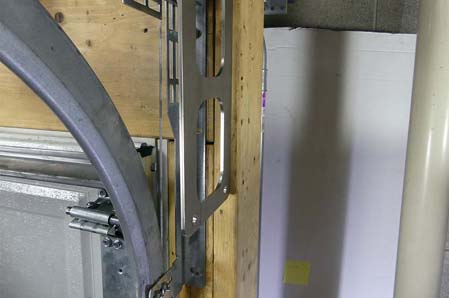
Be sure the bottom of the winder has at least an inch of jamb beyond the bracket. If you are raising a door, turn the winder upside down and ensure the top is supported with at least an inch of wood beyond the winder bracket.
If you don't have at least an inch of overlap, add a support angle or additional wood to prevent the torque from the springs spinning the winder and causing injury or death.
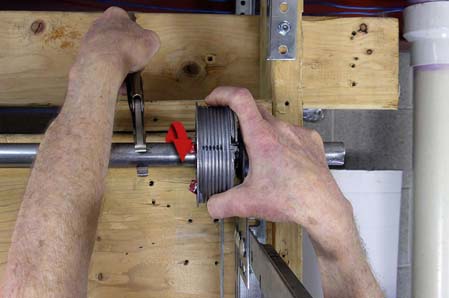
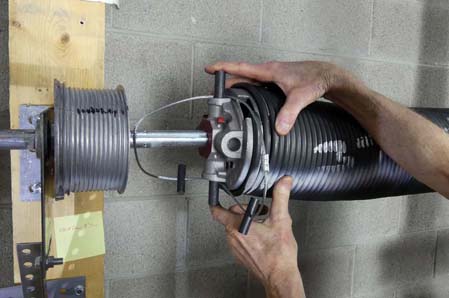
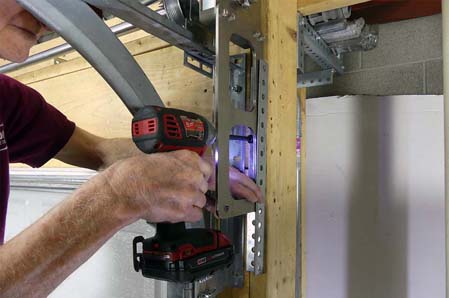
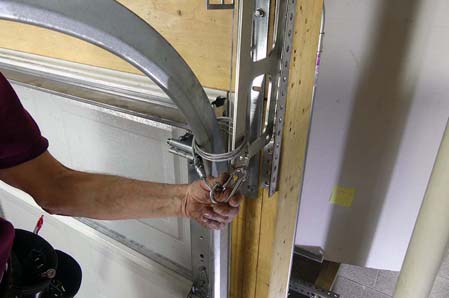
Secure the bottom of the winder with cable loops or chokers.
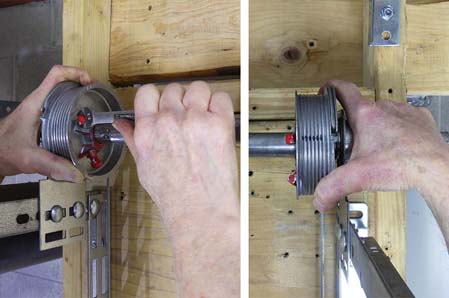
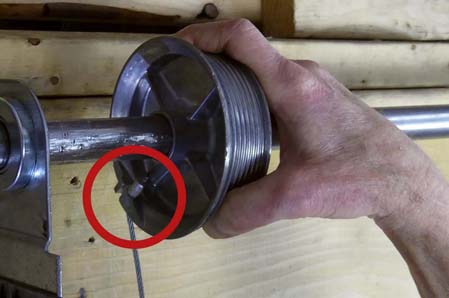
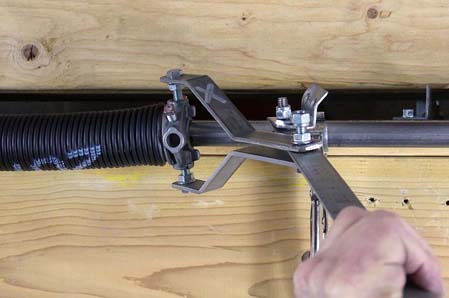
Tighten the set screws at least 1/4 turn after finger-tightening. This is when the set screw first hits the shaft. On 14 ga and 15 ga hollow shafts turn the set screws an additional quarter turn.
On doors with solid shafts align the keyways and install the 1/4" keys before tightening the set screws.
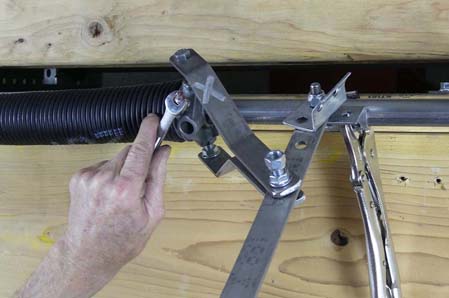
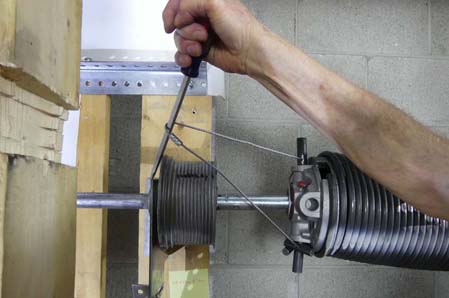
Stretch the springs enough to avoid damaging the springs, cones, shaft and possibly the winder.
CAUTION: if you over tighten the set screws you may not be able to remove the winder after tensioning the springs. Hitting the winder with a hammer will probably damage it.
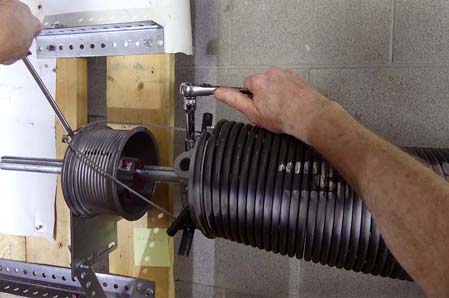
When winding the springs keep your head out of the operational plane of the winder in case the winder flies up and hits you.
Keep your head below the top of the door. If the spring tension is too strong, this will prevent the door from rising and hitting you in the head.
We also recommend 24" of socket extensions. This will protect you if the winder should spin.
Before removing the winder test to assure the springs are not too strong nor overwound. Reverse winder direction and turn 1/4 turn. This will transfer the torque from the winder to the torsion assembly: door, cables, drums, shaft, springs, spring anchor bracket, header. The bottom of the winder should be loose.
If the bottom of the winder is lodged against the jamb, unwind a turn of tension from the springs and test again. If the winder is still not free to be removed, unwind an additional turn of tension from the springs and test again. Repeat this process until the winder is free to remove. DO NOT REMOVE THE WINDER UNTIL YOU ARE CERTAIN THE DOOR WILL STAY CLOSED AFTER YOU REMOVE THE WINDER.
When it comes to installing the winder, safety is our number one priority. In addition to these written instructions please read, watch and carefully follow our instructions on this page and on our YouTube channel linked above. This is especially important when winding springs on doors that weigh closer to 1,500 pounds. If you are uncertain of the door weight, please call us at 800-383-9548 to discuss your application. We can also provide a number for texting images, or you can email your images to mail@ddmgaragedoors.com.
Please note. The installer assumes full responsibility for safely installing the winder.
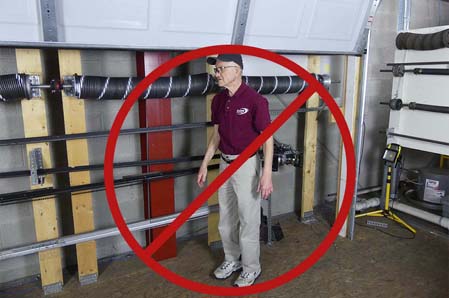
2.3. Stay out from under the door if you are using the winder to raise a door with a broken spring.
2.4. Inspect full lengths of both cables, especially the bottoms where rust often disguises the fray. Installing new springs will often break the cables, creating a dangerous situation.
2.5. Vise grip both tracks about 3" above a roller on each side.
2.6. Install the springs if needed.
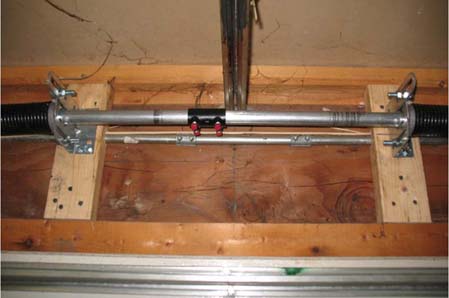
2.7. Your door may have a continuous hollow shaft without a coupler and smaller springs with inside diameters up to 3 3/4 inches. If so, secure the stationary cones to the center support spring anchor bracket. On heavier doors there may be three or four of these.
2.8. If you have a split hollow shaft with a fixed coupler, secure the stationary cones of the two springs to the two spring anchor brackets. There could be up to four springs and two additional brackets.
2.9. You may have a split solid shaft with an adjustable coupler. These are usually on springs with inside diameters from 2 5/8 to 6 inches. Secure the stationary cones of the two springs to the spring anchor brackets. There could be four or more springs and additional brackets. Adjust and bolt the two halves of the coupler together with the keyways and three slots aligned on both sides. Secure both sides of the coupler to the shafts. Add lock nuts to secure the keys.
2.10. There could be four or more springs and additional brackets.
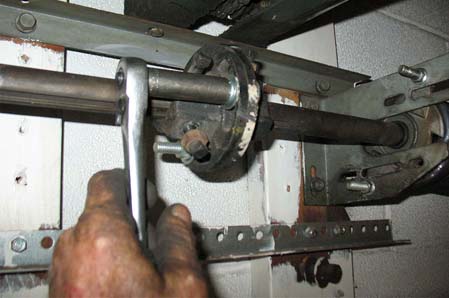
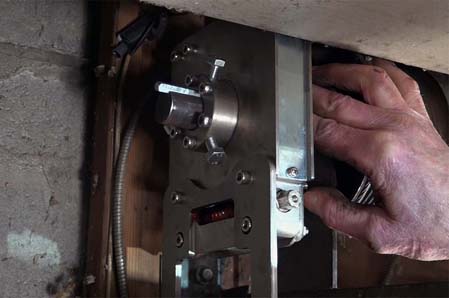
2.11. The end of the shaft on which you install the winder needs to extend at least three inches beyond the end bearing. If needed, slide the shaft. Be careful to leave at least an inch on the other end of the shaft.
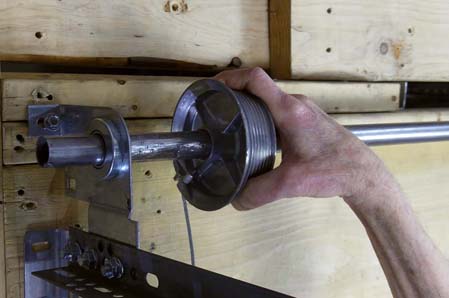
2.12. The next step is to install and adjust the drums to prevent the shaft from sliding horizontally. Securing both drums will prevent one or both of the springs from losing some of their stretch. Should this occur, the springs could bind and prevent the springs from winding completely. This could also cause the shaft to move the winder away from the end bearing and possibly cause the winder bottom bracket to slide off the secure surface and spin dangerously. Securing the drums at this point will also make installing the cables easier after the springs are wound.
2.13. Begin on the side where you will install the winder.
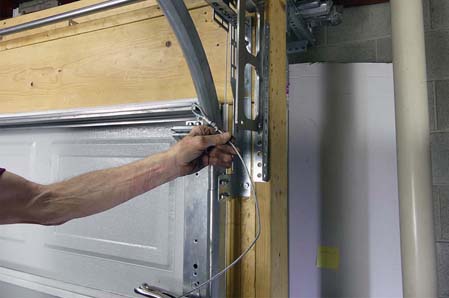
2.14. First, install the cable in the drum. Make sure the cable is properly installed inside the cable drum.
2.15. If you have a hollow shaft, press the drum against the end bearing and tighten the set screws 1/4 to 1/2 turn after the setscrew touches the shaft.
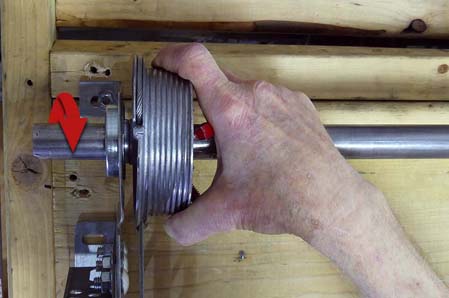
2.16. Install the cable and turn the drum and shaft until the cable is tight. Vise grip the shaft tightly to keep the cable tight.
2.17. If you have a solid keyed shaft, insert the key and tighten both set screws.
2.18. Next, wrap the cables around the drum and vise-grip the shaft to keep the cable tight.
2.19. Go to the other side. On a keyed shaft, install the cable and turn the drum to tighten the cable. The keyways should align. Insert the key, and tighten the setscrews.
2.20. On hollow shafts install the end of the cable in the drum.
2.21. Turn the drum to tighten the cable and slide the drum until it is tight against the race of the end bearing. Push the shaft toward the other end to confirm the shaft won't slide horizontally after you secure the drum.
2.22. Tighten both set screws. Both cables should now be tight.
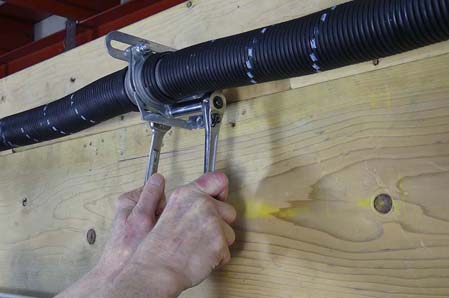
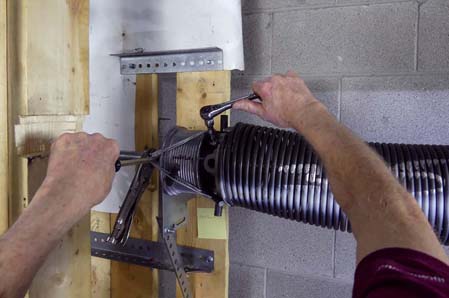
3.1. It's important at this point to stretch the springs enough to avoid damaging the springs, cones, shaft and possibly the winder.
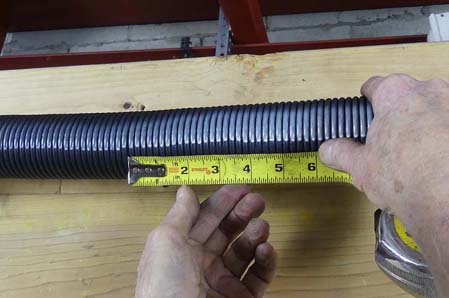
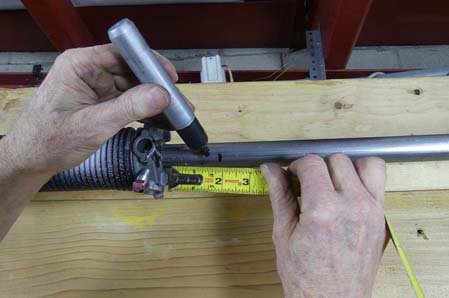
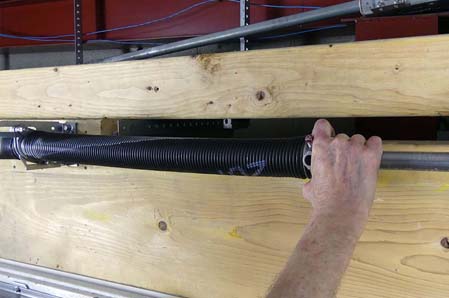
3.2. First, determine the stretch needed. You will be stretching each spring the distance of one coil for every turn of spring tension, and then adding a coil. For example, if you are winding the springs 7 1/2 turns, measure the width of 7.5 coils and add one coil to the dimension. If you have .250 wire, as an example, (7.5 coils)x(.250)=1.875. Add 1/4 inch and the total stretch should be 2 1/8 inches. Measure for stretch.
3.3. Mark this distance from the end of each cone.
3.4. Please note. If you’re winding partial turns, add these before stretching the springs. For example, if a spring is wound 7 1/2 turns, add the half turn before stretching the spring.
3.5. There are several ways to stretch the springs. For smaller spring wire it may be possible to stretch the springs by hand.
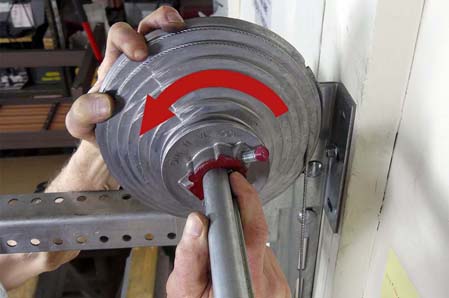
3.6. Another option is inserting a bar in the winding cone, pulling the bar toward the center of the door, and tapping the bar with a hammer.
3.7. A third way is to pull on the bar with a comealong.
3.8. You can also use 3/8 threaded rod or long bolts to pull the stationary cones after securing the winding cone set screws.
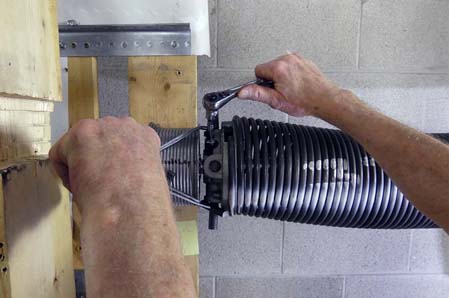
3.9. DDM has developed two unique tools for stretching springs. One is adjustable to fit any inside diameter of spring. Insert the 3/8 bolts into the winding cone, pitch the stretching arm toward the winding cone. Vise grip one of the two inch pieces of angle to the shaft.
3.10. Pull the arm to stretch the spring.
3.11. After stretching the spring, secure the set screws.
3.12. If you have a two spring system, repeat this process on the other side of the door.
3.13. The second tool DDM has developed is the cable loop stretcher. It's especially helpful when there is not enough room on the shaft for a spring winder or our other stretcher.
3.14. Insert the short bars into the cone. For the conse on 6" springs use 5/8" bars.
3.15. Insert a long screw driver, winding bar or piece of angle through the loop and lodge the end against a spring bracket, drum or vise grip to provide a pulling point. If the cone binds, lubricate the shaft in the path of the cone.
3.16. Pull on the cable with the screwdriver to stretch the spring. If you can't get enough stretch, tighten a set screw and repeat the process.
3.17. Continue pulling the cable in increments. When the cone reaches the mark tighten the setscrews.
3.18. With our cable loop puller we were able to stretch the 6" - .375 wire spring to within a quarter inch of the drum.
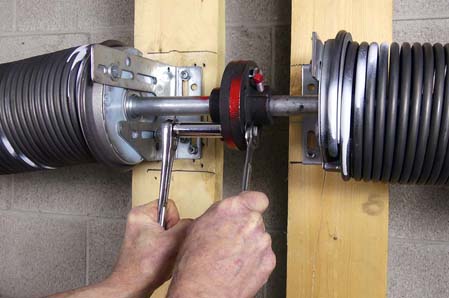
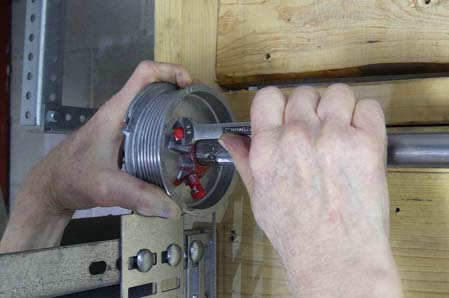
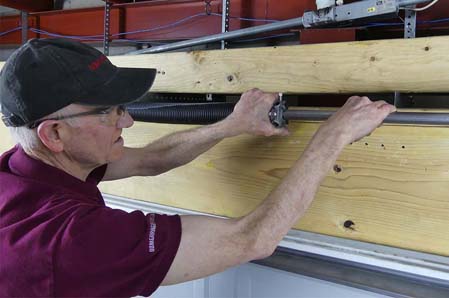
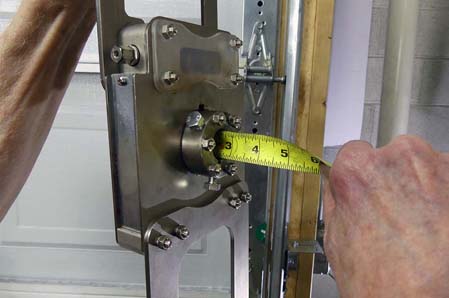
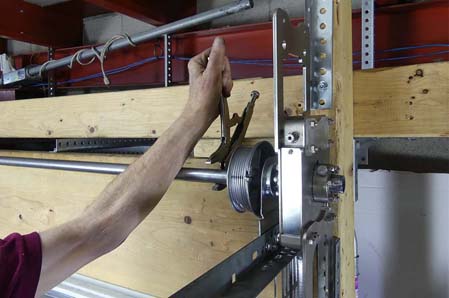
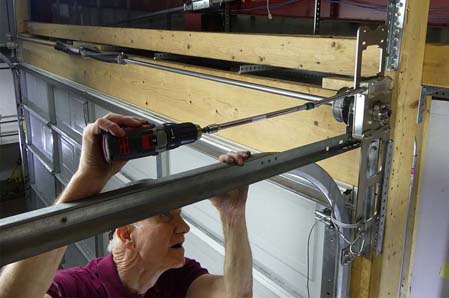
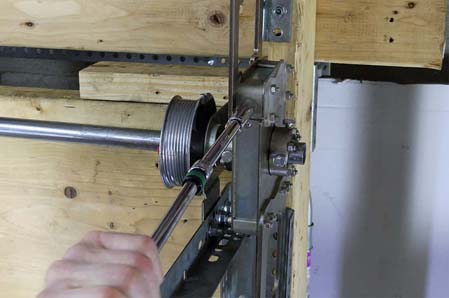
4.1. Before installing the winder measure to assure the coupler will overlap the end of the shaft by at least two inches. Except on larger doors three set screws are adequate to secure the coupler to the end of the shaft.
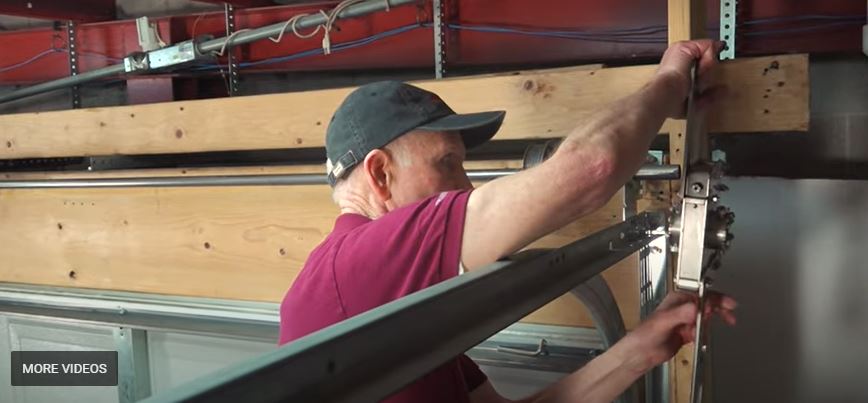
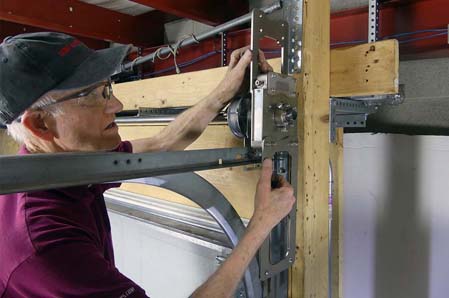
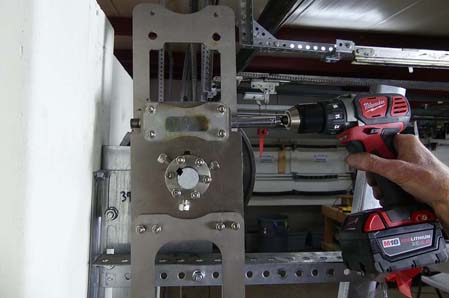
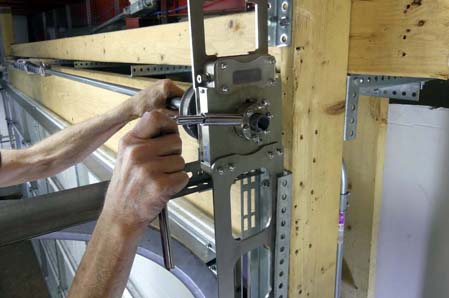
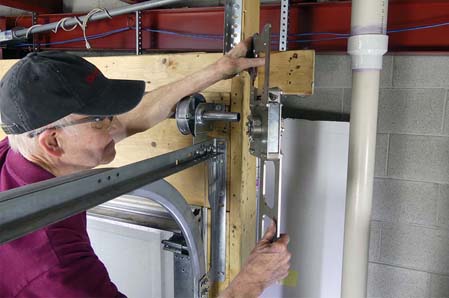
4.2. Now that your torsion spring assembly is in place, you can install the Safe-T-Winder™ and tension the springs.
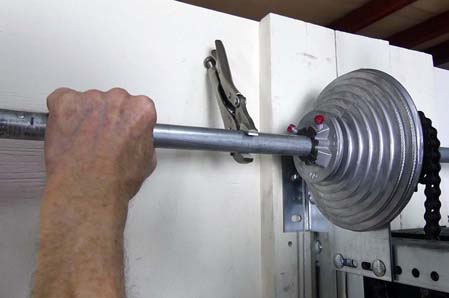
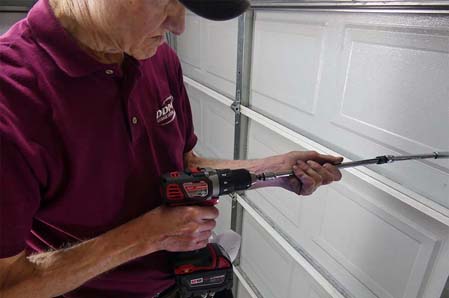
4.3. Slide the winder onto the shaft with the flat part of the winder away from the end bearing.
4.4. Slide the winder so the coupler is ¼-inch from the end bearings. Measure and mark if you are not sure.
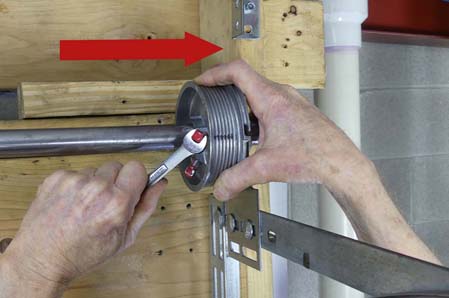
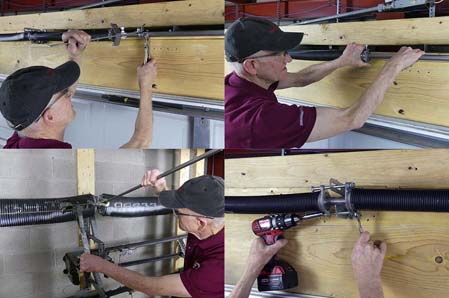
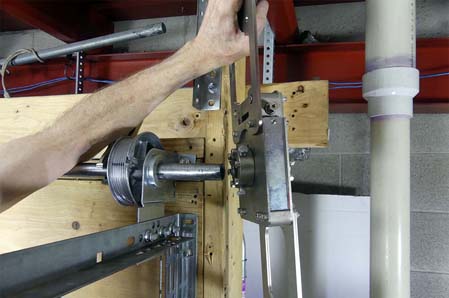
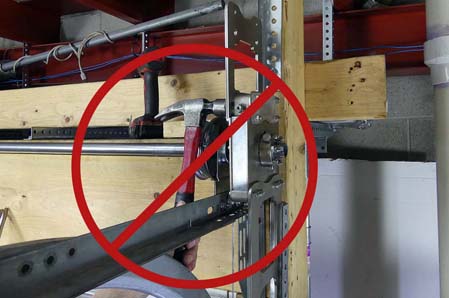
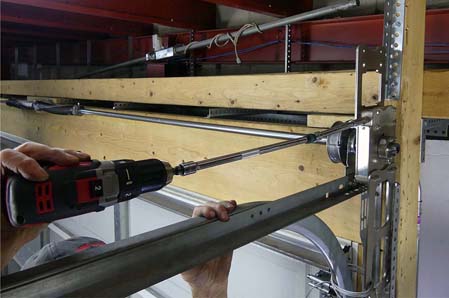
4.5. CAUTION! This is the most dangerous point in the installation! Check to make sure the bottom bracket of the winder is secure with strong jambs and with at least an inch of jamb beyond the bracket. This could prevent the torque from the springs spinning the winder and and causing injury or death.
4.6. If not, add angle to secure the bottom bracket.
4.7. Or, add another length of 2X4 to handle the torque from the winder.
4.8. In addition to this, secure the bottom of the winder with cable loops or chokers.
4.9. Also, check to assure the jamb above the top of the winder is secure and that the bracket has at least an inch beyond it. This might also prevent the winder from spinning dangerously.
4.10. If you are raising a door, turn the winder upside down and secure the top bracket as you would the bottom bracket in the instructions above.
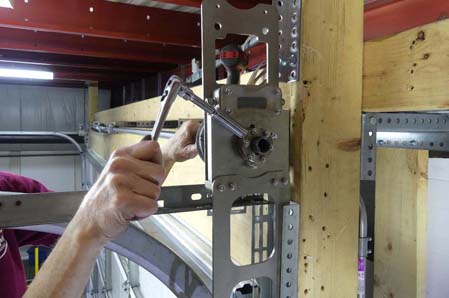
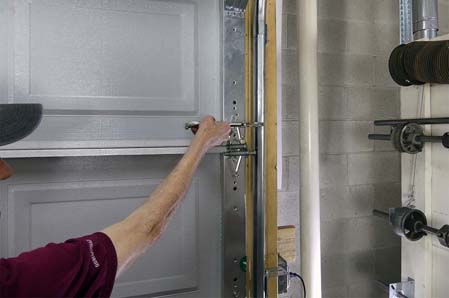
4.11. On doors with solid shafts align the keyways and install the 1/4 key.
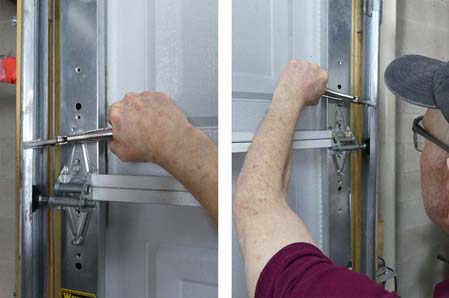
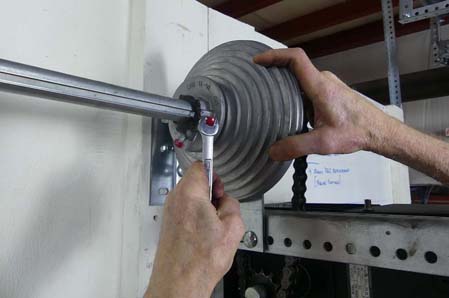
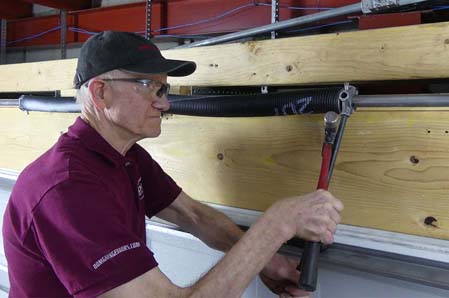
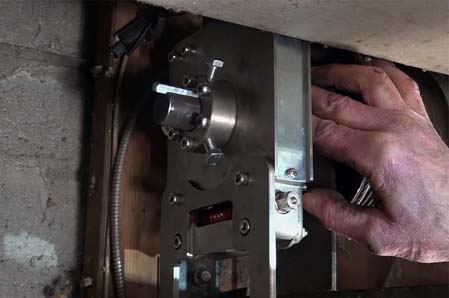
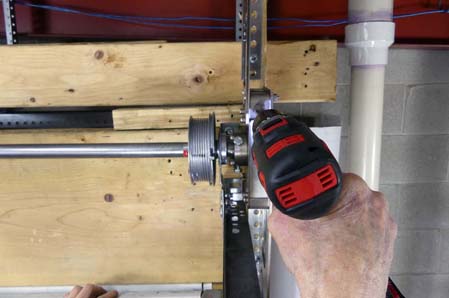
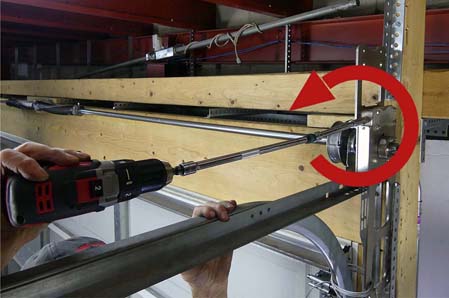
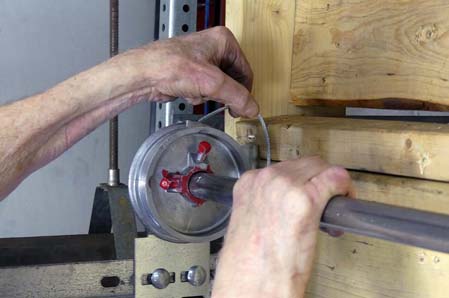
4.12. Tighten at least three of the setscrews. In order to access all of the set screws, you may need to turn the winder screw. Tighten the set screws at least 1/4 turn after finger-tightening, when the setscrew first hits the shaft. On 14 ga and 15 ga hollow shafts turn the set screws an additional quarter turn. On heavier doors tighten all six set screws.
4.13. Caution: If you over tighten the setscrews you may not be able to remove the winder after tensioning the springs. Hitting the winder with a hammer will probably damage it.
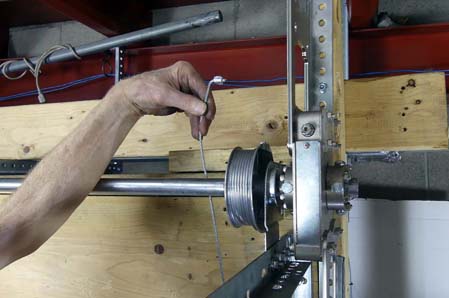
4.14. Mark the drums or shaft so you will know when to stop winding the spring and when you can reinstall your cables.
4.15. Once you have secured the winder, remove the vise grip on the shaft.
4.16. Unwind the shaft by one quarter turn. Usually the mark and the slot for the cable will be on top of the drum.
4.17. Remove the cables at both ends. This will allow you to wind the springs without interference from the cables and drums.
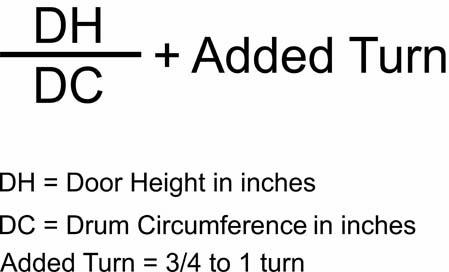
5.1. For most standard lift track systems the standard formula for winding the springs is Door Height in inches divided by the drum circumference and then add 3/4 to one turn. For all other drums you can download Service Spring's free Solutions app.
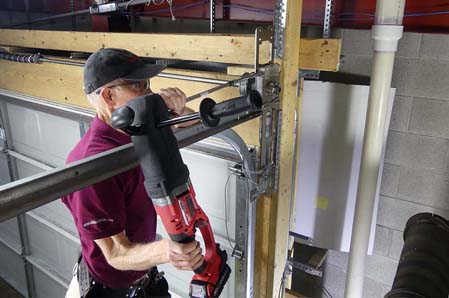
5.2. Before winding the springs, position yourself so you can keep your head out of the operational plane of the winder. This will prevent the winder from possibly flying up and hitting you.
5.3. Also, position yourself so that you can keep your head below the top of the door. Many injuries have occurred over the decades from too much spring tension raising the door and hitting someone or knocking them off the ladder.
5.4. For safety we also recommend 24 inches of socket extensions in the event the winder should spin loose.
5.5. If all three set screws have not all been tightened, use the winder to turn the shaft and winder hub just part of a turn. Then you can reach and tighten the other set screws.
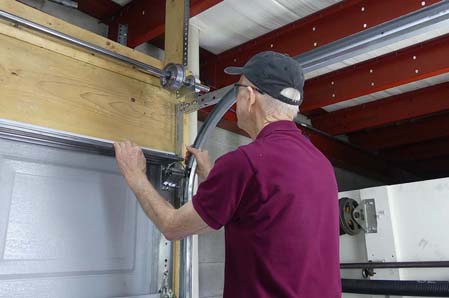
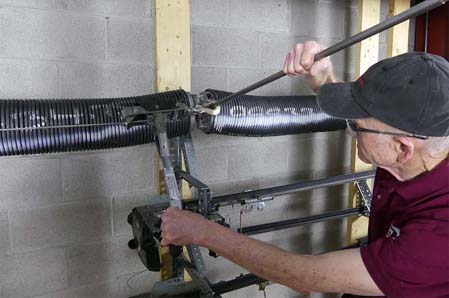
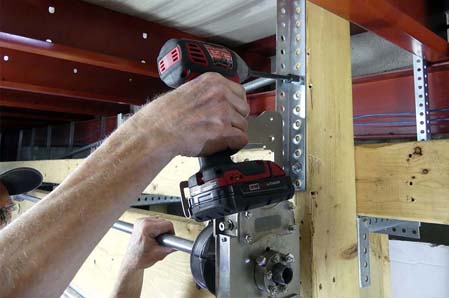
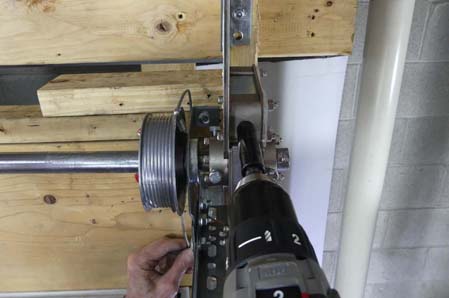
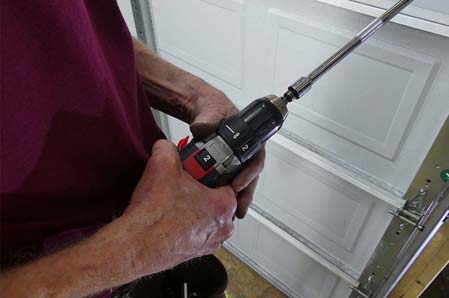
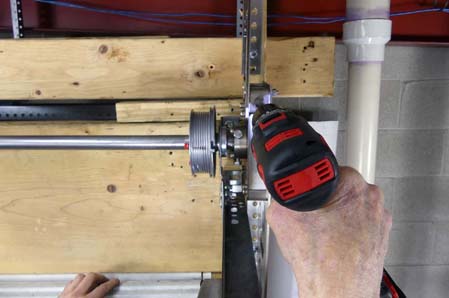
5.6. You will be winding the springs with a drill. Do not use an impact wrench; they usually overheat before turning long enough to wind the springs.
5.7. To wind the springs set the drill to counterclockwise, check the mark made earlier on the drum, and pull the trigger. The shaft will begin to turn. Check the winding cones to see if they are turning the same direction as when you wind the springs with winding bars. Count the number of times the mark on the drum or shaft comes around to the front facing you.
5.8. Depending on the strength of your drill, and the number of turns on the springs, the drill may start to slip. If this happens, increase the torque on your drill.
5.9. Depending on the torque of the springs you may need to use a more powerful drill.
5.10. Another option, if your drill is not strong enough and if you have a coupled shaft, is that you can separate the coupler halves and wind the spring on each side separately. Although the winder is rated to work for doors that weigh 750 pounds, the winder will work on heavier doors if you allow an extra 20 minutes or more for the winder to cool. CAUTION! Failure to maintain normal operating temperatures can wear down the gears and eventually compromise the safety of the winder.
5.11. Stop winding the springs 1/4 turn before the springs are fully wound. At this point the mark you made earlier on the drum and the slot for inserting the cable should be toward the top of the drum.
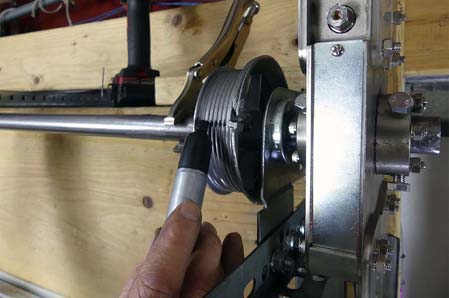
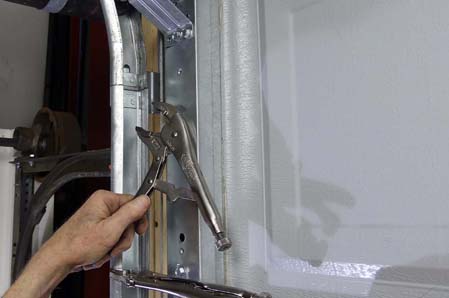
5.12. Reinstall the cables on both drums.
5.13. Hang a vise grip on the far cable.
5.14. While guiding the cable onto the other drum next to the winder, turn the winder clockwise 1/4 turn to tighten both cables.
5.15. Remove the far vise grip from the cable. Confirm that the two vise grips are still on the tracks 3" above a roller on each side.
5.16. Confirm that the two vise grips are still on the tracks 3" above a roller on each side.
5.17. Turn the winder slightly to transfer all of the torque from the winder to the torsion assembly.
5.18. Before removing the winder test the spring tension. The bottom of the winder should pull away from the jamb and it should be loose enough to move it forward and backward within the cable restraint.
5.19. CAUTION! If the springs are overwound, or if they are too strong, the bottom of the winder bracket will pull away from the jamb and be constrained by the bottom cable restraint or the top bracket of the winder. If this happens, keep the safety cables attached, unwind a turn of tension from the springs, and test again. If the winder is still not free to pull away from the jamb, unwind an additional turn of tension from the springs and test again. Repeat this process until the winder is free to remove. DO NOT REMOVE THE WINDER UNTIL YOU ARE CERTAIN THE DOOR WILL STAY CLOSED WHEN YOU REMOVE THE WINDER.
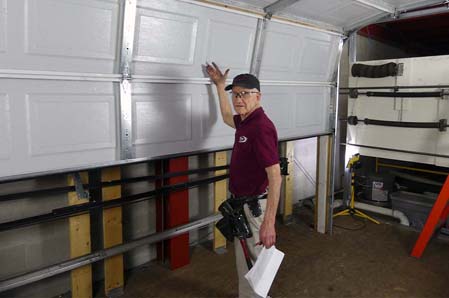
7. Test the Door Balance and Make Final Adjustments.
7.1. At this point there should be a vise grip on each side secured to the vertical tracks three inches above a roller. Confirm that there is a gap above each roller and that the door stays on the floor without having to restrain it.
7.2. Remove the vise grips on both sides.
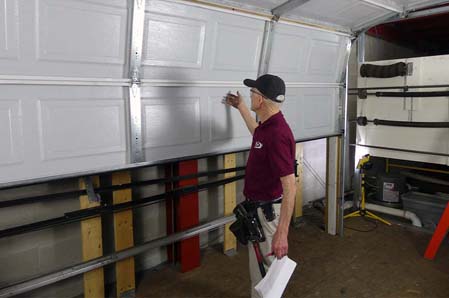
7.3. Test the door balance. CAUTION! Stay out from under the door when opening and closing it. The door should stay when open half way, and it should stay up when open.
7.4. The door should stay down when closed.
7.5. Check the level of the door at the floor. When adjusting drums, changes in shaft location will often result in a gap under the door.
7.6. If you need to adjust the spring tension, and if you have the correct springs and a hollow shaft, reinstall the winder, turn the winder enough to remove the cables, and add or subtract a quarter or half a turn by turning the shaft to wind or unwind the springs. Loosen and secure the drums so the cables are tight and restore spring tension to the drums and cables.
7.7. If you need to adjust the spring tension, and if you have the correct springs and a keyed shaft, unwind the springs, remove the stretch, add the partial turns needed, restretch and rewind the springs.
7.8. If the door does not balance, you may have the incorrect springs. These may need to be replaced.
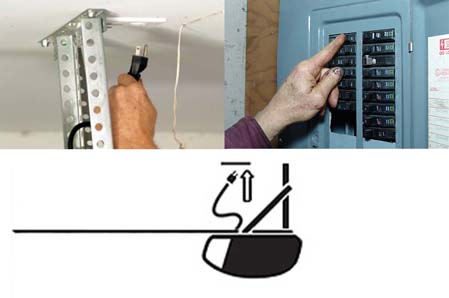
7.9. If the door balances, you can service the door, reconnect the operator, turn on the power and check the door operation.
7.10. CAUTION! Garage door work is dangerous! Please use extreme caution when servicing doors, especially when adjusting spring tension. Although the Safe-T-Winder™ is much safer than winding bars, working with torsion springs is always dangerous.
Huge inventory of torsion springs for same or next day shipping! Here you will find all you need in the most common sizes of 1 3/4," 2," 2 1/4," and 2 5/8" inside diameter springs. Larger 3 3/4" and 6" inside diameter commercial and industrial springs may require a day or two to ship. You'll also find TorqueMaster Springs, Extension Springs, Self-Storage door springs, steel rolling door springs and springs for one piece single panel doors.
Shelves packed with every part you need to fix your doors.
Please note. Shipping times and costs have changed. Normal transit times are currently not guaranteed, even on next day and second day shipments. Shipping prices on items over eight feet have more than tripled.