Crawford Torsion Spring Conversion

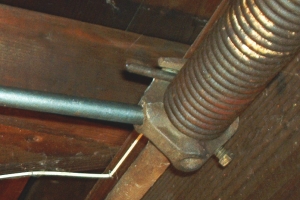
Older Crawford garage doors had unique torsion spring hardware. In the center of the torsion shaft is a support bracket.
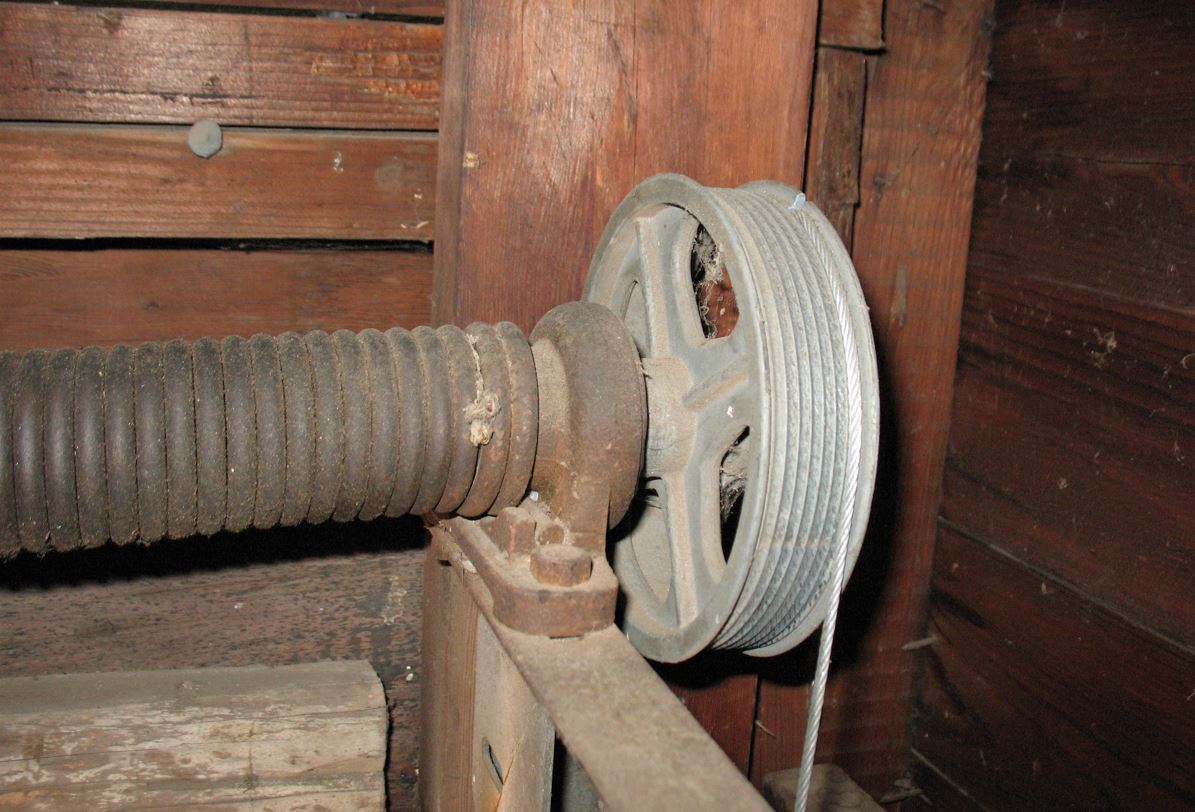
One end of each spring is mounted at the end next to the bearing plate and cable drum, as pictured below. The springs normally have 1 19/32" inside diameters with extended ends to secure the springs to the cones. Notice here the extended end and the larger 5 1/2" spoked cast aluminum cable drum. Many older Crawford drums were made of cast iron. Standard residential drums are now 4" in diameter, and they are made of cast aluminum alloy.
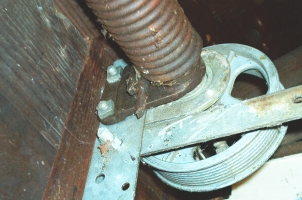
At the other end of the spring toward the middle of the door is the winding cone. The older cones use 5/8" bars for winding. Notice the extended end that locks into the winding cone just as it does in the stationary end above. The springs on these outside lift doors are normally wound the opposite of standard torsion springs. When unwinding a spring the bar should pull up rather than down.
The following instructions are for converting your Crawford garage door with two torsion springs to standard hardware with new drums, cables, spring anchor bracket and possibly new end plates. In these instructions we will be converting springs on a door where the cables come off the sides of the drums facing the inside of the garage. This results in the door traveling six inches further. Because of this we spring the seven foot high door as a seven foot six inch high door and with the 15 inch radius tracks typical of Crawford doors.
We also normally shorten the cables about six inches from 8 feet six inches to 8 feet zero inches because Crawford shafts are normally about six inches lower - 90 inches instead of 96 inches. Please measure to confirm.
They are to be used in conjunction with the instructions for replacing torsion springs. Please review that page before using these directions. Caution! Please note! In this conversion you will wind down instead of up when tensioning the springs.


Getting Started: Safety First!
As with our other tutorials, we begin these instructions with our sternest warning:
CAUTION! Torsion spring replacement is dangerous because the springs are under tension. If you do not use the right tools and follow safe procedures, you could lose fingers, limbs, or even your life. You could also damage property. We want your business, but not at the expense of your well-being. Doing the job right is your responsibility. If you have any doubts about your ability to perform the work safely, we recommend you hire a professional.
It is impossible to cover every dangerous situation you may encounter. The directions below hopefully will help guide you in safely converting your Crawford torsion assembly to a standard assembly, but there are no guarantees. Pay special attention to the warnings that appear in red, before proceeding, review the safety warnings on our Torsion Spring Replacement Page.
| To begin, gather the tools you will need. you will need a minimum of one or two 10" vise grips, an adjustable wrench, two 5/8" X 18" and two 1/2" X 18" winding bars. Most hardware stores sell 36" steel rods that can be cut in half. You will also need a firm ladder. A ruler and a file may also be needed, and a socket wrench and sockets would shorten the time required. | 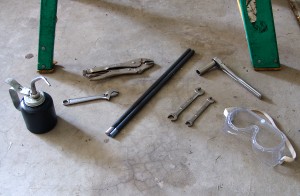 |
| If you have an opener attached to your door, unplug the power cord. Some older openers are hardwired, and you will need to remove a fuse or flip the circuit breaker. |  |
| It is now time to unwind the unbroken spring. These springs are wound down, and the bars will pull up when you loosen the set screws. Use bars that fit snugly in the winding cone. Do not use half inch bars on the older Crawford cones. We suggest you test the force you will be handling before loosening the set screws. To do this, push down on the bar one quarter turn and bring it back up. This will provide an idea of the amount of force you will be holding on the bar. Be prepared for the torque to be transferred to the bar. There is also the possibility the cables may come off the drums and the bar will rise to the ceiling. If this happens, loosen the set screws and unwind the spring from this point. | 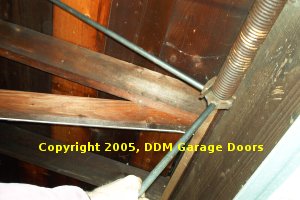 |
| If the cables are still on the drums, firmly grip the end of the winding bar and loosen the set screws. Expect the end of the bar to pull up. Properly tightened screws will loosen with less than a turn. Once you loosen a set screw, keep at least one bar in the cone AT ALL TIMES until the spring is fully unwound. Many cones have been over-tightened. The spring may unwind 1/4 turn and not unwind any more until one of the set screws is loosened some more. You may need to completely remove the set screws. The shaft may be distorted and the cone still may not unwind at all. Raise the bar and let it rest against the ceiling or joist. Next, insert the second bar in the next lower hole. Pull down a little, remove the top bar, and raise the lower bar to the ceiling. Repeat this process until the spring is fully unwound. If you have two wound springs, unwind the second spring. |  |
| Install the new spring anchor bracket with three 5/16 X 1 5/8" lag screws. | 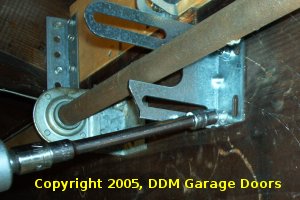 |
| The third screw goes on the top since the springs are to be wound down and the spring torque will be pulling the top of the bracket down and away from the header. | 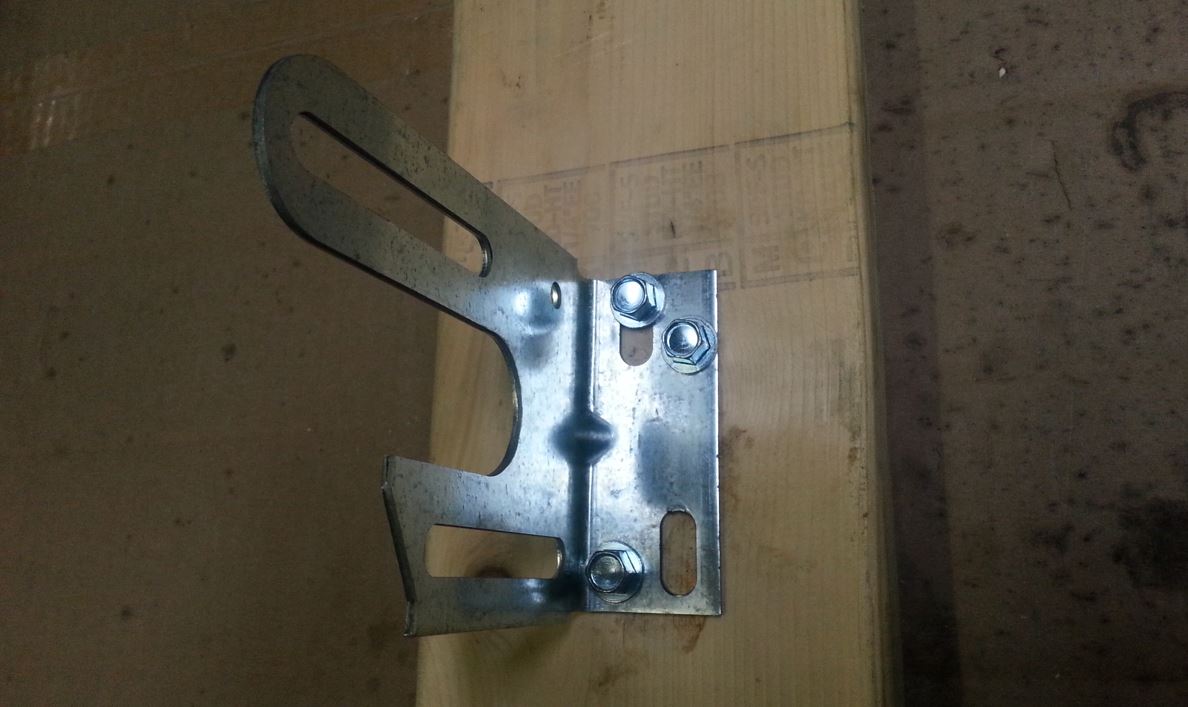 |
| Secure the shaft inside the new center bracket with a vise grip as pictured. This will prevent the shaft and springs from rolling out of the bracket. | 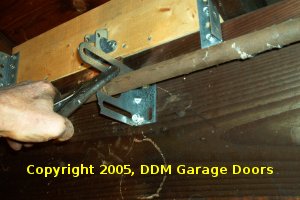 |
| Remove the old Crawford center support bracket. | 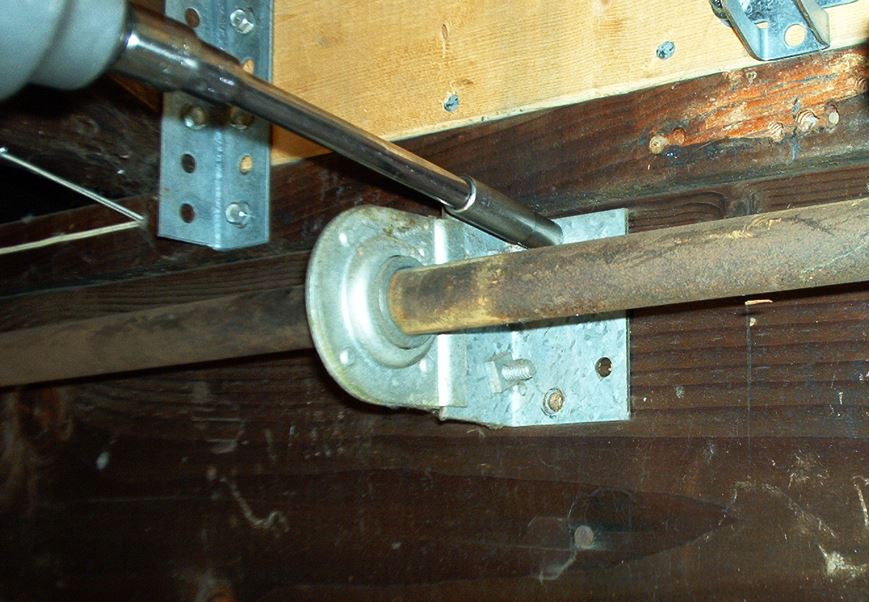 |
| Next, loosen the set screws of the right cable drum and slide it off the shaft. The shafts often have protruding set screw burs that will require you to beat on the drums with a hammer. | 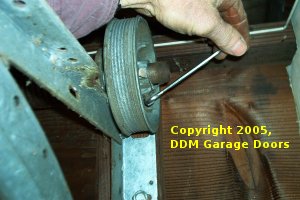 |
| File away the set screw burs until the end of the shaft is smooth. | 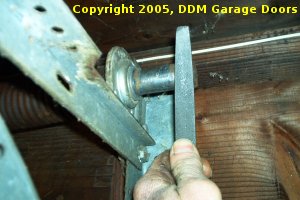 |
| On many Crawford doors the stationary cone is mounted to the vertical flag angle as pictured here. Remove the two nuts that secure the stationary cone and the end bearing plate to the vertical angle. | 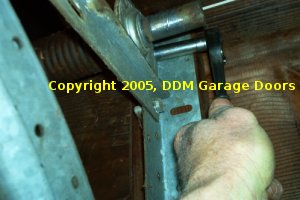 |
| Separate the stationary cone from the end bearing bracket. | 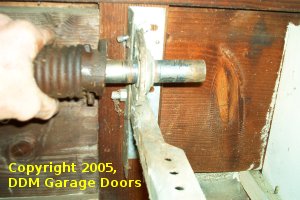 |
| Remove the bolts and end bearing plate from the vertical angle. | 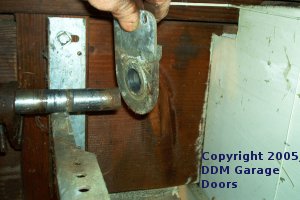 |
| Slide the old spring and cones off the end of the shaft while bending it as shown. |  |
| Bend and slide the new spring and cones onto the torsion shaft. In these instructions the cable unwraps off the front of the drum facing the inside of the garage. Because of this, you will be installing the right wind spring with the red cone on the right side. |  |
| Continue by sliding the spring toward the spring anchor bracket. Notice the red paint on the winding cone. | 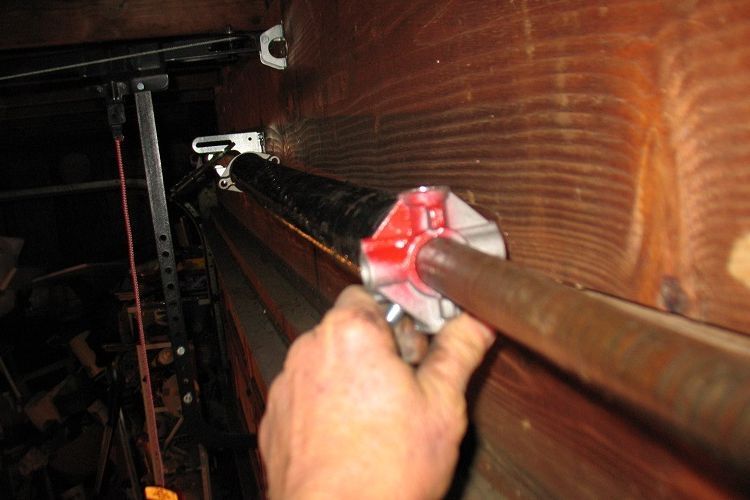 |
| Remove the cable drum on the opposite side and slide the shaft 12" to the right. Next, remove the old spring on the left side, bending it as needed for limited side room. | 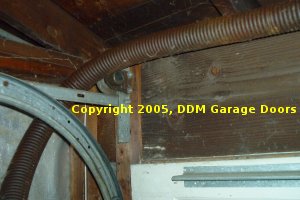 |
| Slide off the winding cone and the old center support bracket. | 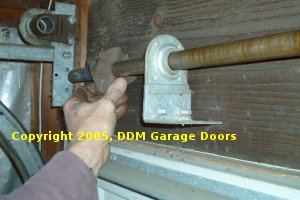 |
| Slide on the new spring along with a bushing or bearing. | 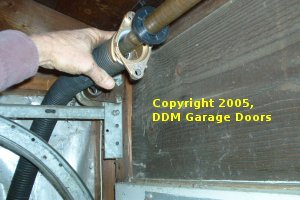 |
| The spring on this side is left wind. Notice the black mark on the winding cone. | 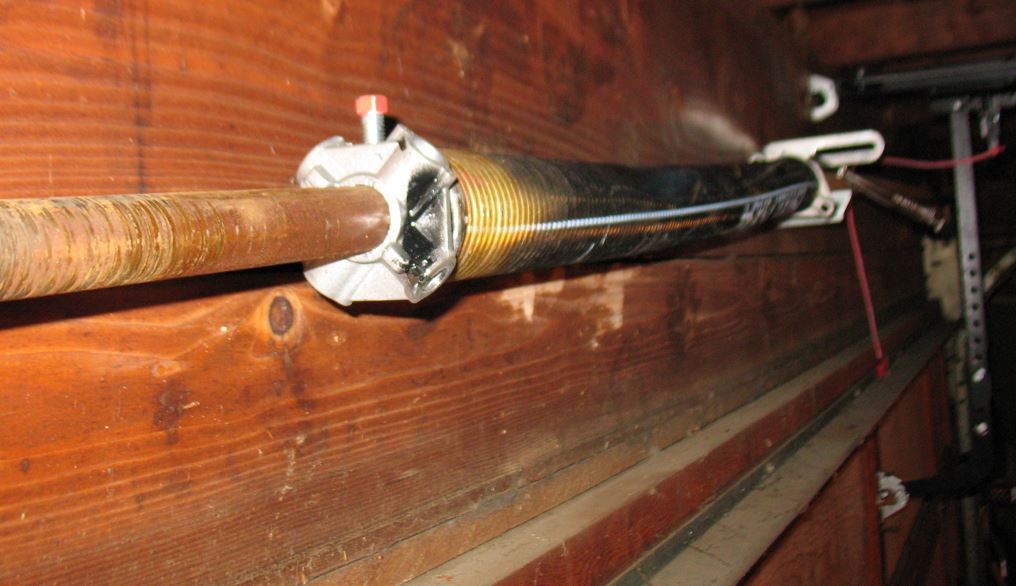 |
| Remove the left spring anchor bracket and reinstall the end bearing brackets on both sides with the bolt heads on the outside and the nuts inside the bracket so the cable drums will not scrape the bolts. Center the shaft between the end bearings, so the amount of shaft extending beyond the bearings is the same on both sides. | 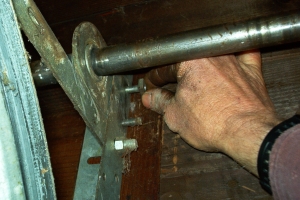 |
| It is now time to replace the cables. Because of the lower end bearings, cables for Crawford doors are usually a few inches shorter. Please provide the floor to center of shaft measurement when ordering cables. |  |
| Most Bottom fixtures have a ring to which most cables can be attached. To minimize wear on the bottom cable loop we recommend ordering cables with thimbles. | 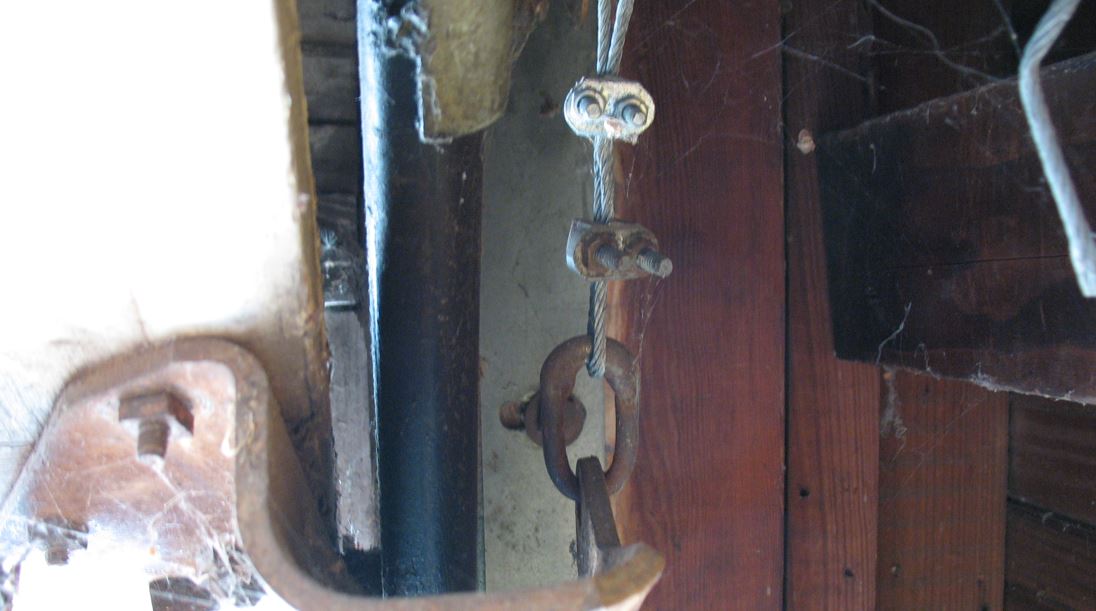 |
| On this door the bottom fixtures have teardrop retainers to secure the bottom of the cable to the bottom fixture. To remove the cable, use a hammer and screw driver to drive the teardrop out of the slotted retainer. Remove the eye and the old cable. Notice the eye to the right of the bottom fixture. | 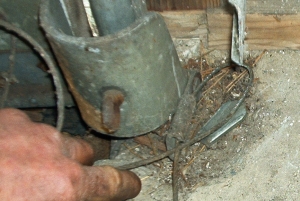 |
| Here is the procedure for replacing these cables. For this 7' high door we installed cables for the higher 8' doors as required by the bottom fixtures. Install the cable drum marked with black paint on the right end of the shaft and secure it by tightening the set screws one half to 3/4 turn. Rotate the shaft 360 degrees to make sure the drum does not scrape the angle or bolts. Install spacers or washers between the drums and the bearings if needed. Install the cable in the drum and rotate the shaft and drum 180 degrees until the end of the cable is closest to the header. Vise grip the shaft as shown to keep it from turning. | 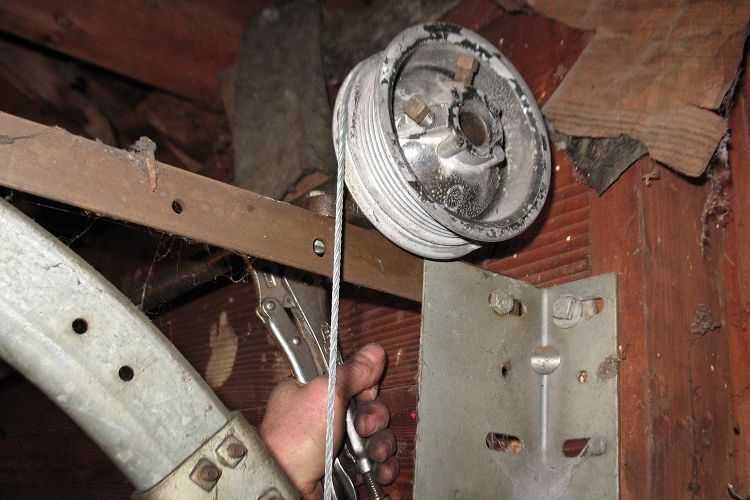 |
| Pull the cable so it is tight on the drum. While pulling the cable, loop the bottom end of the cable into the tear drop retainer and install the tear drop. | 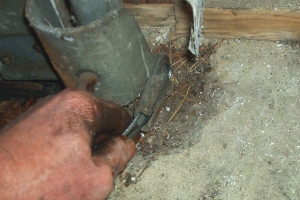 |
| Pull on the cable and eye until they are tight in the retainer. About nine inches of cable will be extending beyond the retainer. Adjust the cable, eye, and retainer to tighten the cable. | 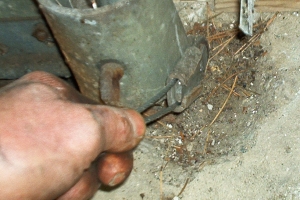 |
| Follow this procedure to replace the other cable. At the left end of the shaft the cable drum will be marked with red paint. Pull the shaft to the left so the other drum is against the bearing. Slide the cable drum to the right. (Add arrow to picture) Insert the top tip end of the cable into the drum and wind the cable onto the drum 180 degrees until the cable slot is closest to the header. Tighten the set screws. |  |
| Pull on the cable and install the cable on the bottom fixture as you did on the right side earlier. (pic - reverse) Adjust the cable at the bottom fixture if needed so that both cables are equally tight with the same length of cable extending from the retainers. The cable length and tension can be adjusted by tapping the eye and loosening it enough to shorten or lengthen the cable. | 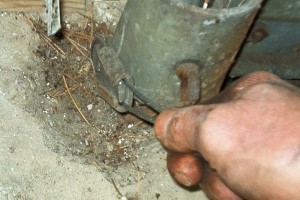 |
| At this point, you will slide the springs and mount them to the center spring anchor bracket. Run the bolts through both cones and the center bracket and start the nuts on the bolts. Lubricate the bearing or bushing. Secure the stationary cones to the center spring anchor bracket. First, finger-tighten the nuts until the cones are flush against the plate. Next, tighten the nuts with a wrench or socket. |  |
| Because the cables in this tutorial come off the fronts of the drums, you will be winding the springs down instead of up. |  |
| It is now time to wind the new springs. In this tutorial we will begin on the left side. However, before doing so, I recommend marking the shaft just beyond the winding cone. This is a final step taken to assure that you have installed the springs on the correct sides of the center bracket. Torsion springs always grow in length when they are wound in the proper direction. If your spring does not lengthen as you wind it, you are winding it the wrong direction probably because it is improperly installed. We frequently get calls about springs coming loose from the cones at about 6 turns. If this happens, switch the springs. | 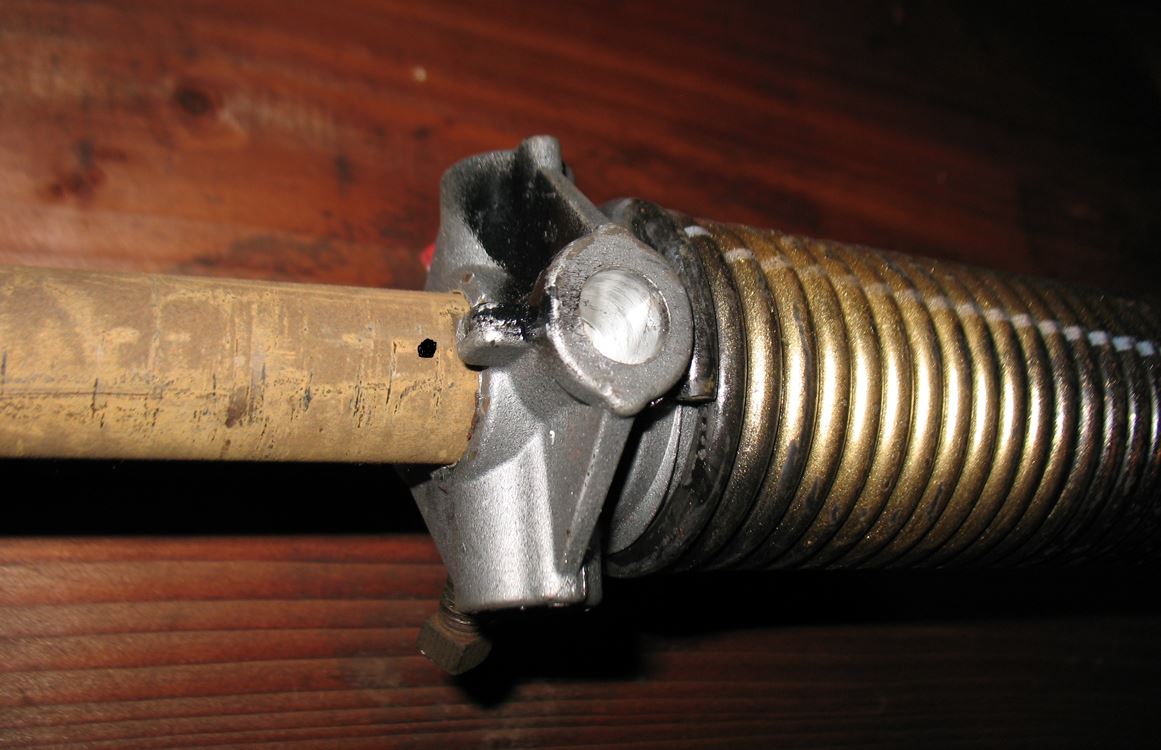 |
| Tape your winding bars, not only to assure that you are inserting the bars completely into the cones as you wind the torsion springs, but more importantly to assure that the bar does not slip out of the cone when you stretch the springs at the end. | 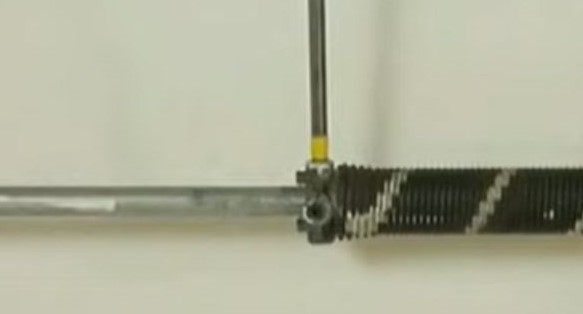 |
| At this point you will wind the spring. Notice that the end of the spring on the winding cone points down when facing you. (pic) You will wind both springs down. | 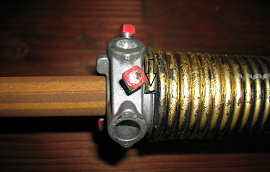 |
| Begin by turning the spring down 1/4 turn until it meets resistance. This is your first quarter turn. Count "one." Next, insert the bar and lower it 90 degrees. Insert the second bar. This is "two." As you wind the spring it should grow in length the thickness of one coil for every turn. The cone should cover your mark after the first couple turns. Lower the second bar 90 degrees and insert the first bar. This is "three." Each time you insert a bar into the winding cone, listen for the click to let you know the bar is in all the way. Not inserting the bar all the way could cause the cone to explode. Continue winding until you reach a count of "30." This is 7 1/2 turns, which is normal for most 7' doors. On 8' doors count to 34. | 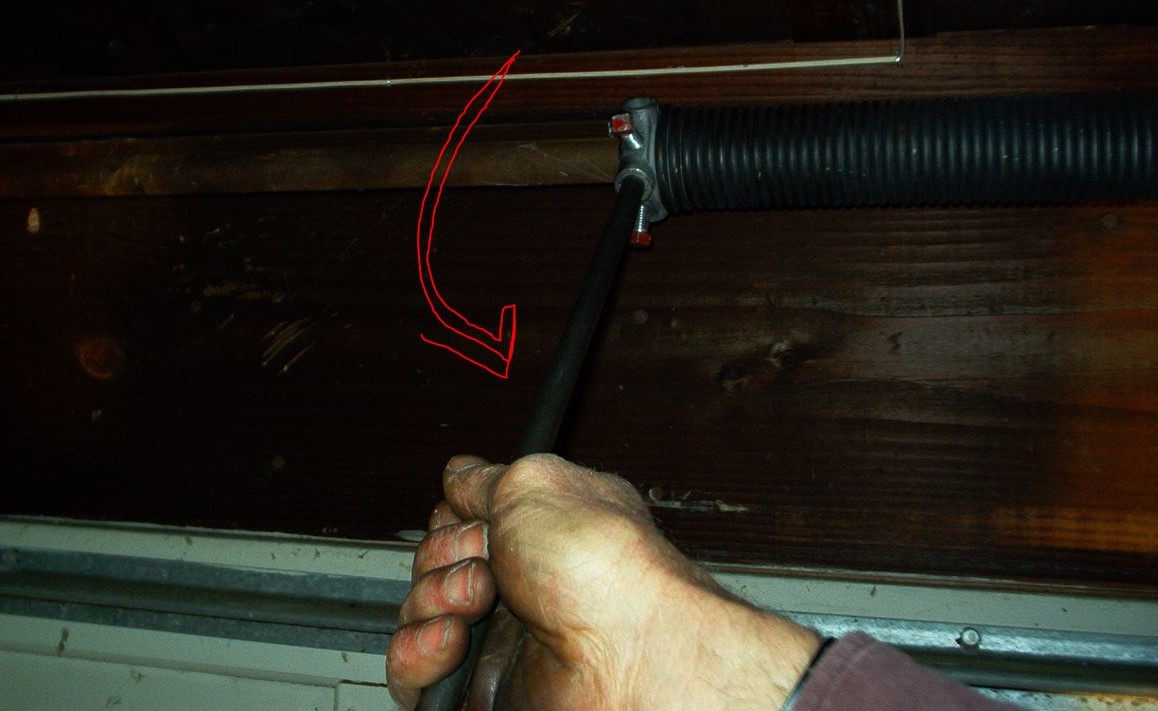 |
| Before tightening the set screws mark the shaft one coil beyond the cone. |  |
| Here you will need to do three things at once. With your left hand, pull down on the bar, pull the bottom of the bar toward the center of the door, and tap the top of the bar just under the cone until the cone reaches the mark made earlier. If the cone slips away from the mark, repeat this step. Keep an eye on the tape to make sure the bar doesn't slip out of the cone. | 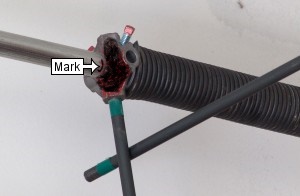 |
| Carefully test the set screws by pulling up on the bar. The winding cone set screws should be tight enough so that when you pull upon the bar, the garage door should begin to lift. If the bar starts to slip when you raise it, add 1/4 turn to each set screw. | 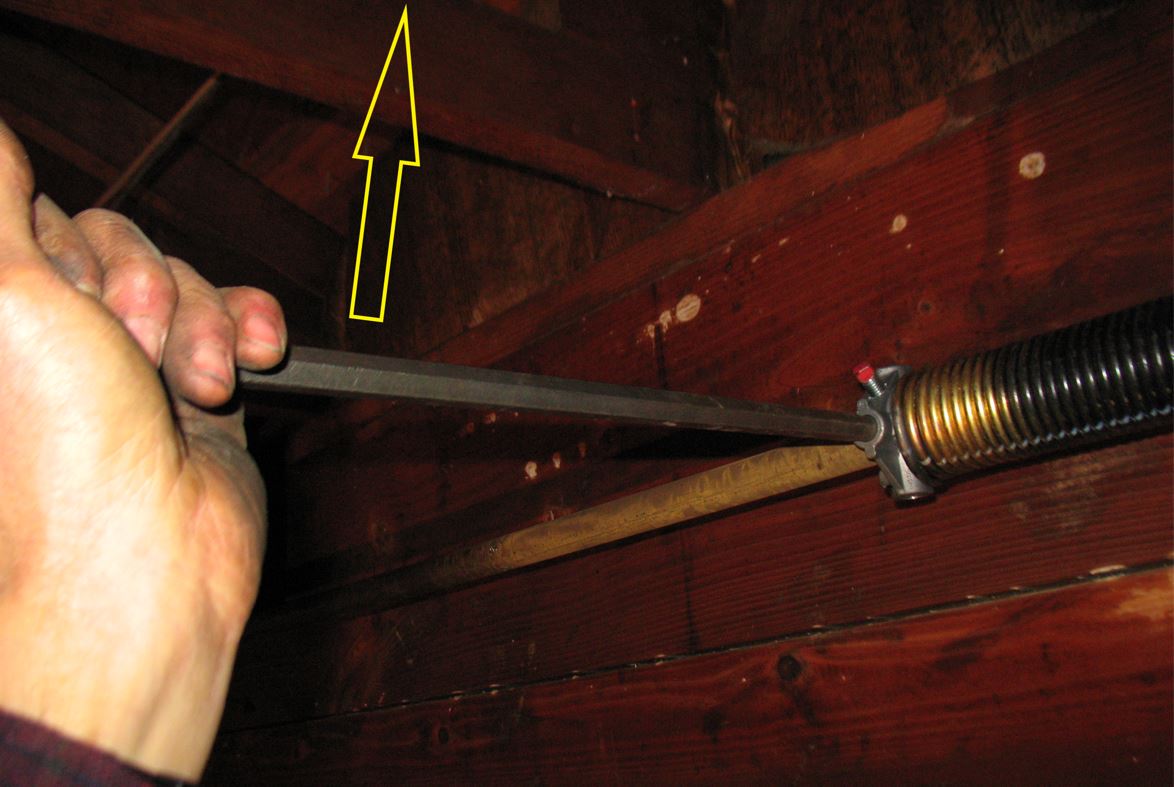 |
| Vise grip the vertical track about 3" above one of the rollers. If you have installed the wrong springs, or if you have over-wound the springs, this will prevent the garage door from flying up and knocking you off your ladder after winding the second torsion spring. |  |
| Follow the same procedure for winding the second spring. Stretch the spring the width of one coil and secure the set screws. CAUTION: Before removing the bars from the cones after securing the winding cone, you must run an important test of the door. Many of the accidents that occur while fixing springs are due to installing springs that are too strong. | 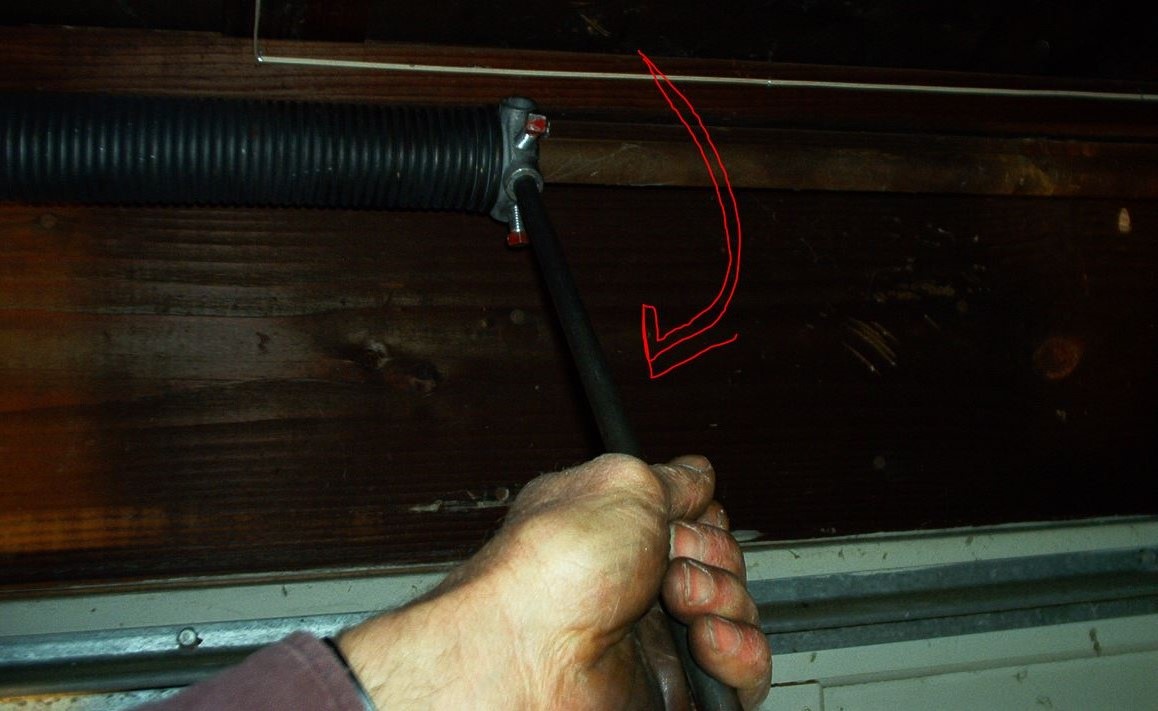 |
| Slowly lift the winding bar until the garage door rises 3" and the roller hits the vise grip on the track. The door will usually drop back down and lower the bar. If it doesn't, lower the end of the bar until the door closes. If the door comes up by itself when you hold the bar lightly, the springs are either over-wound or they are too strong. You may need to remove 1/4 to 1/2 turns from the springs. If the door comes up on its own, you either have too many turns on the springs or you have the wrong springs. This can be very dangerous. We recommend getting professional help. Removing the winding bar could cause the garage door to knock you off the ladder. | 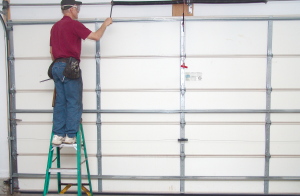 |
| If the door stays on the floor when you raise the bar, remove the bar from the cone. | 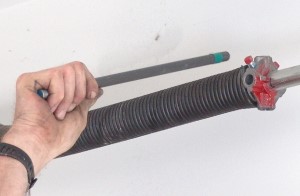 |
| Many torsion spring replacement accidents occur from springs that are too strong. If the garage door stays on the floor by itself, remove the vise grip from the track. If the door is off the floor and the roller is against the vise grip, close the door with one hand and remove the vise grip with the other. If the springs are too strong, you have to restrain it from flying into the open position. | 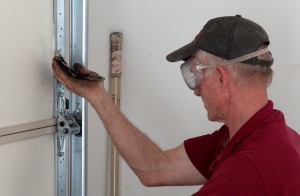 |
| Raise the garage door slowly. Check the door balance. If you have the correct springs the door should stay down when closed, halfway when opened halfway, and open when opened. If the door will drop to the floor by itself from the halfway point, add 1/4 turn of tension to each of the torsion springs. If the garage door won't stay on the floor, and if it pulls itself up when stopped halfway, close the door and remove 1/4 turn of tension from the springs. |  |
| If the springs you installed are too strong, and if you wind the springs the correct number of turns, the door will not stay down nor halfway. The garage door will be hard to close. DO NOT REMOVE MORE THAN HALF A TURN OF SPRING TENSION TO CORRECT THE PROBLEM. Here's why. If you remove 3/4 of a turn to get the door to stay closed, and then if you open the door, it will get heavier as you open the door, and once open, the cables will come off the drums. This could create as much as a day's extra work. It could also cause door damage and/or result in serious injury. Do not use the door! Get different springs! |  |
| If the springs you installed are too weak, and you wind the springs the correct number of turns, the door will be heavy at the floor, and it will not stay open halfway, but it will stay open if raised completely. If tension is added to the torsion springs to lighten the garage door and to get it to stay open halfway, the door will be harder to close; openers often damage the new steel garage doors when they are too hard to close. |  |
| Oil the springs. The more viscous the oil the longer it will last. I normally use 40 wt. motor oil, but 10W40 will do if that is all you have. Squirt a stream of motor oil across the tops of the torsion springs and rub the oil into the coils. Do not oil the last inch of the springs that is wound around the cones. | 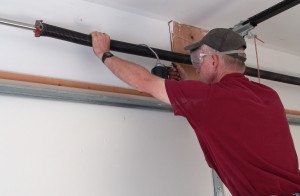 |
| Check the garage door at the floor. It should seal all the way across. If it doesn't you may need to adjust the drum on the higher side or the slip teardrop on the bottom fixture to get the door to level. We have a separate tutorial to help in leveling your garage door. | 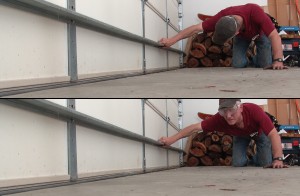 |
| Reengage the opener. | 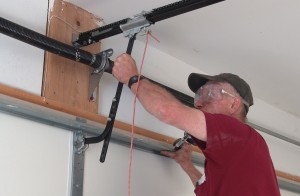 |
| Plug in the power cord. Adjust the opener force and travel as needed. | 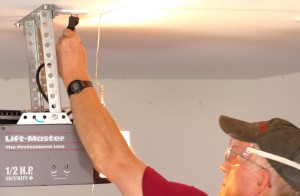 |