Chamberlain, Liftmaster, Sears Gear Replacement
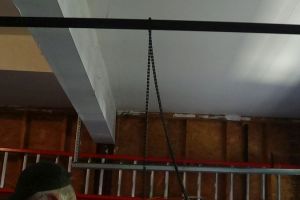
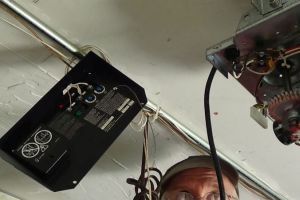
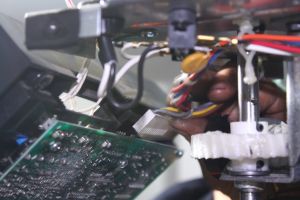
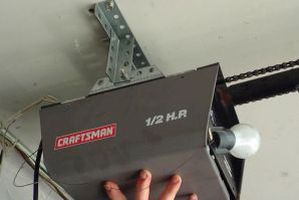
In most Chamberlain, Liftmaster, and Sears openers a motor turns the worm gear and drive shaft inside the opener, which rotates the sprocket attached to the top of the drive shaft. This turns the chain and moves the door.
The most common issue that occurs is when the ridges in the gear wear out because the gear lubrication has evaporated. As a result of the worn gear, the sprocket cannot turn the chain, and the door will not open nor close.
This tutorial demonstrates how to replace the gear on most Chamberlain, Liftmaster, and Sears openers.


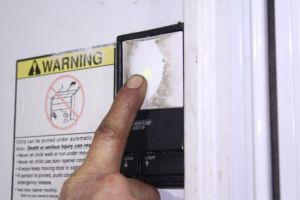
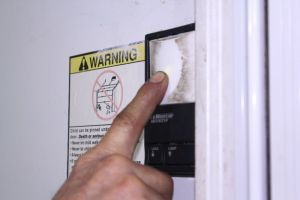
1. It is easier to replace the gear with the opener trolley in the up position. If the door is closed, push the wall button.
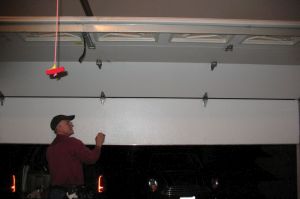
2. Although the gear is stripped, it will still turn in the same direction it normally turns to open the door. Manually lift the door in sync with the motor. If the door makes a loud grinding sound when you try to lift the door, and if the door will not open, it may be because the motor is turning in the direction it normally turns to close the door.

3. If this is the case, press the button again to reverse the direction the motor turns.

4. Try to open the door as before, but now in sync with the motor and drive gear. When the door is fully open the motor should stop turning.
5. Caution! This process needs to be completed in less than a minute. Otherwise the motor will overheat and possibly blow the capacitor.

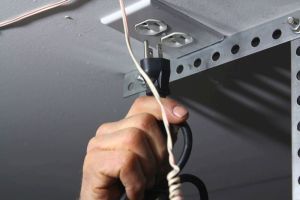
6. Next, unplug the power to the opener. This will keep it from running if someone accidentally tries to open the door while you are working.
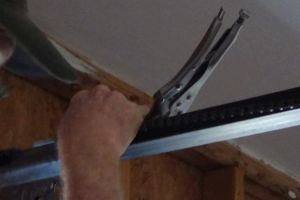
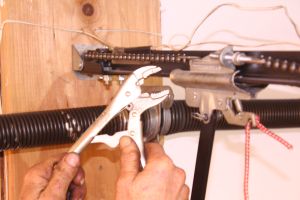
7. Vise grip the opener chain, and cable if present, on the door side of the trolley. This will prevent the chain from coming off the front idler sprocket or pulley. It will also keep the trolley from moving.
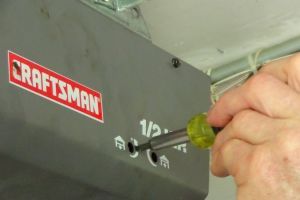
8. Loosen the two outer spring trolley nuts on the end of the chain using a 1/2" open wrench or adjustable wrench.
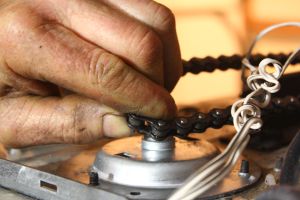
9. Carefully remove the chain from the sprocket. Keep your fingers on the sides of the chain at least 3" away from the sprocket, lift up the chain, and unwrap it from the sprocket.
10. CAUTION! Serious injury to the hand or fingers may occur if the chain is not safely removed.

11. Rest the chain over the opener end of the rail.
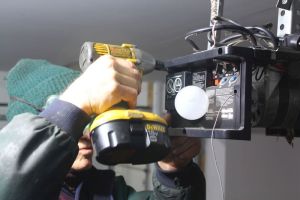
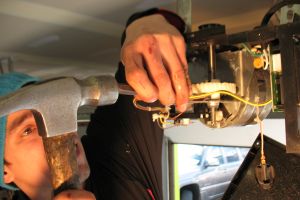
12. Remove the screws which secure the main cover to the frame. There are usually four on top and two or four on the bottom.
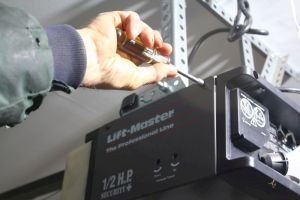
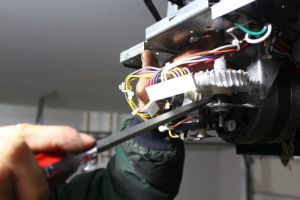
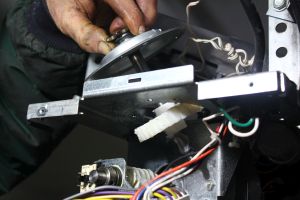
13. Remove the two screws on the top of the back cover of the opener and remove the cover, revealing the circuit board.
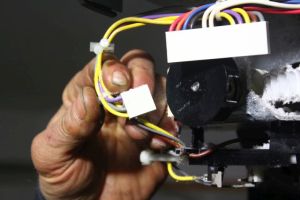
14. Pull the wire harness from the circuit board.
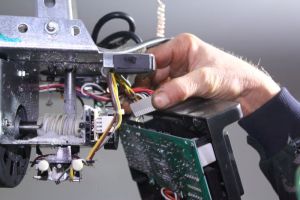
15. Move the circuit board and wires away from the immediate work area.
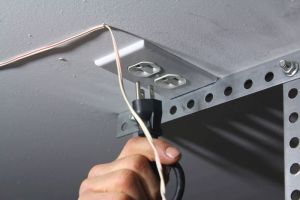
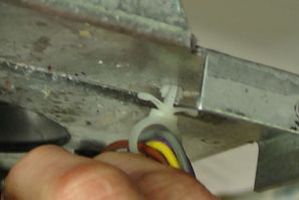
16. With one hand pinch the top of the wire tie support with your fingers or needle nose pliers while pulling the wire tie down with the other hand.

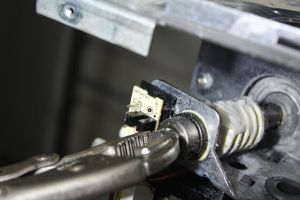
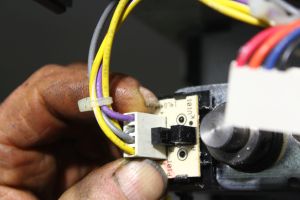
17. Unplug the RPM harness from the RPM sensor.
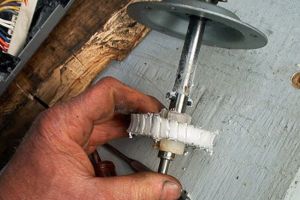
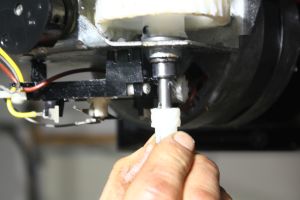
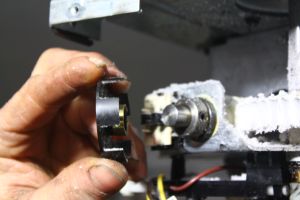
18. Secure the RPM interrupter cup, the round slotted sensor wheel, with two or three fingers and a thumb, and carefully pull it straight off the end of the motor shaft.

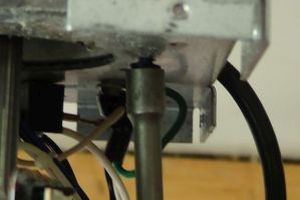
19. Remove the retainer clip which secures the timing gear to the bottom of the drive shaft.

20. Pull the timing gear off the end of the drive shaft and place it aside.
21. Lower the wiring harness below the bottom of the drive shaft.
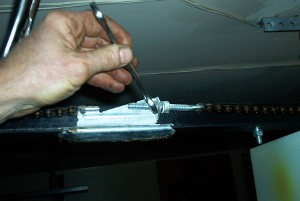
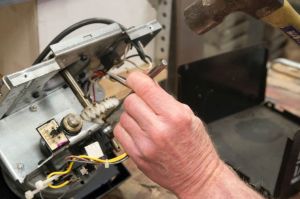
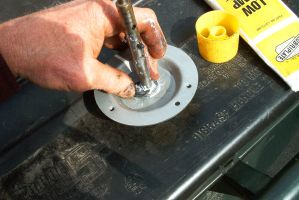
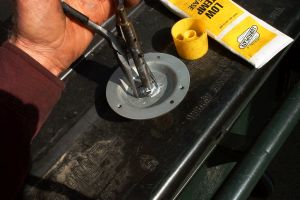
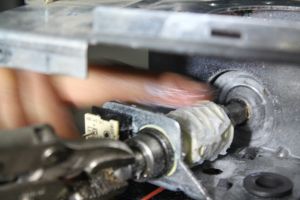
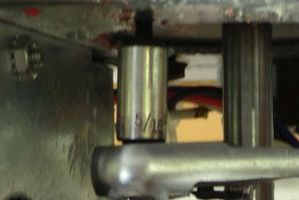
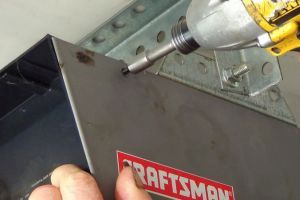
22. Using a hammer and a 5/32" punch or a 16 penny nail, drive the lower pin from the bottom of the old gear. You may need to turn the gear and/or motor shaft to properly position the pin as shown.
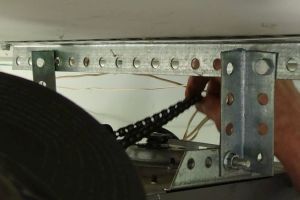
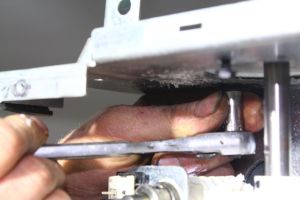
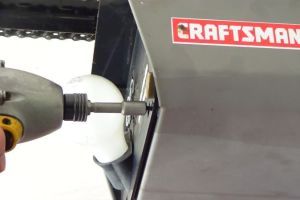
23. Use a 5/16" socket wrench or nut driver to unscrew the three screws supporting the motor bracket and set the screws aside.
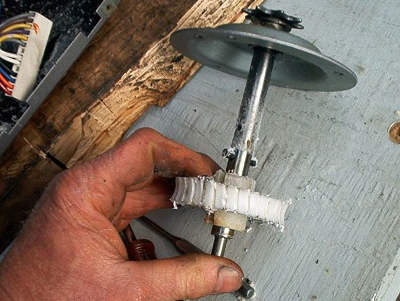
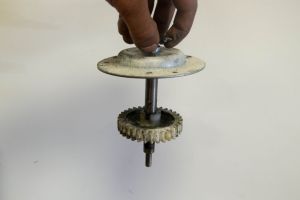
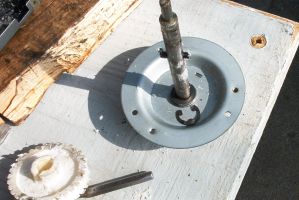
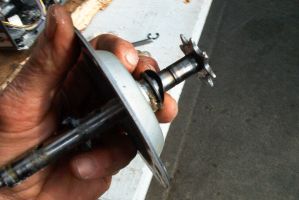
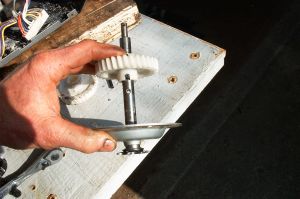
24. Lift the gear and sprocket assembly out of the lower bushing. You may need to pry the bottom of the gear up with a screw driver. Set the gear and sprocket assembly aside.
25. Clean the gear dust from under the motor shaft and worm gear with a knife or other flat utensil. Failure to clean under the gear might shorten the life of the gear because the grease will become mixed with the old gear dust.

26. Clean the dust from the RPM sensor eyes. Be sure to clean the sides and between the sensors.

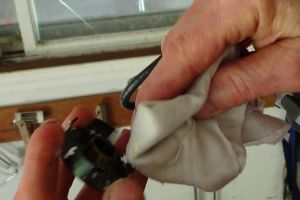
27. Clean the RPM sensor wheel with a cotton swab, rag, or air pressure. Failure to clean both the RPM sensor eyes and the RPM sensor wheel could cause the RPM sensor to malfunction. The motor would then run for two seconds and then stop or reverse to where it was before. The garage door moves a few inches and stops, or it moves a few inches and reverses.
28. If needed, you can clean the debris from the worm gear with compressed air or WD-40 and a tooth brush.

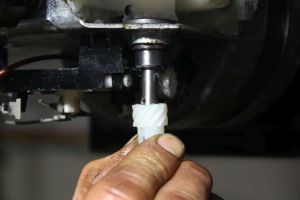
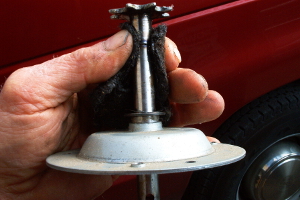
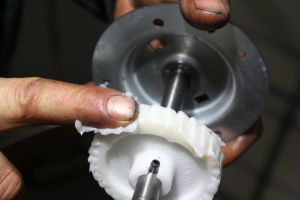
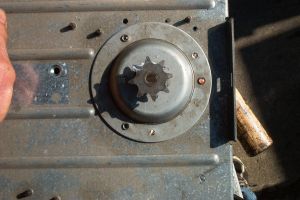
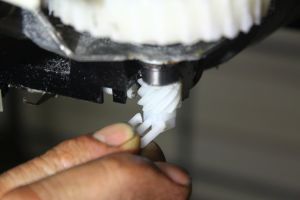
29. Notice the wear and damage on the old gear. If the gear is white on top, then only the gear needs to be replaced.
30. If gray or black debris is present on the top of the gear, the bushing at the top of the drive shaft, and possibly the drive shaft as well, is worn. You may need to replace the top bushing or the complete gear and sprocket assembly. You can determine the extent of the damage in the steps below.
31. Slide the old gear off the bottom of the drive shaft.
32. At this point you will need to clean and lube the top of the drive shaft and bushing. Since the gear and the upper bushing normally wear out at about the same time, this will avoid probably having to repeat a similar process in the next year or so. To begin, remove the c-clip that secures the top of the drive shaft to the bushing. Insert the end of a flat screw driver into the ring and turn it.
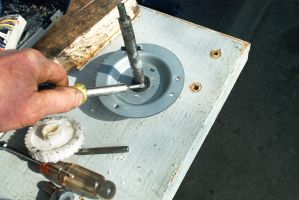
33. Pry the ring loose.
34. Inspect the wear of the shaft and bushing. If the bushing is sloppy, you may need to replace the bushing as well. If the shaft has worn, you will need to replace the complete gear and sprocket assembly (insert link).
35. If the bushing and shaft show no signs of wear, clean the neck of the drive shaft with any kind of cleaner or solvent. Steel wool will speed the process. Be sure to dry thoroughly after cleaning.
36. Lubricate the top of the drive shaft with grease from the kit. This must be a special low temperature grease to prevent premature wear.
37. Reinstall the c-clip. To do this, squeeze the spring washer, bushing and flat washer against the sprocket with your left hand to reveal the ring around the neck of the drive shaft. Slide the c-clip part way onto the groove.
38. Next, while continuing to squeeze the washer and bushing against the sprocket, squeeze the c-clip onto the groove with a vise grip or pliers.
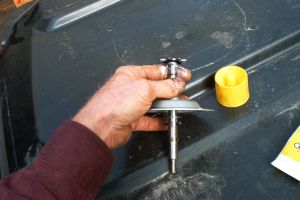
39. Slide the new gear onto the shaft with the gear slots aligned with the pin.
40. Lubricate the new gear thoroughly with the special low temperature grease provided with the kit. On many occasions do-it-yourselfers have called us asking us what happened to a new gear they purchased on line. "After three weeks the gear stripped," is the common statement. When I ask if they lubricated the gear they reveal the cause of the failure. Note also, that wheel bearing grease will deteriorate the gear in a matter of months, particularly in colder climates.
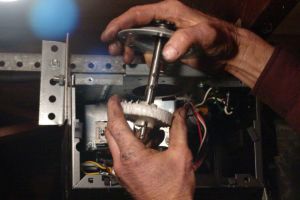
41. Turn the motor shaft with a vise grip.
42. Lubricate the underside of the worm gear as well.
43. Place the new lubricated gear in the slot at the top of the opener and match its ridges with the ridges of the worm gear.
44. Align the bolt hole with the cover hole on the top of the opener towards the back side, closest to the door.
45. Put the three screws back in the slots at the top of the sprocket but only tighten the screw above the worm gear with a nut driver.
46. Screw in the other two screws with a socket wrench.
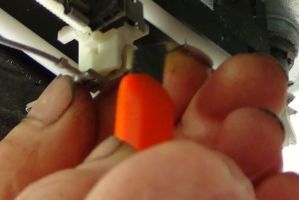
47. Use the hammer and a punch or a nail to drive the pin into the new gear, securing it into the gear sprocket assembly.
48. Place the timing gear on the bottom of the gear and sprocket assembly.
49. Secure the timing gear with the retainer clip.
50. Carefully place the RPM cover on the RPM sensor.
51. Plug in the RPM harness.
52. Secure the wiring clips to the holes at the top of the motor shaft.
53. Plug the wiring harness back into the circuit board.
54. Place the back cover back on and slowly screw in the two washer screws on the top and bottom of the cover. Be careful, if the screws are over tightened then the plastic cover may be damaged or cracked.
55. Plug in the opener.
56. Test the opener by pressing the button. Make sure the motor does not run over a minute, it will overheat and shut off the motor.

57. Check to see if the motor and the gears are spinning smoothly. If the motor runs clockwise then it is in close mode. If the motor runs counter-clockwise then is in open mode.
58. Press the button again.

59. Carefully latch the chain onto the sprocket. Keep your fingers on the sides of the chain at least three inches away from the sprocket.
60. Tighten the two outer spring trolley nuts on the end of the chain using a 7/16" open wrench.

61. Make sure to align the chain on the top of the rail about 1/2" from the center.
62. Remove the vise grip from the track.
63. Press the button to open the door half open.

64. Unplug the opener.

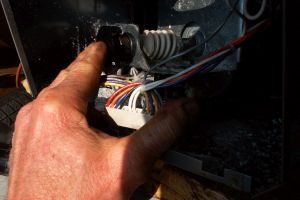
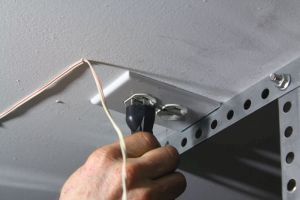
65. Clean both the travel side and stationary side of the open contact on the up limit, the one closer to the limit drive gear, by scraping it with a knife.
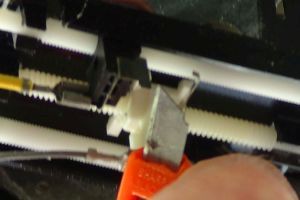
66. Clean both the travel side and stationary side of the closed contact on the down limit, the one further away from the limit drive gear, with the knife as well.
67. Plug in the opener again.

68. Press the button twice to open the door all the way.
69. Unplug the opener.
70. Reinstall the side and bottom cover.
71. Tighten the fine thread screws on the top of the cover.
72. Tighten the coarse thread screws on the bottom of the cover.
73. Adjust the travel limits and the force of the opener with a screwdriver. Watch our video titled "How to Adjust Your Garage Door Opener's Travel and Force" for more information.
74. Plug in the opener again.

75. Test the opener. Sometimes the travel timing gets out of sequence. The quickest fix is to remove the timing gear and retaining clip. For example, if a door closes all the way except for 10 inches, you can do the following: 1. Open the door with the opener. 2. Remove the E-Clip and timing gear. 3. Close door a foot with the motor running and then pull the power cord. 4. Reinstall the E-Clip and timing gear. 5. Reset the open and close travel.