Vertical Lift Track Assembly
Before converting your garage door from a standard lift to a vertical lift, you will need to assemble a pair of vertical lift tracks. These are normally made by cutting off the curved portions of your horizontal tracks and adding a track extension to provide the necessary length for the upper vertical tracks.
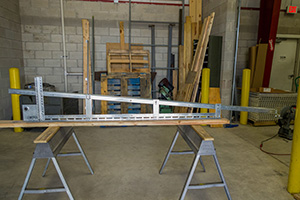
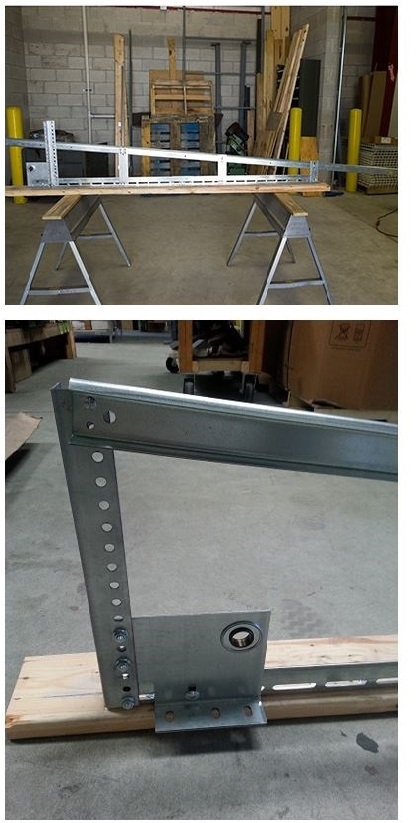
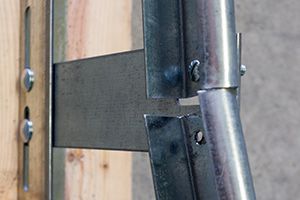
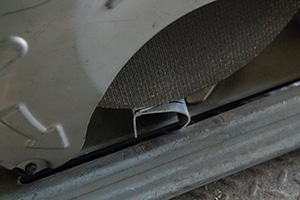
The instructions that follow are for the top picture above. They demonstrate one of several ways to cut and assemble a vertical lift track. The short track extension is at the left end of the track. Notice that the end bearing plate is to the left of the top cross angle. When these tracks are installed the bearing will be above the top support angle. This is what you will see in the images and instructions below.
The lower image shows another way to assemble the tracks. The short track extension is at the right end of the track. Notice that the bearing is to the right of the cross angle. When these tracks are installed, the bearing will be below the top support angle. A short vertical lift track assembly video is available to show where the parts go. The video begins at the bottom of the lower vertical track and moves to the top of the upper vertical track.
Please note that these are preliminary, general instructions. These are for an 8 X 7 door. The specific details for other sizes of doors will vary.


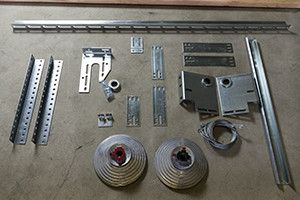
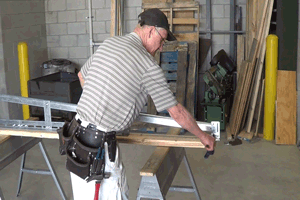
1. All the parts from the Vertical Lift Kit necessary for the vertical track assembly should look similar to this. Assembly of the vertical lift tracks is done on a bench and then installed on the vertical jambs afterward. You will also need to assemble the vertical lift tracks on a platform such as a table or flat wood board that is at least 1 ft. longer than the height of the door.
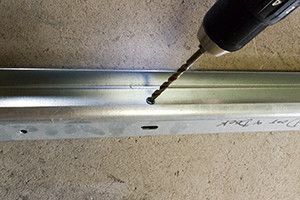
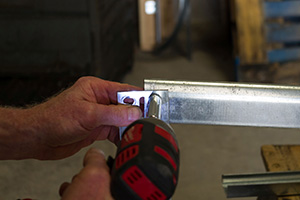
2. Door tracks normally come with an angle and rivets. Before assembling the vertical tracks, you must first remove the rivets.
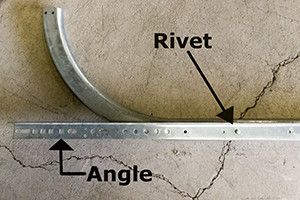
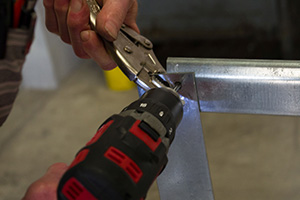
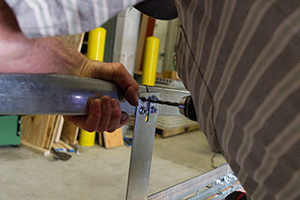
3. Remove all rivets from the track by drilling through each one with a 1/4" drill bit at a 45 degree angle. A 5/16" drill bit can be used, but this may risk enlarging the hole.
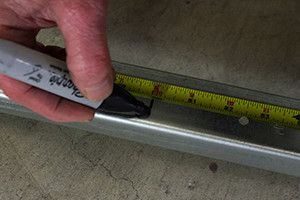
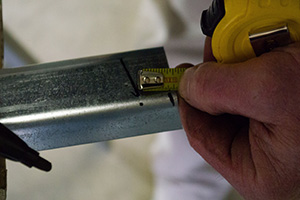
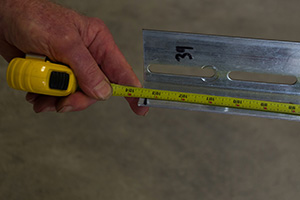
4. Measure the maximum length of the straight part of the horizontal track and mark a line at the endpoint. The length of this horizontal track is 80 inches.
5. Cut the track at the mark with a handsaw.
6. Divide the length of the cut track by three.

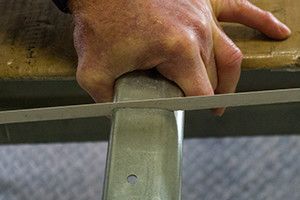
7. Lay the track face down on the platform. Measure the calculated length and mark two lines on the track that divide it into thirds.
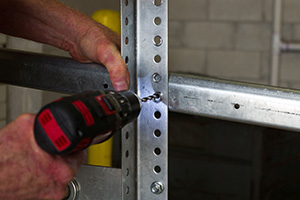
8. Drill a 1/4" hole at each mark on the track and remove the burrs with a 1/4" step drill bit.

9. Gaps between the tracks will not affect the operation of the door. However, if you want to improve the alignment, you will need to trim the bottom of the track that connects to the lower vertical track.
10. One way is to trim the bottoms of the tracks about five degrees. Another way is to trace the high lift plate onto the bottom of the track with a marker.
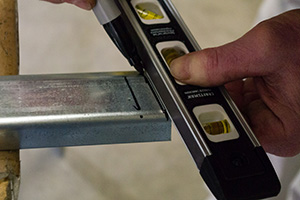
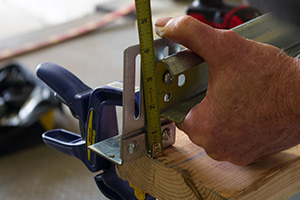
11. Lay the track face down onto a workbench. Make a second mark between 1/2" and 3/4" from the first mark. The second mark should be parallel to the first mark.
12. Use a level to extend the second line and to confirm that it is parallel to the first line.
13. Lay the second line of the track underneath the blade of the saw to be cut.
14. Set the angle of the saw to 4.75 degrees.
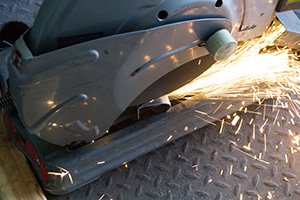
15. Carefully cut the end of the track with the saw. File the end of the track.
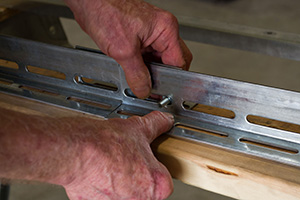
16. Lay the two angles beside each other on the platform with the long edges aligned upright. Place the short connecting bracket behind the center of the two track ends, as shown. This will stabilize the vertical track assembly and make the installation process easier.
17. Insert two 5/16" carriage bolts on each end hole of the slotted angles, securing it to the connecting bracket. Tighten a flange nut onto each bolt with a socket wrench or an impact wrench.

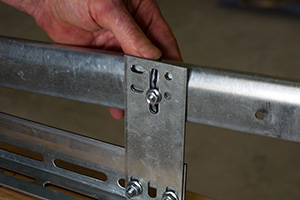
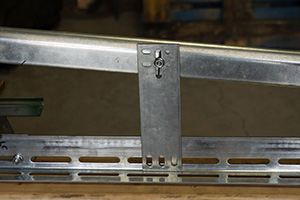
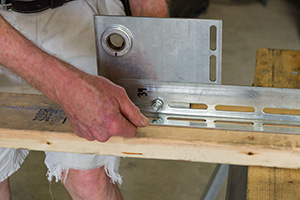
18. Align the three bottom holes on the #6 high lift plate with the first hole on the slotted angle. Insert a carriage bolt through the first and third aligned holes, and finger tighten a flange nut onto each bolt. Make sure that the wider slotted holes at the top of the plate are on the left, as shown.
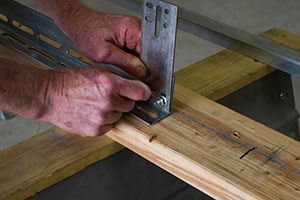
19. Make sure that the plate is perpendicular to the angle and tighten each bolt.
20. Now, you need to install the junction bracket. Align the holes of the offset splice plate with the holes of the jamb bracket. Insert two 1/4" track bolts that connect the lower and upper vertical tracks.

21. Install and tighten both nuts completely with a socket or an impact wrench. The new junction bracket is now assembled. Connect both brackets this way.
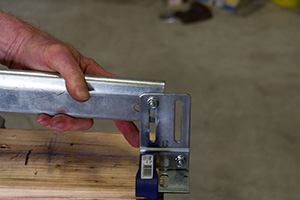
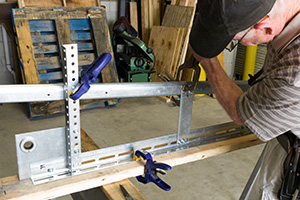
22. Align the junction bracket with the end of the platform so that only half of the bracket covers the platform. Vise-grip the bracket to the platform.
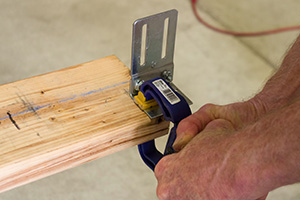
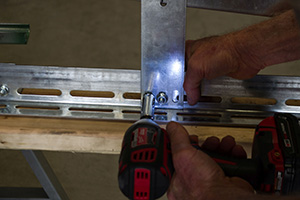
23. Insert a track bolt into the first drilled hole on the vertical track, which is 1/3 of the way up. Align the bolt in the middle slot of the #6 high lift plate and finger tighten a nut onto it.
24. Align the two holes on the bottom of the track with the left open slot on the junction bracket. Insert a track bolt into the top hole of the track and finger tighten a nut onto it.
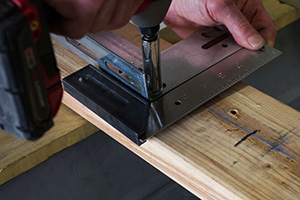
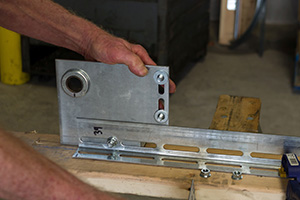
25. Center the top of the #10 high lift plate with the outside, flat part of the track. Secure the top of the track to the plate using a vise-grip and mark inside both of the open holes on the plate.
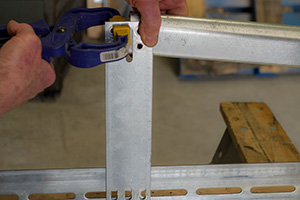
26. Align the three holes at the bottom of the #10 high lift plate with the middle of the slotted angle. Make sure the plate is perpendicular and insert two carriage bolts. It is fine if the two bolts are next to each other, but if you want to be precise, then you can re-drill through one of the slots. Tighten a flange nut onto each bolt.
27. Check the "track to jamb" dimension that you provided when submitting your inquiry. You should also have received an email specifying your track to jamb dimension.
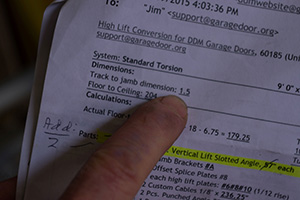
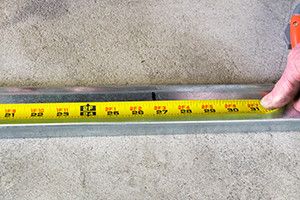
28. Measure from the platform to the bottom edge of the track. Adjust the bottom of the track in the junction bracket until the track to jamb dimension is accurate.
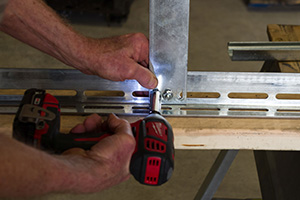
29. Tighten the top nut completely. Drill a second hole beneath the first bolt on the outside, flat part of the track.
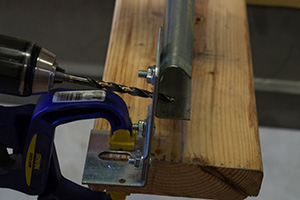
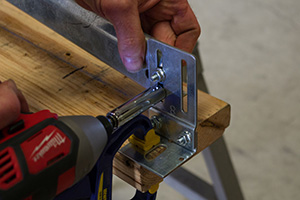
30. Insert another track bolt into the second hole. Tighten a nut onto the bolt.
31. Check to make sure that the two marks at the top of the #10 plate are on the flat part of the track. Drill two 1/4" holes through the marks on the top of the plate on the flat part of the track. If preferable, you can remove the track and lay it on a bench to drill the two holes. Ream the holes with the step drill bit afterward.
32. Insert a track bolt into the two holes and tighten a nut onto each bolt.
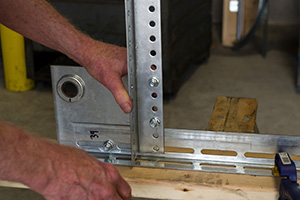
33. Insert a bolt into the second marked hole on the vertical track. Align the bolt with the middle slot on the top of the #8 high lift plate. Finger tighten a nut onto the bolt.
34. Align the bottom of the #8 high lift plate with the holes on the slotted angle. Insert two bolts into any two aligned holes on the bottom of the #8 high lift plate. Tighten all nuts on the #8 high lift plate.
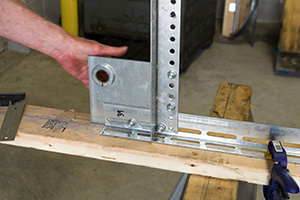
35. Check the "actual floor-to-shaft" dimension given on the paperwork that came with your order. This dimension is the distance from the floor, which is the bottom of your lower vertical track, to the center of the end bearing. This is where you will place your end bearing. You will need to locate your end bearing plate, so the center of the bearing is this same distance from the floor.
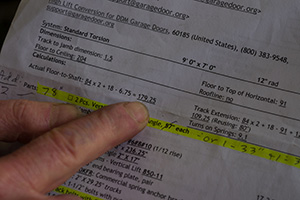
36. Measure the previously calculated floor-to-shaft value from the bottom of the two angles to the top. NOTICE: This dimension is critical! If the measurement is off by an inch, your door may not open or close. Mark the measurement on the angle with a marker.
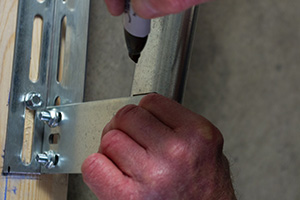
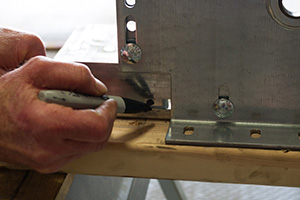
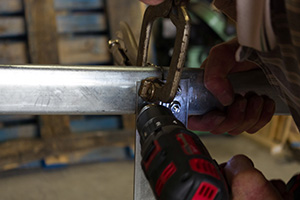
37. Remove the vise-grip that secures the junction bracket to the platform. Shift the whole vertical track assembly to the right and re-tighten the vise-grip to the upper slotted angle.
38. Align the center of the end bearing plate with the floor-to-shaft mark. If the hole on the bottom of the end bearing plate does not align with the angle, you can either drill a new hole OR you can cheat by inching the plate up until the holes align. Make sure that the plate is perpendicular and secure it to the slotted angle with a 3/8" carriage bolt and nut.
39. Place two track bolts on the top and the bottom vertical slots of the end bearing plate. Insert a washer on the end of each bolt.
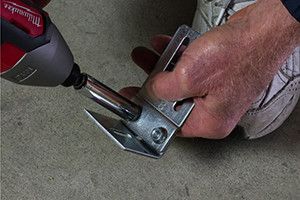
40. Align the punched angle onto the two track bolts on the end bearing plate. Tighten a nut onto each bolt.
41. Mark a small circle in the slotted angle hole that is overlapped by the bottom of the punched angle, as shown.
42. Use a 1/4" drill bit to drill a hole through the mark previously made on the bottom of the punched angle. NOTICE: The drilled hole must only go through the punched angle only. Finish drilling through the same hole with a 3/8" drill bit.
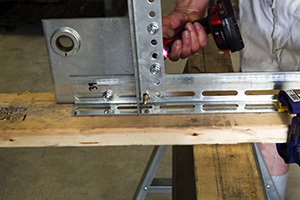
43. Insert a 3/8" carriage bolt and nut into the previously drilled hole on the plate. Tighten the nut completely.
44. Align the upper track beside the lower track. Slightly raise the end of the upper track to secure it to the angle with a vise-grip. Secure the bottom of the upper track to the top of the #10 high lift plate with a vise-grip.
45. Drill through the bottom hole of the #10 high lift plate with a 1/4" drill bit. Ream the hole with a step drill bit and insert a bolt and nut.
46. Eye-ball the position of the upper track on the punched angle. Once lined up, re-secure the track to the punched angle with a vise-grip.
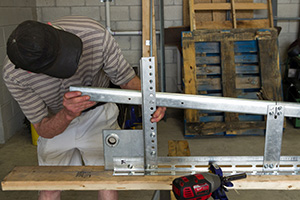
47. Drill a second hole on the top of the #10 high lift plate. Secure the bottom of the upper track to the plate with a bolt and nut.
48. Remove the vise-grip while holding the upper track in its aligned position. Drill through the hole on the punched angle that overlaps the track. Secure the track to the punched angle with a track bolt and nut. You can also remove the excess angle at this time.
49. Follow this same procedure for the track on the other side. The vertical lift tracks are now ready to be mounted onto the jamb. Double-check to see that all the nuts on the assembly are tightened completely with a socket wrench or an impact wrench.