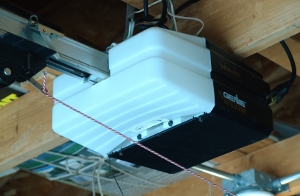
Extension Spring Pulley Replacement
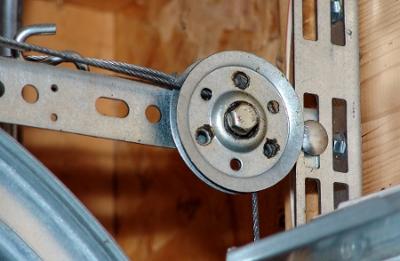
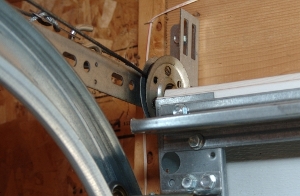
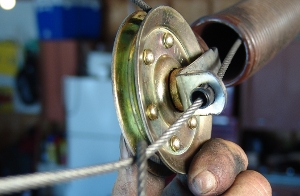
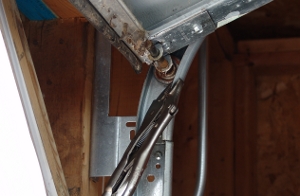
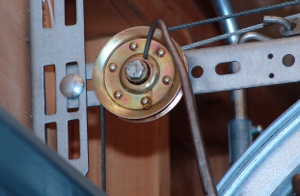
One major cause of failure for garage doors using extension springs is that the pulleys wear out. Usually, the ball bearings break down, causing the pulley to scrape against the track angle, or the rivets fail, and the pulley splits as in the picture above, causing the door cable to stick.
When the owner of this garage door called us she said, "The garage door opens part way and stops." This is one of the many symptoms caused by worn pulleys. This particular door would not sit evenly on the garage floor when we tried to open it, the garage door jammed.
Generally, when pulleys fail, the garage door does not open and close properly. The garage door closes part way and reopens. The door binds and sticks, and scraping sounds often accompany the other symptoms. Some times the first symptom is a frayed or broken cable, or a dangling extension spring, or a dent in the car. In my 30 years servicing garage doors, I have found these symptoms to be some of the more challenging for do-it-yourselfers to diagnose.
Caution: Extension springs can be very dangerous. Replacing the pulleys must be done with the garage door open. Carefully follow all of the safety instructions in this tutorial. Always stay out of the path of extension springs when the garage door is operating or when the door is closed, assuming the cable or spring could break at any moment, and the spring flies off and hits you.
At our parts page, you will find a variety of pulleys you can purchase for your garage door. On this door, 3-inch pulleys equivalent to our PU-30S were replaced with our PU-30H, which is rated to last twice as long. Since all the pulleys in the extension spring system are used approximately the same amount each time the garage door opens and closes, we recommend that you replace all four pulleys - this will save you time and reduce shipping costs.


Let's begin.
| 1. Unplug the power cord to your garage door opener. Some older openers are hardwired, and you will need to remove a fuse or flip a circuit breaker. | 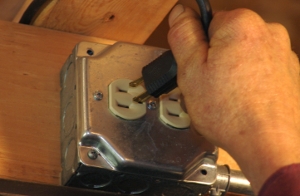 |
 | 2. Disengage the opener from the door. Some door openers have a neutral position for the trolley disconnect. On older openers, you may need to remove the L-shaped drawbar arm. |
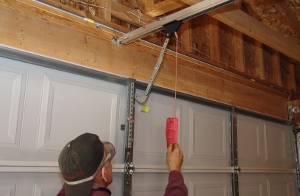
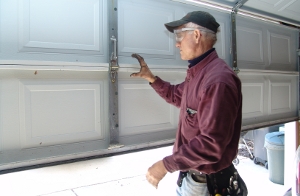
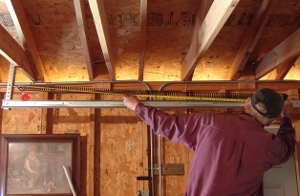
| 3. Open the garage door. If you try to lift the garage door from the middle of the door, it will probably open a little and stick. The door will likely also be uneven. | 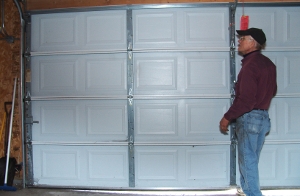 |
 | 4. When a pulley is worn the corner of the garage door will often catch on the broken pulley, preventing the door from opening. Caution: Forcing the door to open when the pulley is in the way can damage the top section. |
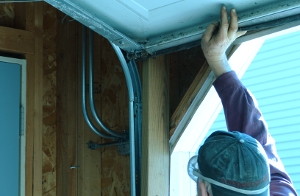
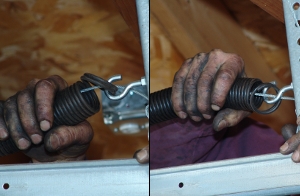
| 5. To open the garage door, you will probably need to move to the side of the door with the worn pulley. Lift the door, being careful to keep the top section from catching on the broken pulley. You may have to reposition yourself, so this does not happen. | 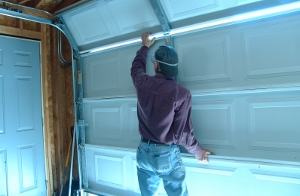 |
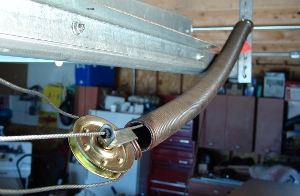
 | 6. Once you raise the door, you can wedge it open with a board, as shown. You can also use a broomstick, or you can prop a ladder under the middle of the door. Be creative! |
| 7. You can also use a vise-grip to hold the door open. Place a vise-grip on the track just below the bottom roller, as shown. | 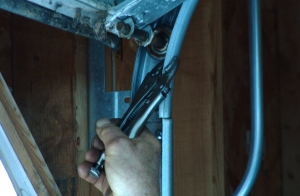 |
 | 8. Another way to hold the door open while working is to reengage the trolley. On Genie Screw Drive openers pull the trolley arm back toward the opener. This locks the trolley into the drawbar assembly. If you have a Sears, Chamberlain, or LiftMaster opener, you will need to plug in the power cord, run the trolley to the open position and reengage the opener trolley. Make sure you unplug the power to the opener again. |
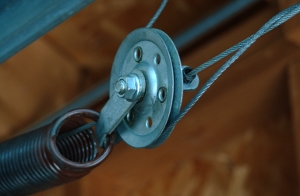
| 9. Let's return to the broken pulley. This pulley was worn out to the point that it was splitting apart. | 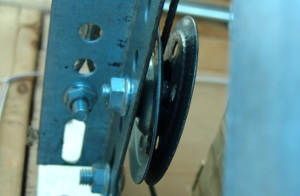 |
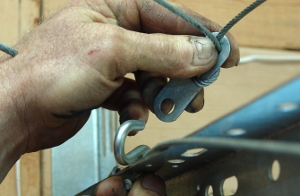 | 10. Remove the cable clip from the S-hook. Since we have already raised the garage door, the extension springs will be loose enough for the cable clip to come off of the S-hook. If these are damaged, you can purchase them from our parts list. |
| 11. Remove the cable from the pulley as shown. |  |
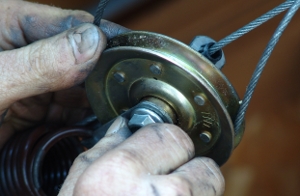
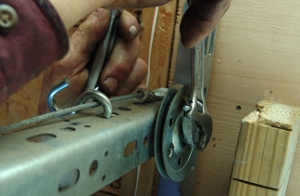 | 12. Loosen the nut and the bolt that hold the pulley to the track. |
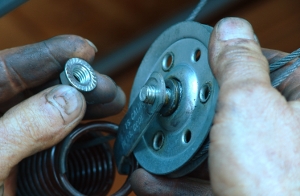
| 13. Remove the nut from the bolt. | 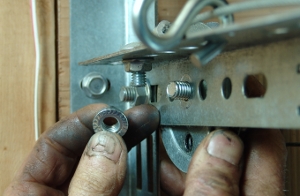 |
 | 14. Take the worn pulley off of the track and remove the bolt. |
| 15. Insert the bolt in the new pulley. | 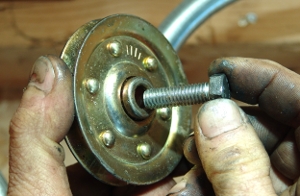 |
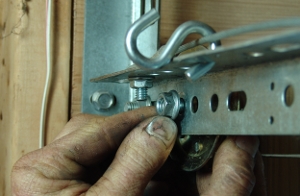 | 16. Place the new pulley back on the track. Finger tighten the nut on the bolt. |
| 17. Secure the bolt. | 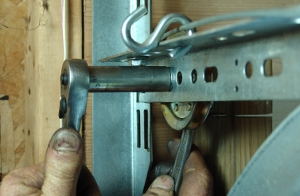 |
 | 18. Move to the other pulley on this side of the garage door. |
| 19. Loosen the nut from the bolt on this pulley. | 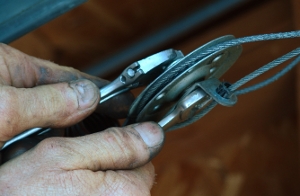 |
 | 20. Remove the nut from this assembly. |
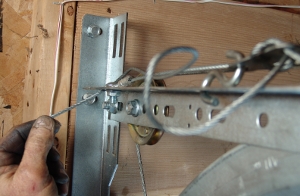
| 21. You may need a screwdriver to assist in the loosening of the cable and the removal of the bolt. | 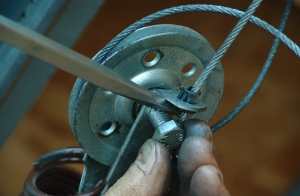 |
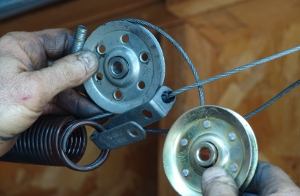 | 22. Once you remove the bolt, keep the cable on the old pulley and keep the pulley fork in its present orientation. If you rotate the cable or the pulley fork, the pulley will rotate as the extension spring expands and contracts when you open and close the garage door. |
| 23. Swap the old pulley with the new pulley. | 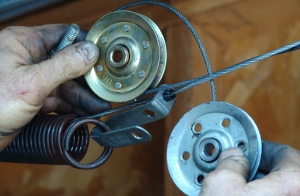 |
 | 24. Place the new pulley in the pulley fork. |
| 25. Insert the bolt in the new pulley, keeping the cable on the pulley, as shown. | 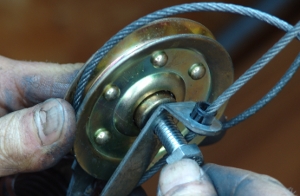 |
 | 26. Place the nut on the bolt, and finger tighten the nut. |
| 27. Secure the pulley to the pulley fork by tightening the nut and the bolt. | 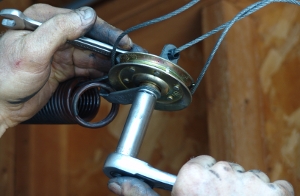 |
 | 28. You are now ready to attach the cable clip to the S-hook. Pull the cable that goes on the pulley attached to the extension spring. You may need to lift the spring to raise it above the track where it normally sits. |
| 29. Place the cable clip on the S-hook. | 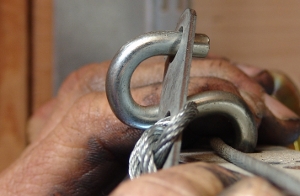 |
 | 30. If the cable is not taut and the spring sags below the track as shown, you will need to shorten the length of the cable. This is a sign that the extension spring is fatiguing and has lost some of its strength. You may want to consider replacing your extension springs, as they may only last a few more years. Even if the spring is not sagging, you may want to consider following these steps for threading the cable through the cable clip. This method of securing the cable to the cable clip has never failed for me. |
| 31. In order to shorten the length of cable, remove the cable clip from the S-hook. Pull on the cable near the cable clip. | 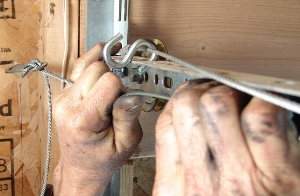 |
 | 32. Pull on the cable until the cable is tight (but not stretching the extension spring), and the spring rests on top of the track. |
| 33. Measure the distance from the cable clip to the S-hook on the track. | 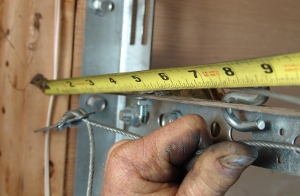 |
 | 34. Relax the tension on the cable. Re-measure this distance and place a vise-grip on the cable. |
| 35. Remove the cable from the cable clip, as shown. | 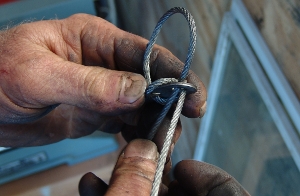 |
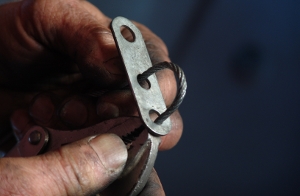 | 36. Make a U with the cable, as shown. The vise-grip should be touching the bottom of the cable clip. |
| 37. Slide the end of the cable through the side of the U, as shown. | 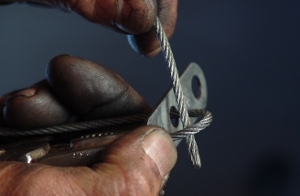 |
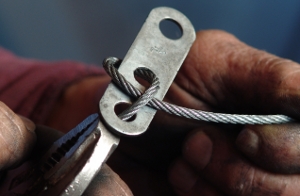 | 38. Pull the cable tight. |
| 39. Slide the end of the cable through the middle hole so that the new portion of the cable is inside the loop formed in the previous steps. |  |
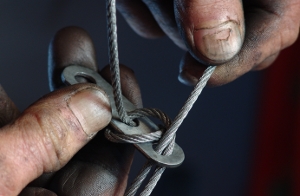 | 40. Remove the vise-grip. Insert the cable in the bottom hole where the vise-grip just sat. |
| 41. Pull the cable tight. | 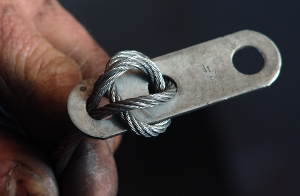 |
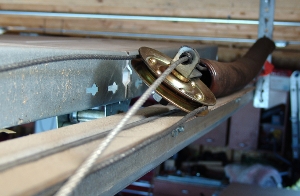
 | 42. Run the cable back through the pulley near the extension spring, as shown. |
| 43. Reinstall the cable clip on the S-hook, making sure that the cable still runs around the stationary pulley. | 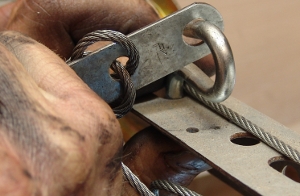 |
 | 44. At this point, you are finished replacing the pulleys. Thread the remaining cable through the outside of the track. This will keep the cable from damaging the garage door as it opens and closes. If you cut off the excess cable, you may need new cables the next time you replace your extension springs. |
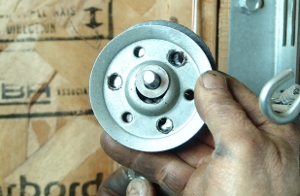
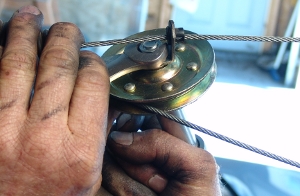
| 45. Move to the other side of the garage door and repeat this process. Remove the old stationary pulley. | 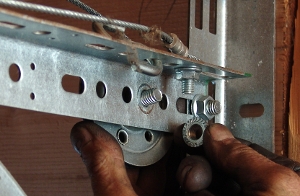 |
 | 46. Install the new stationary pulley. |
| 47. Remove the old pulley attached to the extension spring. As before, do not rotate the pulley fork or the cable. | 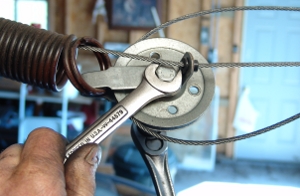 |
 | 48. Install the new pulley. |
| 49. Again, you will need to shorten the cable by the same amount as on the other side. This will cause each extension spring to lift the same force on each side of the garage door, allowing it to rise smoothly and evenly. | 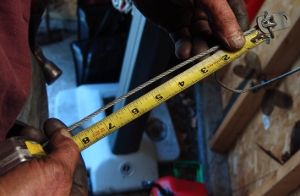 |
 | 50. Reinstall the cable clip on the S-hook, making sure that the cable still runs around the stationary pulley. |
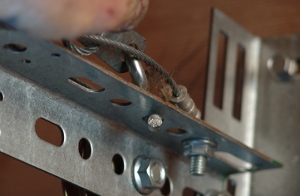
| 51. Verify that the cable is still attached to the bracket at the bottom of the garage door. Check this on both sides of the door. | 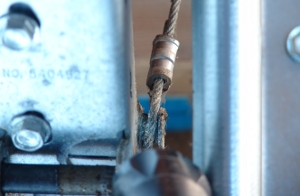 |
 | 52. Remove the vise-grip from the track, and lower it a few inches. At this point, we had to go to the other side and remove the board that was also supporting the door. We also disengaged the opener. The vise-grip was positioned there for safety to keep the door from dropping and slamming onto the floor if something had been overlooked in the repair process. |
| 53. If the garage door stays open, remove the vise-grip from the track. | 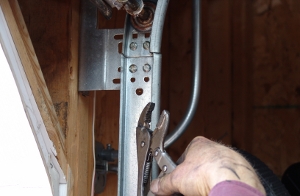 |
 | 54. Check the strength of the extension springs. When it is open halfway, it should not move. When it is opened most of the way, it should stay or pull itself up the remainder of the way. When the garage door is almost closed, it should stay or drop to the floor. |
| 55. Check to see if the door is level. The door should be sealed to the floor all along the bottom. | 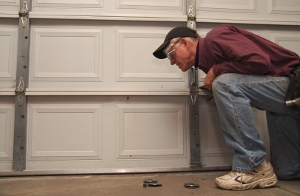 |
 | 56. If one side of the door is too high, you will need to shorten that spring. In this case, the right extension spring was too strong. Place a vise grip just below the roller on the side that is too strong, as shown. |
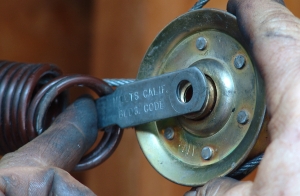
| 57. Rather than adjusting the cable in the cable clip, you can move the S-hook to a hole that is closer to the garage door. | 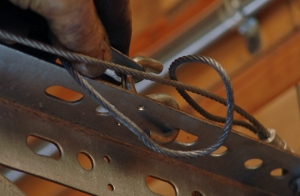 |
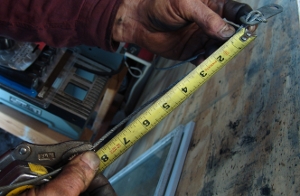
 | 58. To verify that you have the proper positioning of the S-hook, you can measure the length of each extension spring. Each one should be equal length. Extension springs normally stretch out to 67" when they are new. If the springs are stretched to more than 75", they will probably need to be replaced soon. |
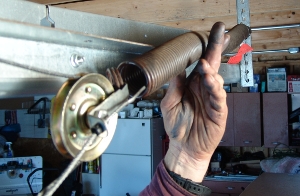
| 59. Grease the top of the track where the pulleys and extension springs ride. This will eliminate the common scraping sounds associated with garage door extension springs. It will also help preserve your garage door hardware. | 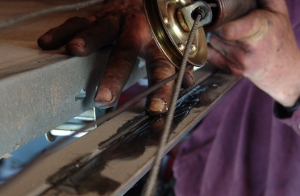 |
 | 60. Oil your stationary pulleys. |
| 61. Reengage your operator. |  |
 | 62. Manually open and close the door to look and listen for any problem areas. Scraping sounds can usually be dealt with using grease. If the pulley rotates as the garage door opens and closes, you may need to rotate the position of the extension spring, as shown. |
| 63. Plug in the power cord for the opener. Adjust the force and travel as needed. |  |