How to Replace Garage Door Extension Springs
Caution: Extension springs can be very dangerous. Replacing the pulleys must be done with the garage door open. Carefully follow all of the safety instructions in this tutorial. Always stay out of the path of extension springs when the garage door is operating or when the door is closed, assuming the cable or spring could break at any moment, and the spring flies off and hits you.


Let's begin.
| 1. Unplug the power cord to your garage door opener. If you have an older opener, you may need to remove a fuse or flip a circuit breaker |  |
 | 2. Disengage the opener from the door. Some garage door openers have a neutral position for the trolley disconnect. On older openers, you may need to remove the L-shaped drawbar arm. |
| 3. Weigh your garage door. This can still be done when only one extension spring is broken. You may need to use a 2x4 or some other object to pry the garage door open. Place scale under the garage door on the side of the door with the broken extension spring. Do not use a digital scale, as they often will not respond to the door weight changing as rollers no longer stick to the track. This video will help you weigh a garage door with extension springs. | 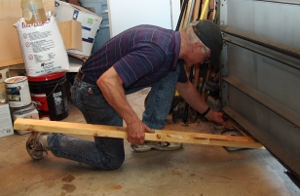 |
 | 4. Shake the garage door to loosen the rollers in order to get an accurate weight reading. NOTE: You will need to raise the opposite end of the garage door by the same height of the side with the scale under it by placing a brick, a piece of wood, or another object under the door on the side without the scale in order to get an accurate weight reading. If the garage door itself is not level, you will not be able to get an accurate reading as the door may bind in the tracks. |
| 5. Since the extension spring on this door was broken on the left side, I weighed the door on the left side. This gives you half of the door weight. If you read 100 pounds on a scale using this method, your door actually weighs 200 pounds. Since extension springs are determined by how much weight they each lift and the pulley system cuts this in half, you need to replace your old springs with 200-pound extension springs. | 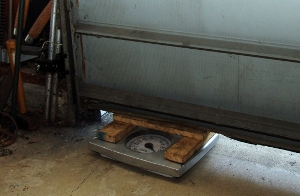 |
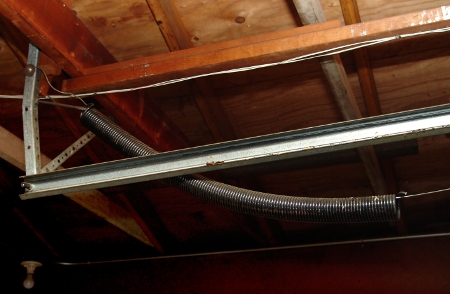
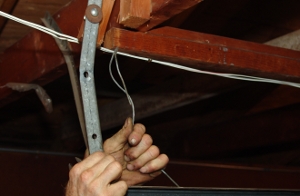
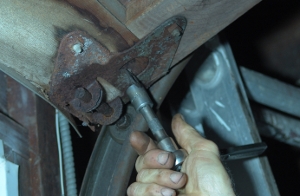
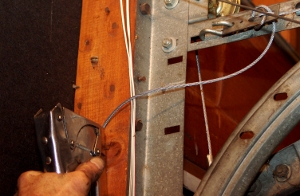
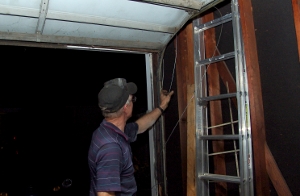
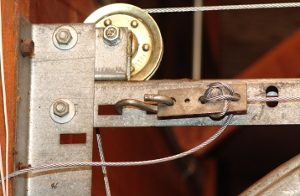
 | 6. Caution: Do not try to remove the extension spring that is not broken when the garage door is closed. Move to the back of the garage where the broken extension spring is located. Pry open any eye-hook that secures the spring to the wall. |
| 7. It may be easier to remove the extension spring from the eye-bolt if you remove the bolt from the wall or angle iron. | 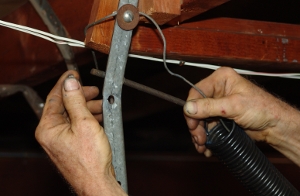 |
 | 8. If the eye-bolt is secured to a piece of wood as shown, you may need to loosen the bolt on the other end in order to remove the extension spring. |
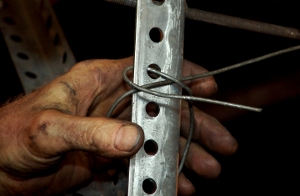
| 9. If you have a safety cable, loosen it from the wall or angle iron. Caution: this will allow the spring to fall to the floor, and it may hit your car or other possessions. Hold on to the safety cable as you loosen it. | 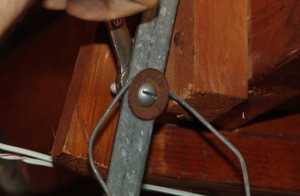 |
 | 10. Remove the safety cable. |
| 11. Lower the broken extension spring, and hold on to it as you climb off of your ladder. | 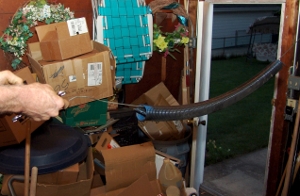 |
 | 12. Remove the broken extension spring from the safety cable. |
| 13. Examine your track and the support in the back. If the angle iron is bent or not well-secured, you should follow the next few steps to replace it now. | 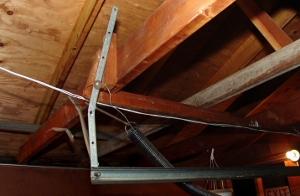 |
 | 14. Remove the bolt securing the track to the angle iron. |
| 15. Remove anything that secured the safety cable to the angle iron or wall. | 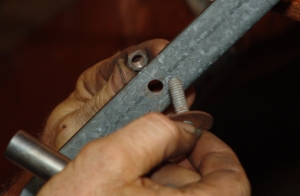 |
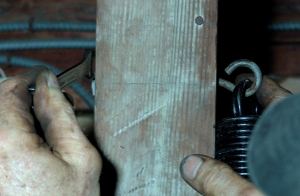
 | 16. Remove the old angle iron from the garage ceiling or wall. |
| 17. Measure the distance from the center of the track (make sure that it is level!) to the location where you will secure the angle iron. | 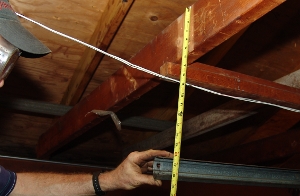 |
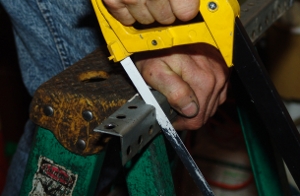 | 18. With this measurement, cut a piece of angle iron to secure the track. |
| 19. Attach the angle iron to the track. | 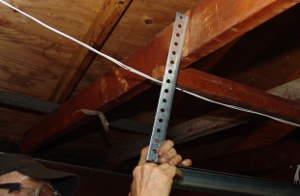 |
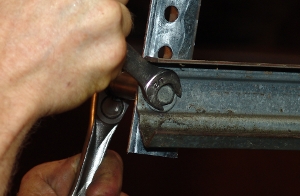 | 20. Secure the bolt. |
| 21. Secure the angle iron to the wall or ceiling. |  |
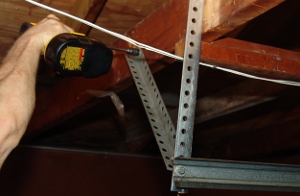 | 22. Add another piece of angle iron. |
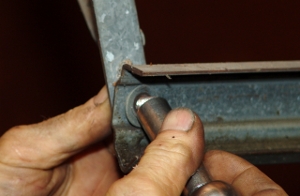
| 23. Reinstall the eye-bolt. | 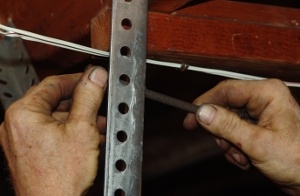 |
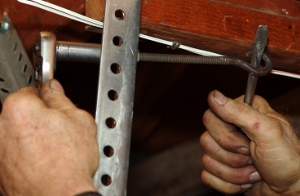 | 24. Secure the eye-bolt to the angle iron. You can use a screwdriver as shown to tighten the bolts. |
| 25. Open the garage door by hand. Lift from the side of the garage door that has the broken spring. This may be difficult with only one extension spring. You may need to have someone help you. |  |
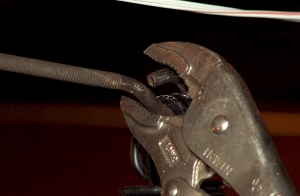
 | 26. Once you open the garage door, vise-grip the track just below the bottom roller. Make sure that the vise-grip will hold when you let go of the garage door. |
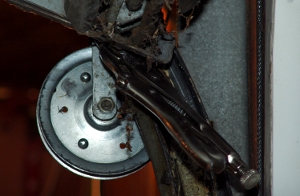
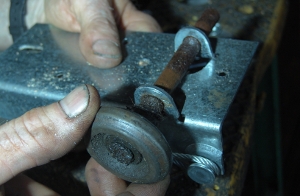
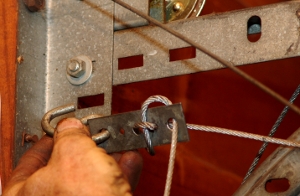
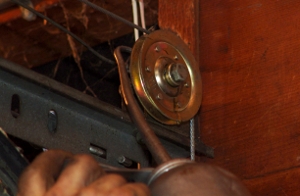
| 27. Check your stationary pulley. Worn pulleys frequently accompany broken extension springs. | 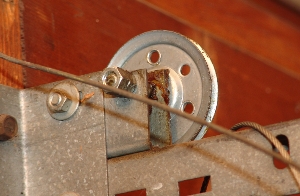 |
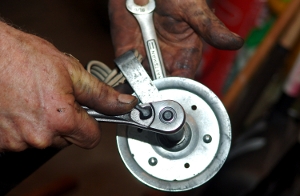
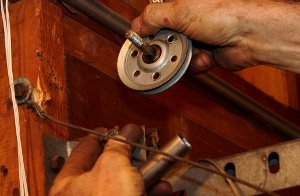 | 28. If your pulley is worn, you will need to replace it. Remove the bolts that secure the pulley to the track. |
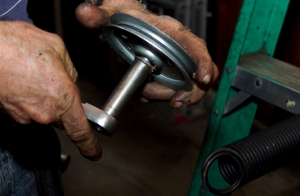
| 29. Insert the bolt from the old pulley into the new pulley. |  |
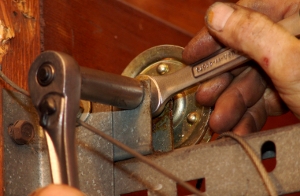 | 30. Install the new pulley. Secure the bolts. If you decide to wait to replace your pulleys, you can find a tutorial here. If you need to replace your pulleys, though, it is a lot easier to do it now than to wait. |
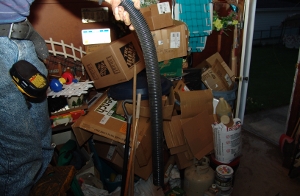
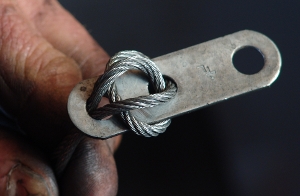
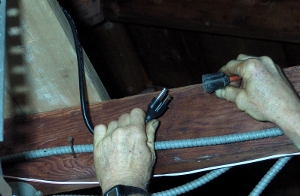
| 31. Examine your cable. If you realize between now and when you close your garage door that your cables are frayed, rusting, or damaged, you can still easily change your cables. If you need to replace the cables, remove the cable from the bottom fixture. You may need to use a screwdriver to pry it off. | 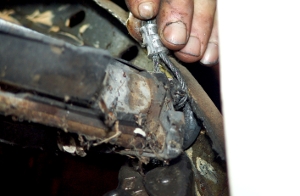 |
 | 32. Pull the cable out from the garage door. |
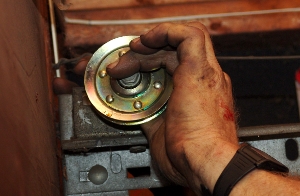
| 33. Some older garage doors use a bottom fixture that has the cable built into it. In order to change the cables, you will have to replace your bottom fixtures. This is a bottom fixture that came off an old wooden door. Follow the next few steps to change your bottom bracket. | 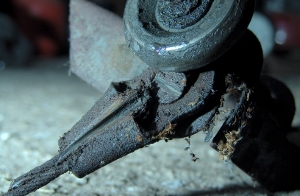 |
 | 34. Remove the bolts that secure the bottom bracket to the garage door. |
| 35. Remove the bottom bracket from the door. | 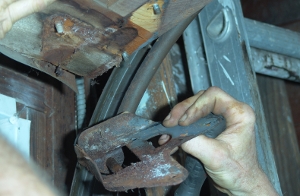 |
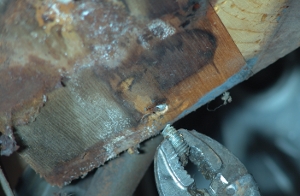 | 36. Using a vise-grip, break off any bolts that do not come loose. |
| 37. Remove the bracket from the other side of the garage door. | 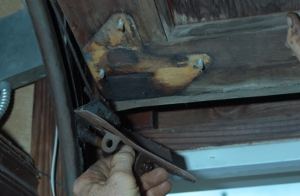 |
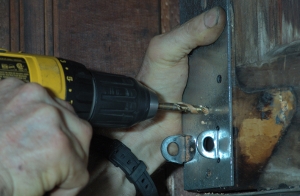 | 38. Place your new bottom bracket on the bottom of the garage door. Pre-drill the door for the new carriage bolts. |
| 39. Insert the carriage bolts through the door from the outside. | 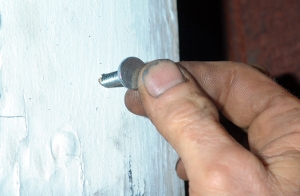 |
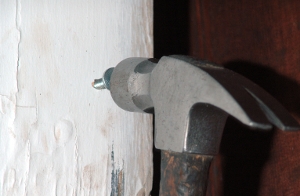 | 40. Tap the carriage bolt into the garage door with a hammer. |
| 41. Repeat this process on the other side of the door. | 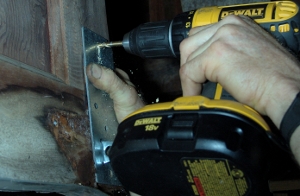 |
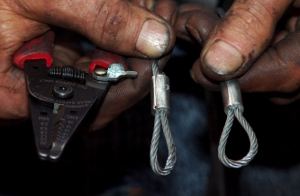
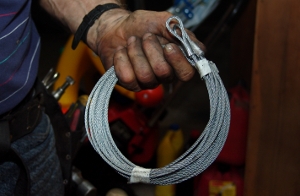 | 42. Get your new extension spring cable. |
| 43. Remove the bottom brackets from the door. Insert the look of the cable on the bracket, as shown. | 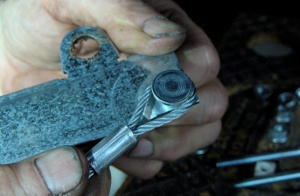 |
 | 44. Slide the roller from the old bracket on the new bracket. |
| 45. Place the bracket back on the garage door. | 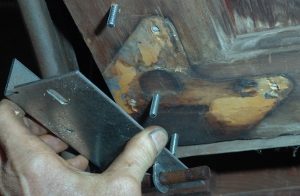 |
 | 46. Secure the bracket with bolts. |
| 47. Repeat this process for the other bottom bracket. | 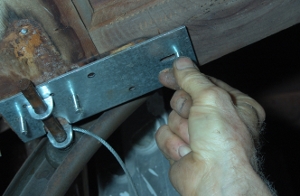 |
 | 48. Remove the S-hook from the track. |
| 49. Remove the S-hook from the pulley that was attached to the extension spring. Disassemble the pulley. If necessary, replace this pulley as well. |  |
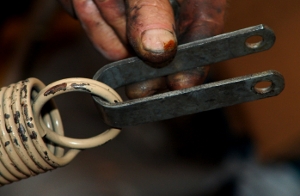 | 50. Slide the pulley fork on the new extension spring. |
| 51. Slide the bolt back through the pulley and pulley fork. | 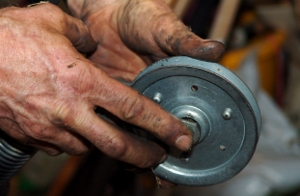 |
 | 52. Secure this bolt. |
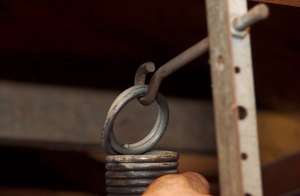
| 53. Slide the end of the extension spring in the eye of the eye bolt. If your new extension springs have clips on them, the clips will be secured by the eye-bolt. | 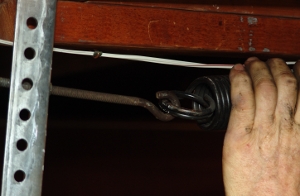 |
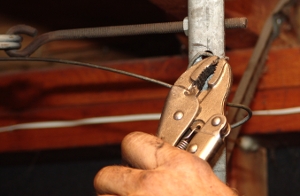
 | 54. Secure the eye-bolt with a vise-grip. |
| 55. Your extension spring is now assembled. |  |
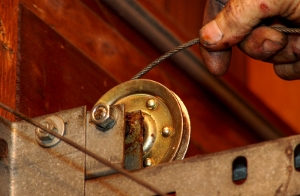
 | 56. If you did not change your cables or if you replaced your bottom bracket, slide the cable over the stationary pulley as shown. |
| 57. If you just replaced your cable, you may need to pinch cable. This is only necessary if you have a smaller slot on your bottom bracket. | 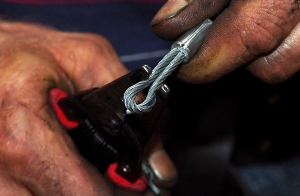 |
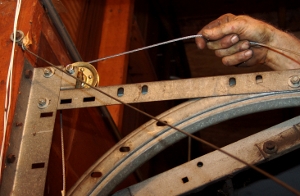
 | 58. You can determine whether or not you need to pinch the cable by comparing the size of the loop to your old cable. After your cable is ready, install the loop on the bottom bracket. Slide the cable over the stationary pulley. |
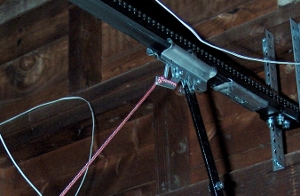
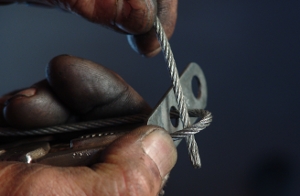
| 59. Slide the end of the cable through the pulley that is attached to the hanging extension spring. | 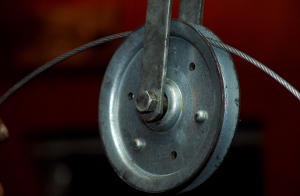 |
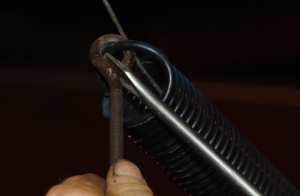
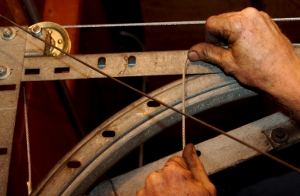 | 60. Pull the end of the cable to the outside of the garage door toward the front, as shown. Pull on the cable until the extension spring lies above the track. Grab the cable at a point that is about three inches from the slot on the track where the S-hook used to be. It may be useful to vise-grip the cable here. |
| 61. If you did not already remove this cable clip from your old cable, do so now. You now need to tie the cable to the cable clip. Make a U with the cable, as shown. If you vise-gripped the cable, it should be touching the bottom of the clip. | 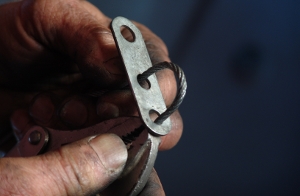 |
 | 62. Slide the end of the cable through the side of the U, as shown. |
| 63. Pull the cable tight. | 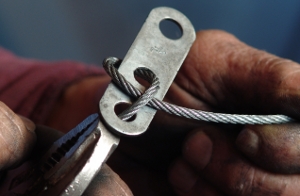 |
 | 64. Slide the cable through the middle hole so that the new portion of the cable is inside the loop formed in the previous few steps. |
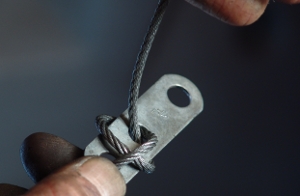
| 65. Remove the vise-grip from the cable. Insert the cable in the bottom hole where the vise-grip just sat. | 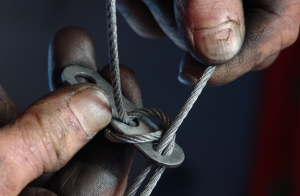 |
 | 66. Pull the cable tight. |
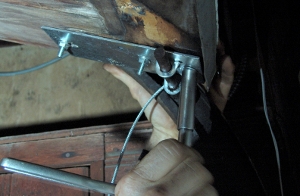
| 67. Slide the S-hook through the other hole, and insert the S-hook in a hole in the track. Make sure that the cable passes over both pulleys. |  |
 | 68. Move the remaining cable out of the way. Using a staple gun works well. This will keep the cable from damaging the garage door as it opens and closes. If you cut off the excess cable, you may need new cables the next time you replace your extension springs. |
| 69. Slide the safety cable through the extension spring. If you do not have a safety cable, you probably found your extension spring hanging close to or on top of your car. When extension springs break, and there is not a safety cable, they frequently go flying to another part of the garage. |  |
 | 70. Secure the safety cable to the angle iron or the wall. |
| 71. Remove the vise-grip from the track. | 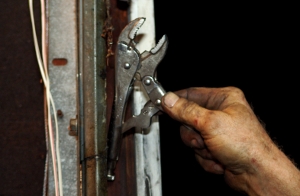 |
 | 72. Slowly lower the garage door. Check to make sure that you have the correct extension spring. If you do not, the garage door will not close properly or may sit with a gap on one side of the floor or the other. |
| 73. Open your garage door again. Vise-grip the track just below the roller on the side of the door that does not have the broken extension spring. | 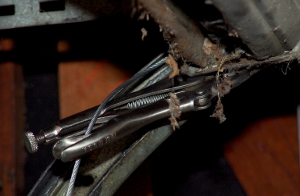 |
 | 74. Repeat this process for the other side of the garage door. Remove the cable from the stationary pulley and replace the pulley if necessary. |
| 75. Remove the safety cable. | 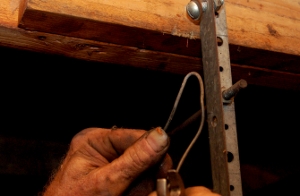 |
 | 76. Remove the other pulley from the old extension spring. |
| 77. Install the pulley on the new extension spring. | 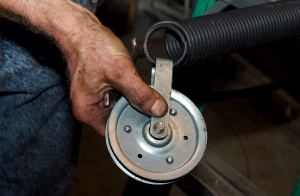 |
 | 78. Insert the loop (or hook) of the extension spring on the eye-bolt. |
| 79. Secure the eye-bolt. | 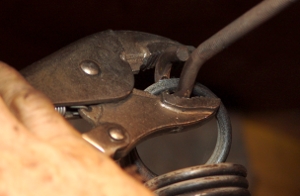 |
 | 80. Replace your cable as necessary. Thread the cable through the pulley fork and around the pulley. |
| 81. Re-thread the cable on the cable clip if necessary. | 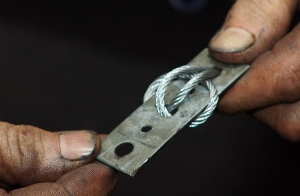 |
 | 82. Install the cable on the S-hook. Move the remaining cable out of the way. |
| 83. Install the safety cable. | 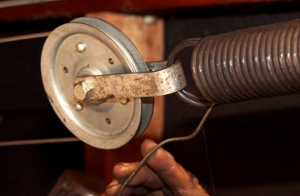 |
 | 84. Secure the safety cable to the angle iron or the wall. |
| 85. Close the garage door. Measure the length of each extension spring. Caution: Stay out of the path of the extension spring! If both springs are the same length, the garage door should be level across the floor. | 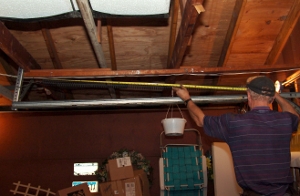 |
 | 86. If the extension springs are not the same length, open the garage door and change the location of one of the S-hooks so that when you close the door, both springs are the same length. Caution! Be sure the door is open and supported when doing this. After matching the spring lengths, if the door is a little heavy, open the door, support it, and move each S-hook the same distance along the track angle toward the header. If the springs are too strong, move each S-hook the same distance away from the header. |
| 87. Oil the rollers on your garage door. This will help keep your door running smoothly for many more years. | 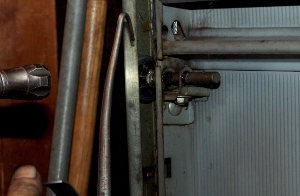 |
 | 88. Oil the stationary pulleys. This will help prolong the lives of the cable and of the pulleys. |
| 89. Re-engage your opener. | 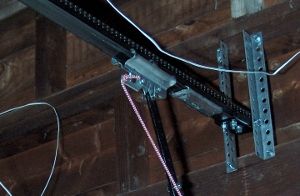 |
 | 90. Plug in the power cord for the opener. Adjust the force and travel as needed. |