Low Headroom Modification for Steel Doors
Several types of top fixtures have been developed to accommodate low headroom situations. One of the more popular are the double roller low headroom top fixtures, also called quick close fixtures, quick closing fixtures, and rapid flex brackets.
For many decades these low headroom top fixtures have been used successfully on wood garage doors by lowering the top strut below the top fixture. Lowering the top strut on a steel garage door, however, compromises the section's integrity and has led to many damaged top sections.
This tutorial offers one solution for installing low headroom double roller top fixtures without damaging the section. This will allow a door to operate with a headroom clearance between 9 and 12 inches.


1. In order to complete this job you will need the following parts for each door:
2 feet of 1 ½ x 2 ¼ slotted angle iron, cut into two 12 inch sections
3 feet of 1 ¼ x 1 ¼ slotted angle iron, cut into two 6 inch sections and two 12 inch sections
20 Tek ¼ inch-20 thread size, 1 inch screws
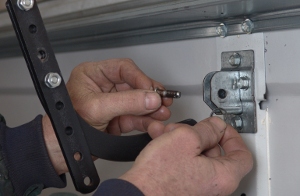
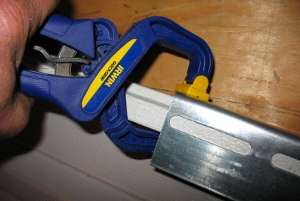
To begin, if installing an opener, disconnect the opener drawbar arm from the garage door. You typically need to remove a clevis pin by first taking off the cotter pin, as pictured.
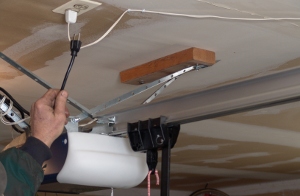
2. Unplug the power to the opener. This will keep the opener from running if somebody accidentally tries to open the door while you are working.
3. If the strut has already been installed on the door, lock the door or install a vise grip above a roller to prevent the door from possibly rising and knocking you off the ladder. After securing the door, remove the top strut. Remove the ends first, and the center last to ease handling of the long strut.
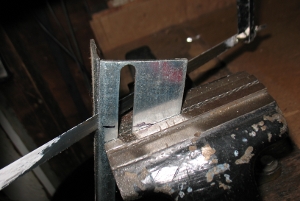
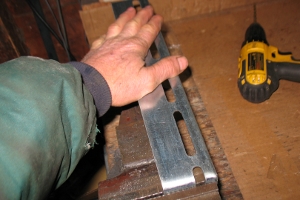
4. Remove one of the existing top fixtures on one side of the door. Some top fixtures have two screws; others may have three or four. Use a vise grip on the track below the top section, or a 2 X 4 to prevent the top of the section from falling out of the opening while you work on it.
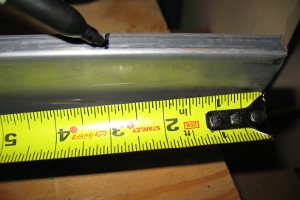
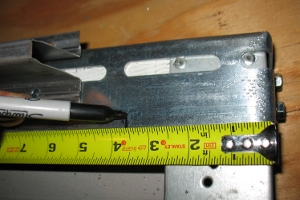
5. Measure the thickness of the top section.
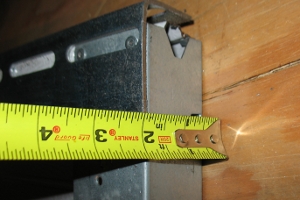
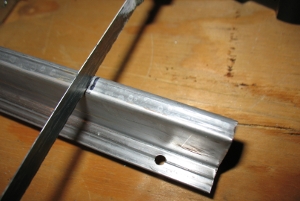
6. Mark the angle at the same distance from the end.
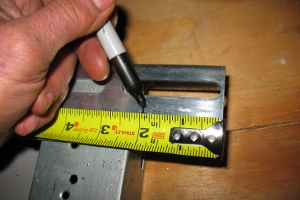
7. Continue the mark on the other side of the angle as this part will be removed.

8. Cut the end of the angle to the mark in the center of the angle point.
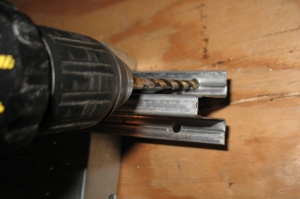
9. Remove the narrower side of the angle with a hack saw. This is the part that would have been on the top of the top section.
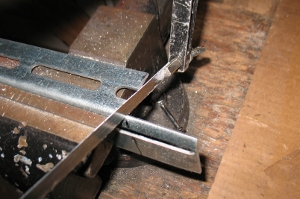
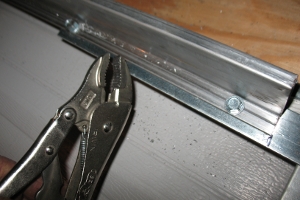
10. If you are using a high lift angle, drill a hole in the center of the wider portion.
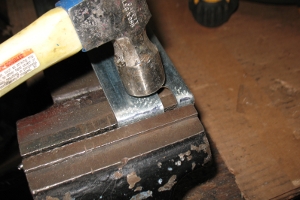
11. Grip the angle in the vise just below the mark.
12. Bend the angle until it is at 90 degrees, being careful to bend the metal evenly and square.
13. Hammer the angle to form a tight 90-degree bend.
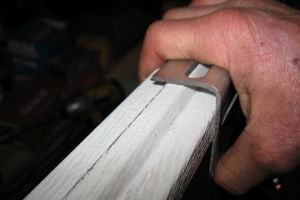
14. Place the angle on the top section to test the fit. The angle should fit snugly on the end. Bend the angle as needed to accomplish this.
15. Check the other end to make sure it is tight against the top of the section.
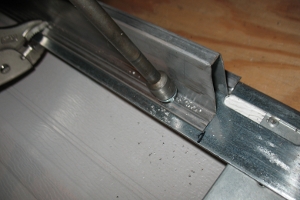
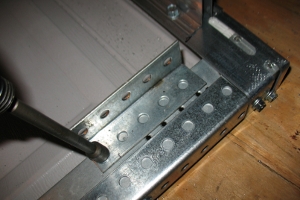
16. Grip the angle to the top section.
17. Secure the bent piece to the end of the section with two self-drilling teks.
18. It is now time to install the strut. It will need to be shortened first, to the width of the door minus seven inches. Measure and mark the strut.
19. Shorten the strut with a hacksaw, or a cut-off saw.
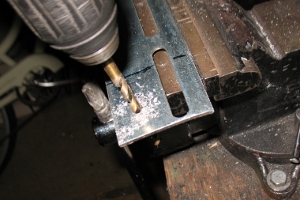
20. Drill new holes at the end of the strut as needed.
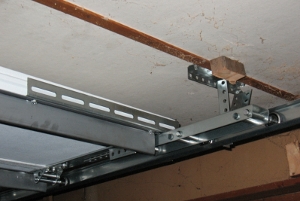
21. Measure and mark 3 1/2 inches from the end of the section for positioning the end of the strut.
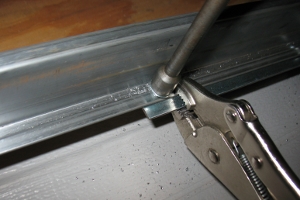
22. Position the strut in place and secure temporarily with a vise grip. You will need to support the strut in the middle when you do this. The edge of the strut should be parallel to the edge of the angle.
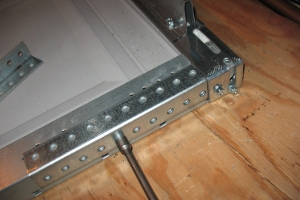
23. Secure the center of the strut to the top of the center stile in the center of the door with a tek.
24. Secure the end of the strut to the angle.
25. Secure the strut to the other end of the angle.
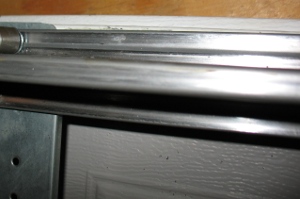
26. Secure the top of the strut at both ends as well.
27. Remove the vise grip.
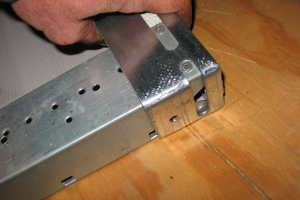
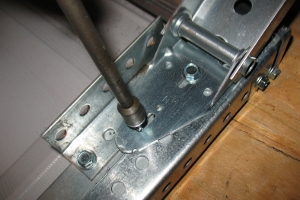
28. Notice here the four teks securing the strut to the angle, and the two teks securing the angle to the end stile of the top section.
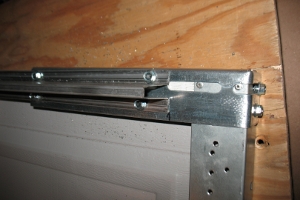
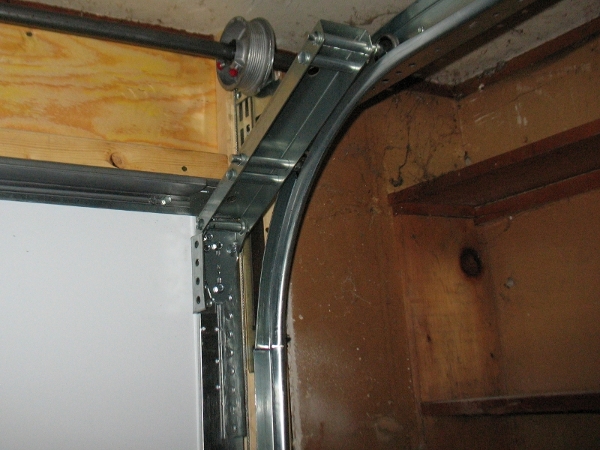
29. Position the longer angle to the side of the end stile.
30. Temporarily secure the shorter angle to the end stile about a quarter inch from the other angle.
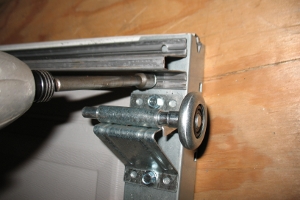
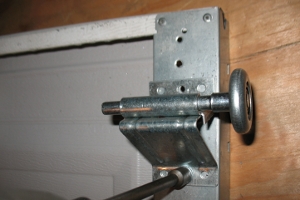
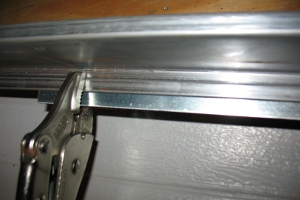
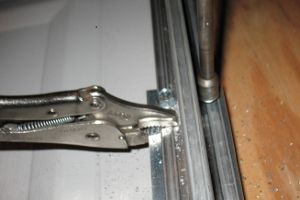
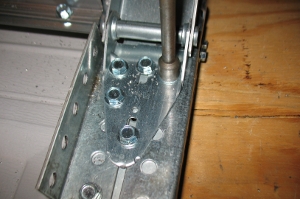
31. It is now time to install the new double roller top fixture. Install two rollers in the first and third roller carriers as pictured and place them in the track. Position the lower part vertically so that when it is in place, the top of the top section stays firmly against the header. The lower part of the bracket should be plumb and flush with the angle on the top section.
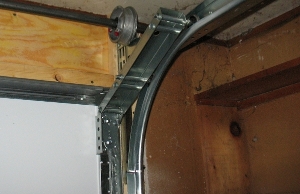
32. Secure the base of the top fixture with two teks. Test the height by confirming that the top section is snug against the header.
33. Add three additional teks as shown to secure the top fixture to the end stile.
34. Repeat the same procedure on the other side. Secure the strut to all the stiles.
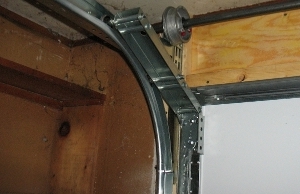
35. Open the door and test the functioning of the top fixtures. If the door is working fine, install the opener or reinstall the arm and plug in the power cord.