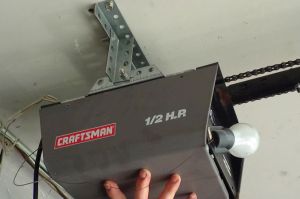
Chamberlain, Liftmaster, Sears Gear and Sprocket Replacement
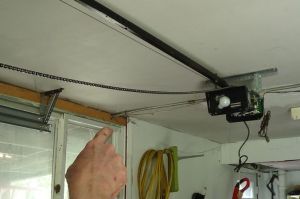
In most Chamberlain, Liftmaster, and Sears openers a motor turns the worm gear and drive shaft inside the opener, which rotates the sprocket attached to the top of the drive shaft. This turns the chain and moves the door.
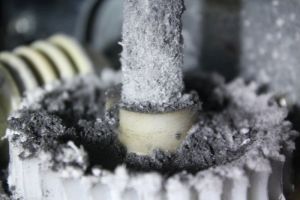
The most common issue that occurs is when the ridges in the gear wear out because the gear lubrication has evaporated. As a result of the worn gear, the sprocket cannot turn the chain, and the door will not open nor close.
This tutorial demonstrates how to replace the gear and sprocket assembly on all Chamberlain, Liftmaster, and Sears openers.


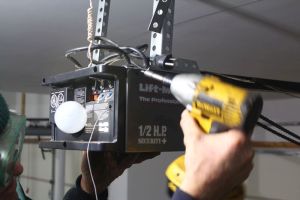
1. Unplug the opener.

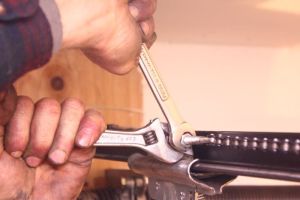
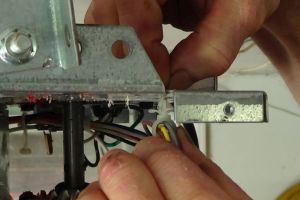
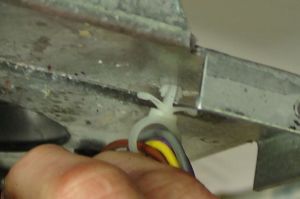
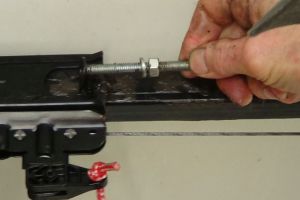
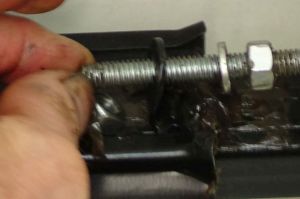
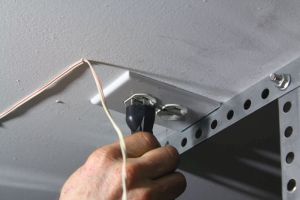
2. Remove the bolt that secures the chain to the trolley by using two 1/2 " open end wrenches or two adjustable wrenches to loosen the nuts.
3. Screw the second nut back on the bolt.
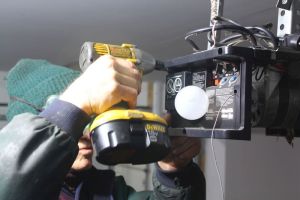
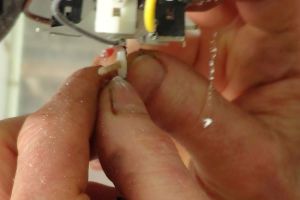
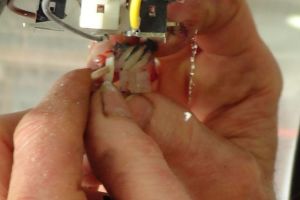
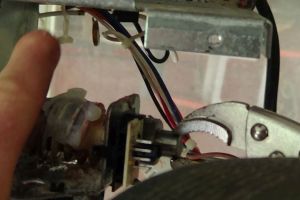
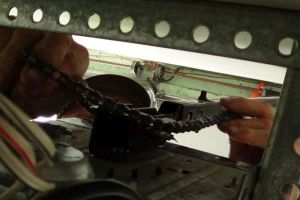
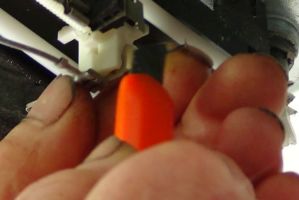
4. If the sprocket is still on the top of the opener, carefully remove the chain from the sprocket. Keep your fingers on the sides of the chain at least three inches away from the sprocket, lift up the chain, and unwrap it from the sprocket.
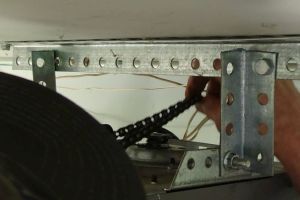
5. CAUTION! Serious injury to the hand or fingers may occur if the chain is not safely removed.

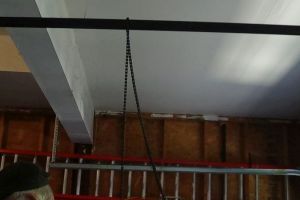
6. Let the chain rest on the door side of the opener.
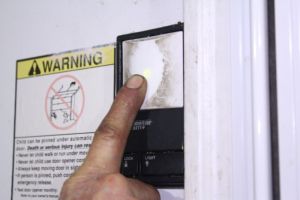
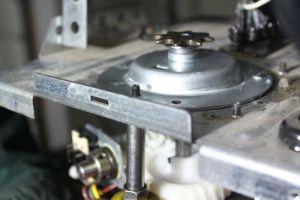
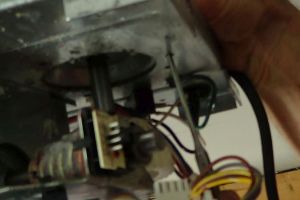
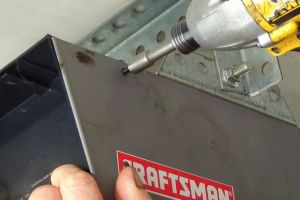
7. Remove the sprocket cover on the top of the opener.
8. Notice that the sprocket is loose in the slot on the top of the opener.
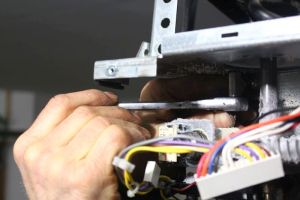
9. Remove the side and bottom cover of the opener by removing two screws at the top on each side, and screws at the bottom as well on the front and back of the opener.
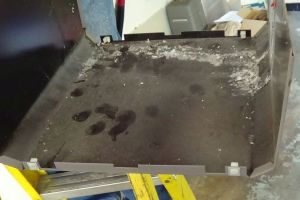
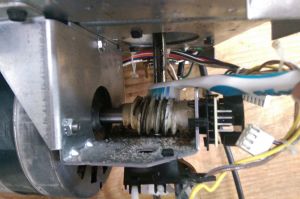
10. Notice the debris inside the cover. This indicates the wear from the shaft and bushing.
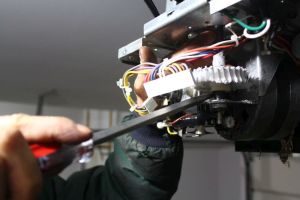
11. Remove back cover by loosening the two screws on top.
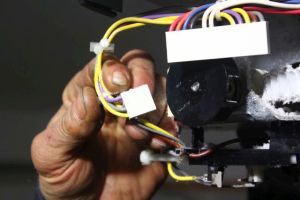
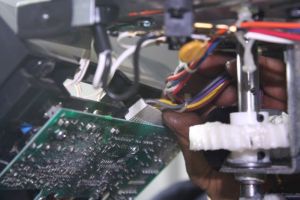
12. Unplug the wiring harness attached to the circuit board.
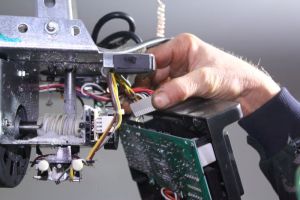
13. Move the back cover and circuit board aside, away from the opener.

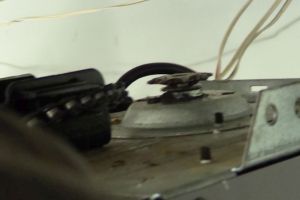
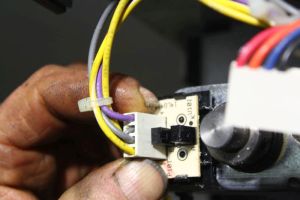
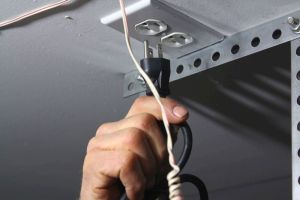
14. Pinch the top of the wiring clip and pull on the bottom simultaneously to remove it.
15. Unplug the RPM wiring harness.
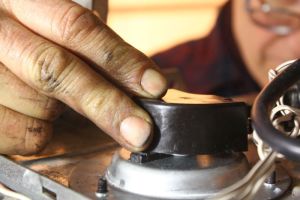
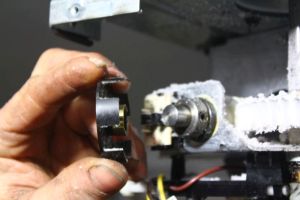
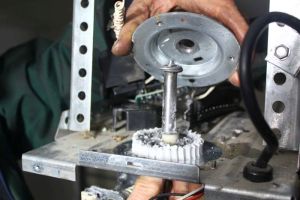
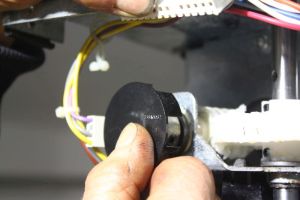
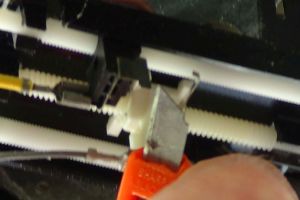
16. Remove the RPM sensor wheel, also called the interrupter cup, by grasping it with two fingers and your thumb, slowly pulling it off the end of the motor shaft.
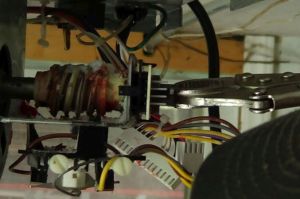
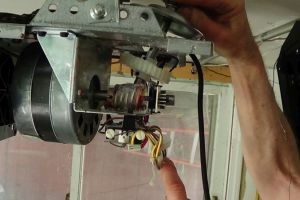
17. Move the wires aside, away from the worm gear and the gear and sprocket assembly.
18. Remove the E-shaped retainer clip at the bottom of the gear and sprocket assembly.
19. Slide the limit drive gear off the bottom of the drive shaft.
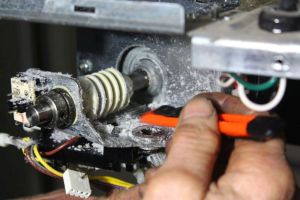
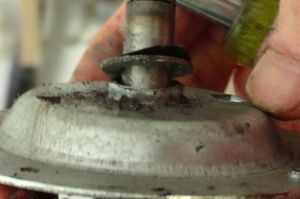
20. Clean the gear dust and debris from the frame under the motor shaft and worm gear with a knife or other flat utensil. Failure to clean under the gear might shorten the life of the gear because the grease will become mixed with the old gear debris.
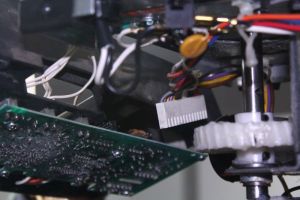
21. Clean the dust from the RPM sensor eyes. Be sure to clean the sides and in between the sensor eyes.
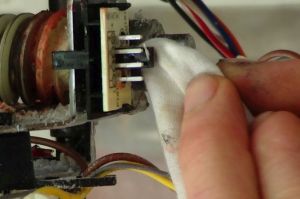
22. Clean the RPM sensor wheel with a cotton swab, rag or air pressure. Failure to clean both the RPM sensor eyes and the RPM sensor wheel could cause the RPM sensor to malfunction. The motor would then run for two seconds and reverse to where it was before. As a result the garage door will open a few inches and stop, or it will close a few inches and reverse.

23. If needed you can clean the debris from the worm gear with compressed air or WD-40 and a tooth brush.
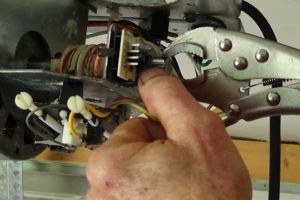
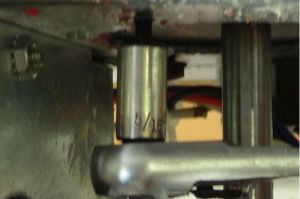
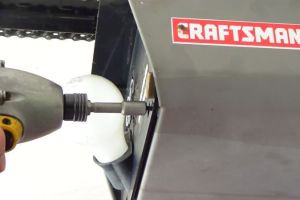
24. Remove the two screws closest to the back of the opener securing the gear and sprocket assembly with a 5/16" hex nut driver.
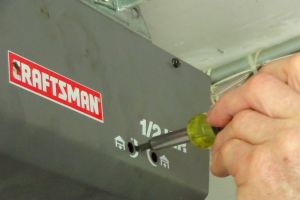
25. Remove the third screw securing the gear and sprocket assembly with a 5/16" open end wrench or a 1/4"socket wrench with a 5/16" socket.
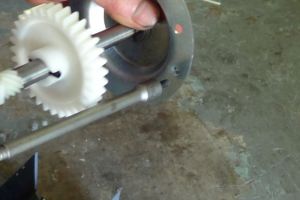
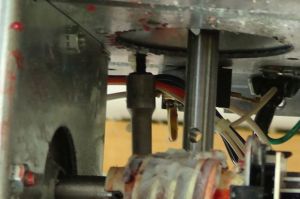
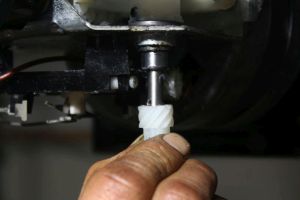
26. Remove the gear and sprocket assembly from the bottom bushing. If the shaft binds, pry it out with a screwdriver.
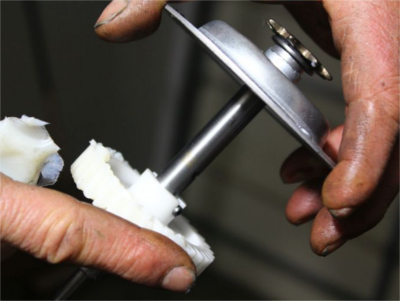
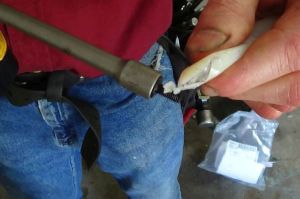
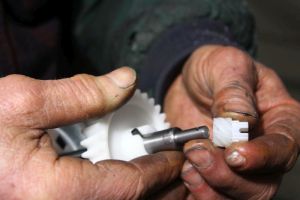
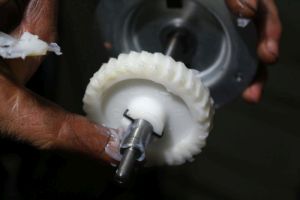
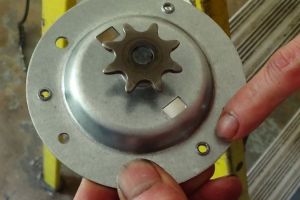
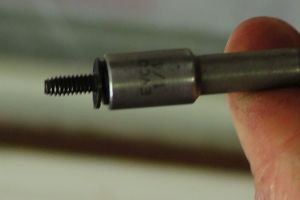
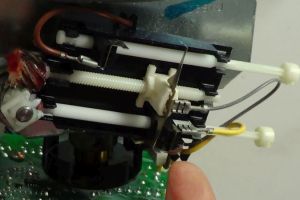
27. On the old assembly notice the black debris on the top of the gear,
28. The worn neck,
29. And the worn plate of the gear and sprocket assembly.
30. Before installing the new gear and sprocket assembly, you need to first tap the three holes. Use grease from the kit to lubricate the three screws that secure the gear and sprocket assembly to the opener frame.
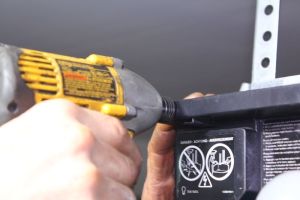
31. Use a nut driver and one of the three screws to tap or to drill and thread the narrower smooth holes of the new gear and sprocket assembly.
32. Remove the E-shaped retainer clip from the end of the new drive shaft.
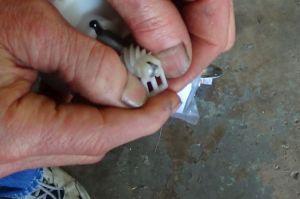
33. Slide off the limit drive gear on the end of the gear and sprocket assembly.
34. Lubricate all the teeth of the new gear.
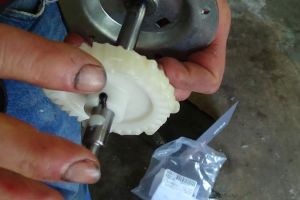
35. Lubricate the bottom neck of the drive shaft as well.
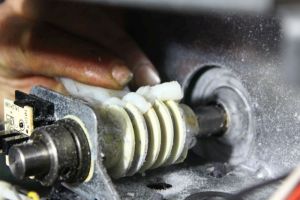
36. Place grease on the worm gear.
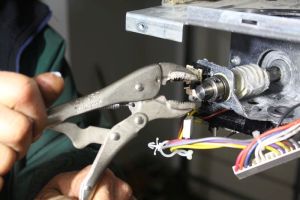
37. To reach all around the gear, grip the end of the motor shaft with a vise grip.
38. Make sure the vise grip can rotate freely and does not hit the RPM sensor eyes.
39. Lubricate all sides of the worm gear by rotating it with the vise grip.
40. Remove the vise grip from the end of the motor shaft.
41. Locate the tapped hole that is parallel from the square on the top of the plate next to the sprocket.
42. Slide the new gear and sprocket assembly into the bottom bushing.
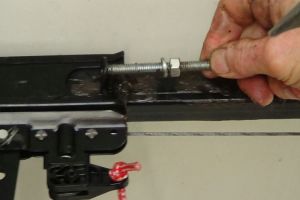
43. Align the specific tapped hole on the plate with the hole on the top of the opener closest to the back of the opener with a punch or a 16" penny nail.
44. Turn in the two screws that are closest to the back of the opener and tighten them halfway with a 5/16" nut driver.
45. Turn in the third screw and tighten it completely with a 5/16" open end wrench or a 1/4" socket wrench with a 5/16" socket.
46. Tighten the other two screws completely with the nut driver or the socket wrench.
47. Slide the limit drive gear onto the bottom of the drive shaft.
48. Insert the E-shaped retainer clip on the end to secure the limit drive gear to the shaft.

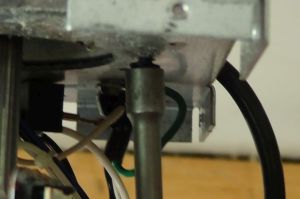
49. Carefully press the RPM sensor cover wheel, or interrupter cup, onto the end of the motor shaft.
50. Plug the RPM wire harness onto the four prongs of the RPM sensor.
51. Plug the wire harness clip into the top of the opener frame.
52. Plug in the wiring harness into the circuit board on the back of the opener.
53. Reinstall the back cover.
54. Tighten the two screws on with a 1/4" nut driver. Be sure to use the screws with the washers.
55. Plug in the opener.

56. Before reinstalling the chain you need to reset the travel timing. Test the opener by pressing the wall button. Make sure the motor does not run over a minute or the opener will overheat and will not operate.

57. Check to see which direction the sprocket turns.
58. You will need to install the chain with the door closed and the opener in the closed position. In order to do this, the sprocket needs to turn clockwise and run its full cycle. To set the travel, Press the wall button and see which way the sprocket rotates. If it turns counterclockwise, let it run its full cycle. Next, press the wall button again and let the opener sprocket turn clockwise until the motor stops.

59. To confirm the limit travel is set in the closed position, check the limit traveler contact. It should be at the end away from the limit drive gear.
60. Unplug the opener.

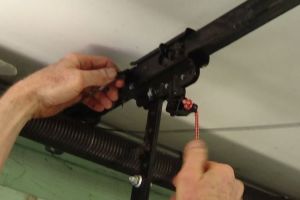
61. Lift up on the bottom of the trolley to engage it.
62. Slide the inner-trolley into the outer trolley.
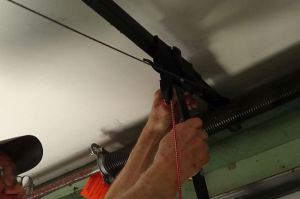
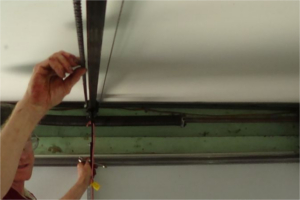
63. Make sure that the cable is attached to the pulley above the torsion springs.
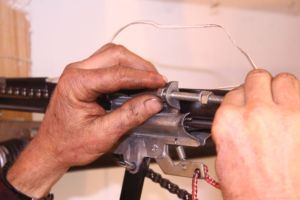
64. Hold on to the cable with your left hand while moving the chain and cable towards the opener.
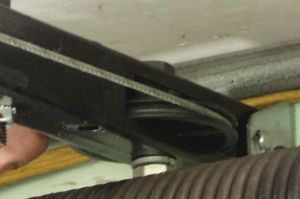
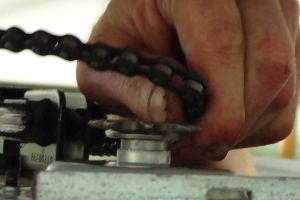
65. Continue to pull on the cable while carefully wrapping the chain around the sprocket. Make sure that the chain is secure on the sprocket and that the cable is secure on the pulley.
66. Install the plastic sprocket cover on top of the sprocket.

67. Pull the other end of the chain, making sure that the whole chain is straight and is not twisted.
68. Remove the nut from the end of the bolt.
69. Insert the end of the chain into the trolley.
70. Turn the nut back onto the bolt.
71. Tighten the nut closest to the door with a 1/2" open end wrench or adjustable wrench.
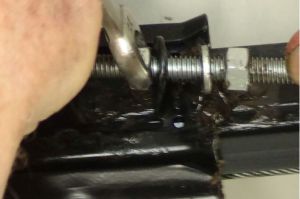
72. If you have a T-rail, then tighten the chain until it is slightly under the rail.
73. If you have a square rail, then tighten the chain until it is even with the bottom of the rail.
74. Tighten the second nut closest to the opener with a 1/2" open end wrench or adjustable wrench.

75. Lock the two nuts together with both wrenches.

76. If the trolley is uneven, bend the chain away from the rail with a screwdriver.

77. Plug in the opener.

78. Press the button to run the door up halfway. Press the button a second time to stop the travel.
79. Unplug the opener.
80. Clean both the travel side and stationary side of the open contact on the up limit, the one closer to the limit drive gear, by scraping it with a knife.
81. Clean both the travel side and stationary side of the closed contact on the down limit, the one further away from the limit drive gear, with the knife as well.
82. Plug in the opener again.
83. Press the button twice to open the door all the way.
84. Unplug the opener.

85. Reinstall the side and bottom cover.
86. Tighten the fine thread screws on the top of the cover.
87. Tighten the coarse thread screws on the bottom of the cover.
88. Plug in the opener again.

89. Adjust the travel limits and the force of the opener with a screwdriver. Watch our video titled "How to Adjust Your Garage Door Opener's Travel and Force" for more information.
90. Test the opener. Sometimes the travel timing gets out of sequence. The quickest fix is to remove the timing gear and retaining clip. For example, if a door closes all the way except for 10 inches, you can do the following: 1. Open the door with the opener. 2. Remove the E-Clip and timing gear. 3. Close door a foot with the motor running and then pull the power cord. 4. Reinstall the E-Clip and timing gear. 5. Reset the open and close travel.