Posted September 22nd, 2017 at 5:12 pm by Dan Musick
Garage door locks are normally installed in the center of the section just above the bottom section. Here are instructions on how to install the two most common lock assembly kits we sell. Although installing or replacing a lock on your own can be daunting, these instructions should give you everything you need to do the job well.
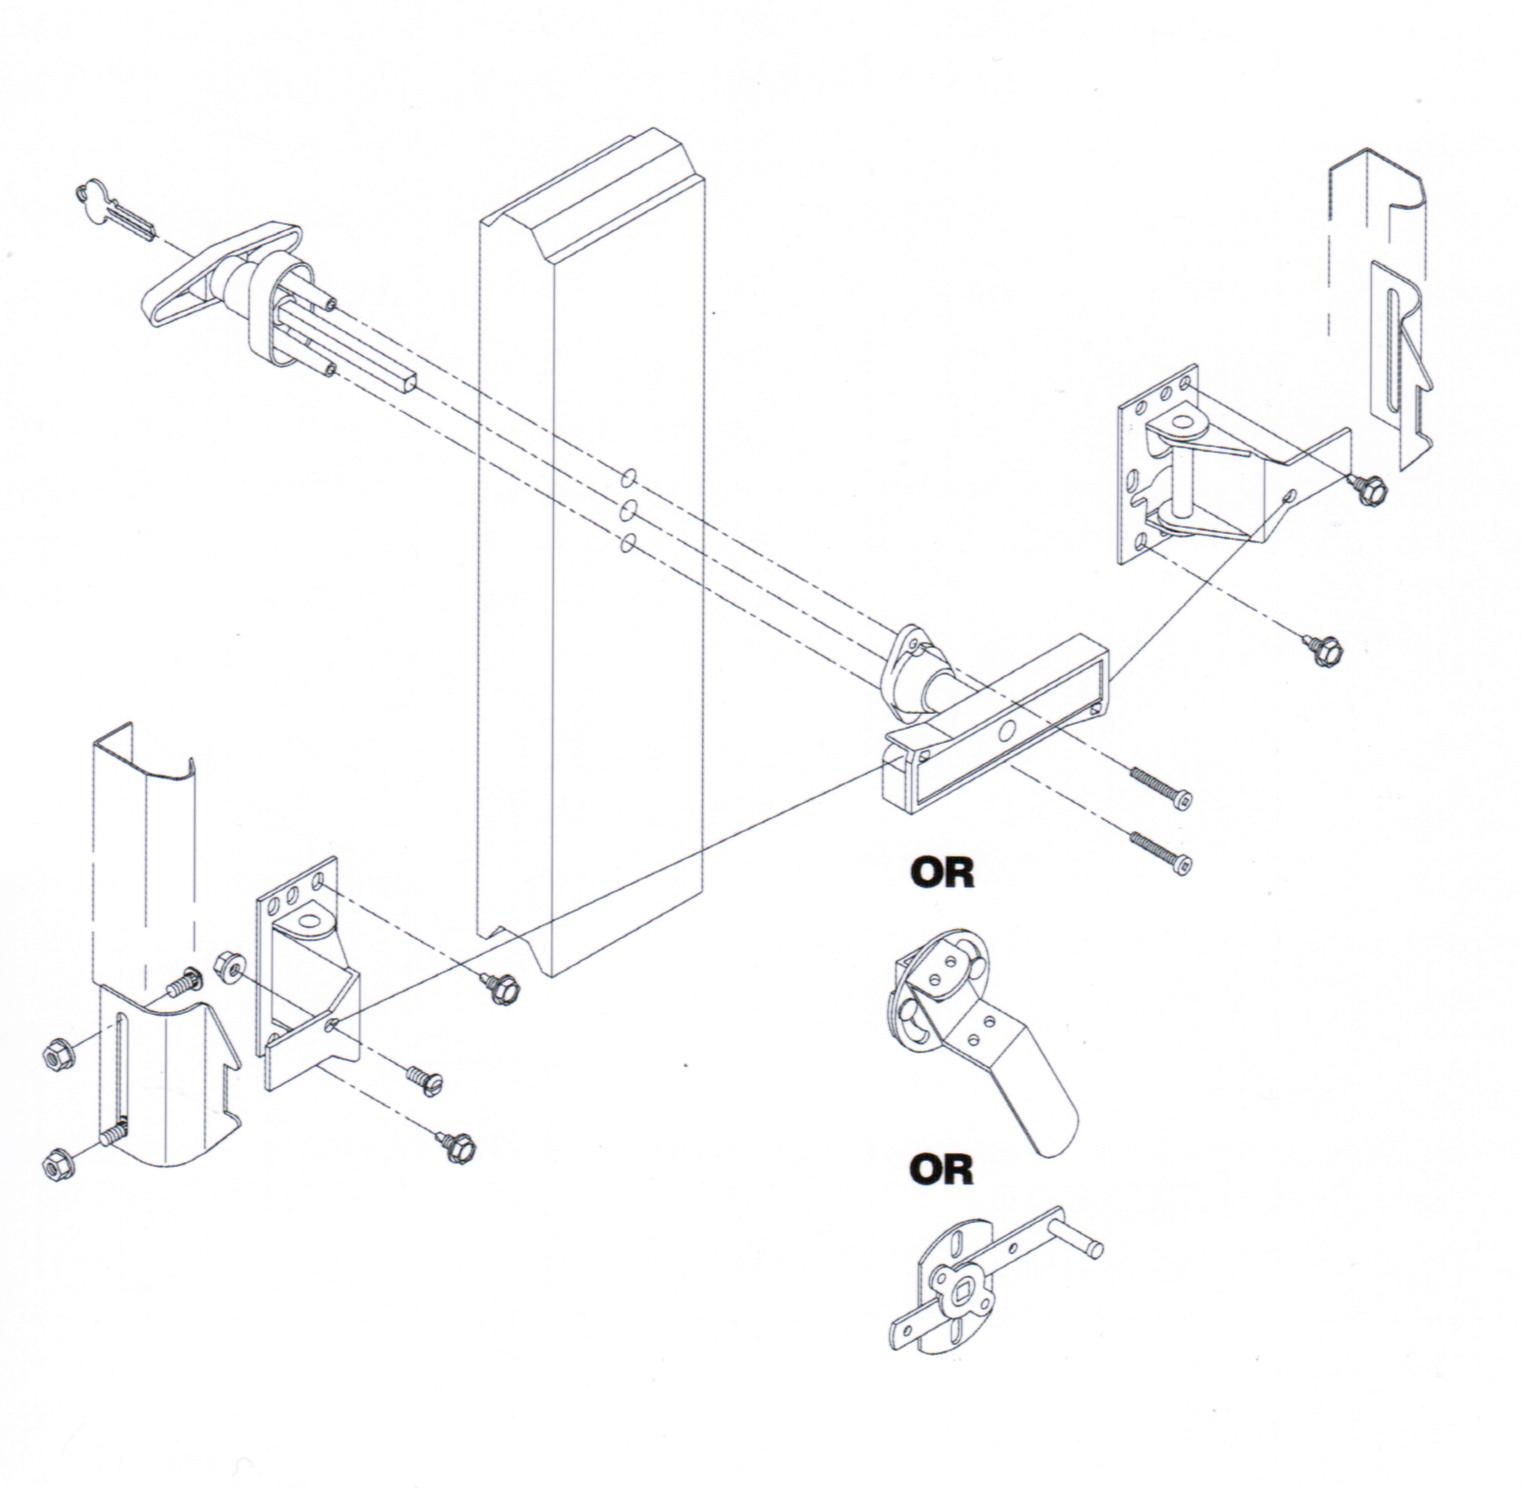
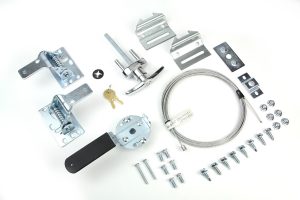
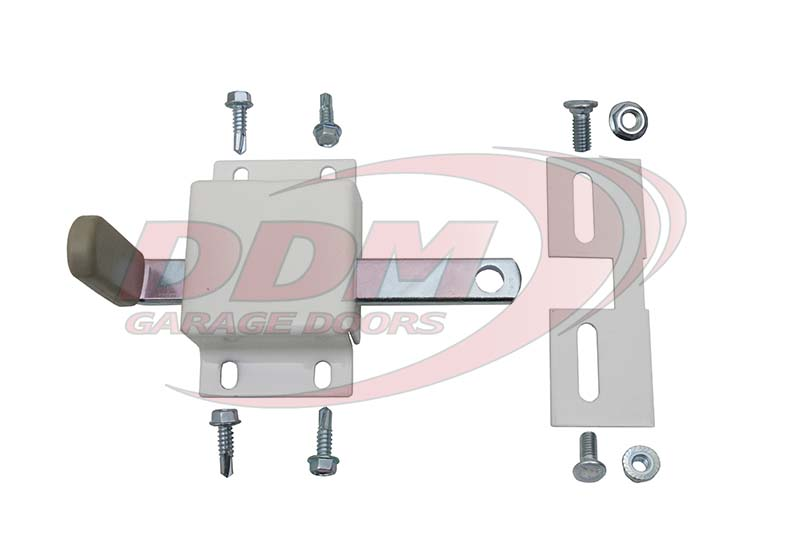
The more common lock assembly uses a cable to connect the outside lock keyed T-handle to the spring latches. The cable runs from the spring latch on one side through the center inside the release handle and on the other side where a track bolt and nut secure the cable to the spring latch. On single-car doors there is often only one latch.
Whereas, the other system uses two sash chains and small S-hooks to link the inside handles and spring latches.
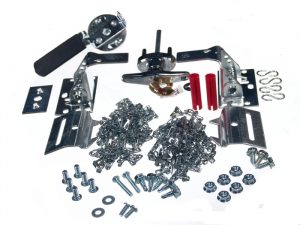
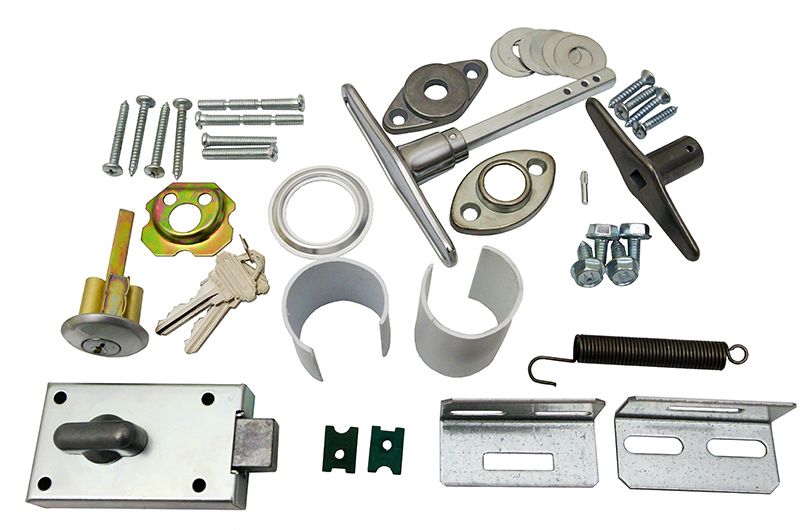
If you have a foam-filled door with steel on both sides, the metal on each side will compress when you tighten the screws that secure the outside handle to the inside handle. To prevent this from happening, use the two red spacers above.
We also offer lock kits specifically for Raynor and Clopay garage doors.
For the first two lock kits, the order of installation is as follows.
I. Install the outside keyed handle and the inside release handle.
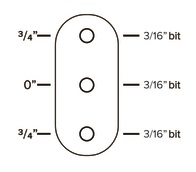
Drilling for the lock will be a two-step process. First, drill three holes with 3/16″ bits. This is key to a properly aligned and functioning garage door lock.
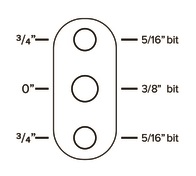
After drilling these holes, you will need to drill larger 5/16″ holes and a 3/8″ hole on the outside skin of the section only, but not on the inside. Sometimes the 3/8″ hole needs to be enlarged slightly.
Most steel doors are either pan doors with stiles joining the edges of the sections, or sandwich doors with steel on both sides bonded to the insulation.
Instructions for Installing Locks on Pan Doors
- If you have a pan door, locate the center stile, and the holes punched for the lock. The holes may be on center, as you see in the insulated pan door below.
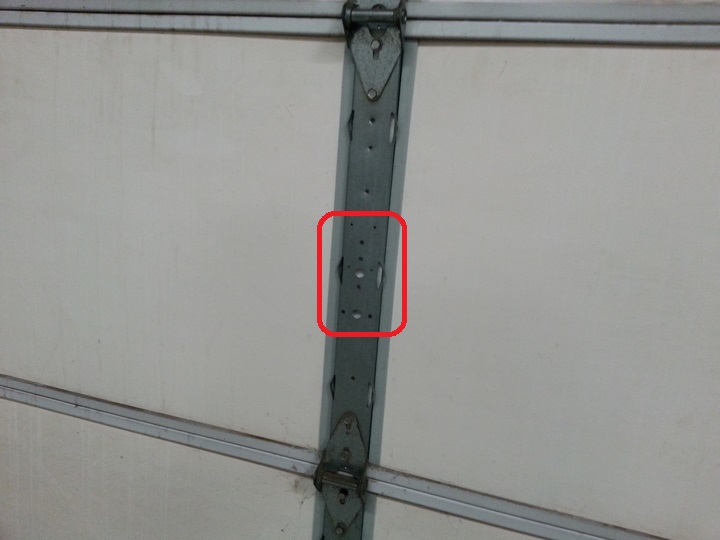
They may also be slightly below center, as you see in this hollow, or non-insulated door. Notice how the lock lines up with the holes.
- Drill three 3/16″ holes from the inside using the holes in the stiles as a guide. Then, center the drill bit in the holes and perpendicular to the section and stile. Also, check the outside of the section to make sure the holes are evenly spaced.
- Drill the three larger holes in the outside skin only of the door. Faster speeds are better because slower speeds tend to rip the thin sheet metal.
- Insert outside lock T-handle.
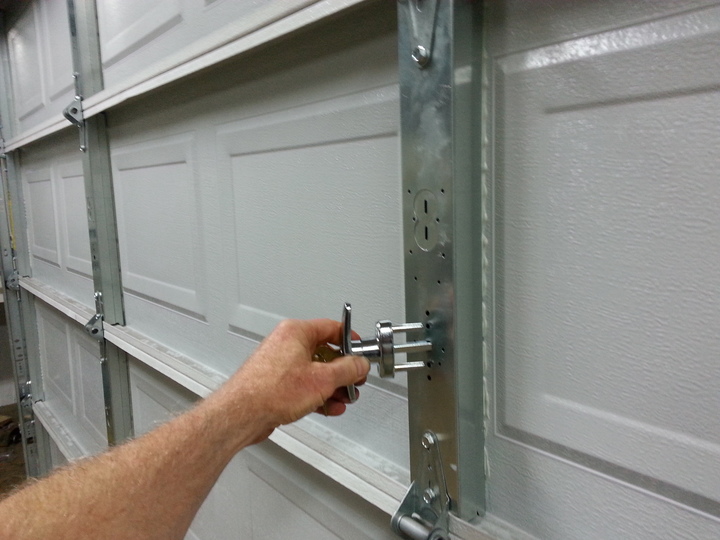
- Then, install the inside release handle.
- Install the two long screws that connect the inside and outside handles.
Instructions for Installing Locks on Sandwich Doors
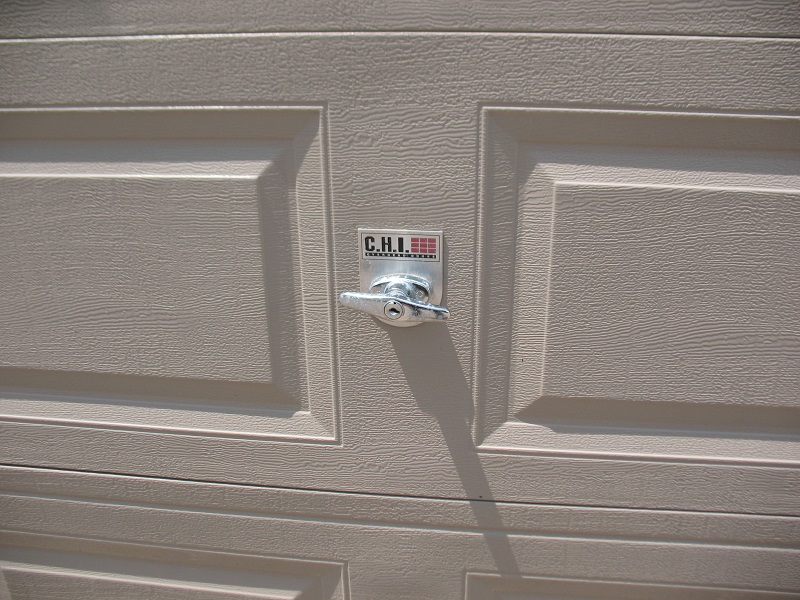
Locate the outside stile where you want to install the garage door lock. This would normally be in the center of the section. On odd-size doors, it will be off centered. The outside T-Handle installs vertically or horizontally, as shown below.
- Drill three 3/16″ holes from the outside and into the inside skin of the section. The drill bit must be perpendicular to the outside of the section. Afterward, check the inside of the section to make sure the holes are evenly spaced.
- Drill the three larger holes in the outside skin only of the door. Faster speeds are better because slower speeds tend to rip the thin sheet metal.
- Cut the red spacers, so they are flush with the outside skin of the door section and install them over the two posts that go into the 5/16″ holes. Then, insert outside lock t-handle.
- Install the inside release handle.
- Furthermore, install the two long screws that connect the inside and outside handles.
II. Install the spring latches in the center at each end of the lock section.
- Screw the latches to the ends of the sections.
- Then, connect the latches and center release handle with the cable or sash chains. Also, pull them to tighten them. The lock will not work if the chain or cable is loose.
- Test the outside lock handle. If the latches don’t pull when the handle is turned, remove the inside handle and turn the outside T-handle 90 degrees.
III. Install the garage door lock strikers.
- With the door closed, align the striker with the spring latch and secure the striker with two track bolts and flange nuts.
- Then, drill additional holes as needed.
- Test the lock to ensure it works.
- Finally, lubricate the latch and inside release handle.
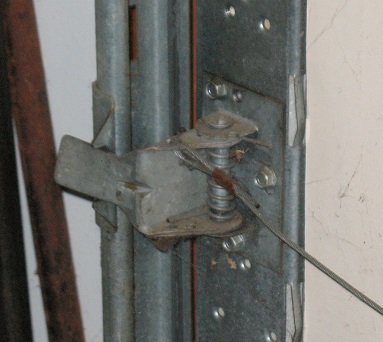
Here’s how the striker and latch align. Some installers bend the latch to get better traction.
We offer both lock kits with sash chains as well as cable lock kits. We also sell the parts to garage door locks, as well as replacement handles and chain hoists, on our locks and handles inventory page.
If you need any help, don’t hesitate to contact us.
This entry was filed under Technical Support. You can follow any responses to this entry through the RSS 2.0 feed. You can skip to the end and leave a response. Pinging is currently not allowed.

Leave a Reply